
sora が 2021年02月26日19時55分14秒 に編集
コメント無し
記事種類の変更
製作品
本文の変更
# はじめに PM2.5が飛んでいる中外に出たくないですよね?でも外に出ないわけにもいかない...今回はM5Stack(と仲間たち)を使って大気質をAmbientでモニタリングできるようにして,かつPM2.5の量が基準値を上回ったときにLINEに通知する機能を実装していこうと思います. # 使うもの この記事を書こうと思ってわざわざ必要なものを買い集めたわけではありません.僕の趣味はネットサーフィンなのでいつものごとくサーフィンしていたらこんな記事が. [M5StackとPM2.5 大気質センサーのセットモデルが店頭入荷、実売6,350円](https://akiba-pc.watch.impress.co.jp/docs/news/news/1305011.html) M5Stackを自分用に一つ欲しいなと思っていたのでちょうどいいやと思い購入しました.今回使うものはこれだけです.(今はスイッチサイエンスも千石電商も在庫切らしてるみたいなので海外のサイトから買うしか手に入れる方法はなさそうです)今回はArudino IDEを使って実装します.UIFlowを使いたかったのですが,一部機能をまだUIFlowで使うことができなかったので今回は諦めました. # 実装していく 順番に実装して統合しましょう. ## PMSA003 PM2.5 大気質センサを使おう [データシート](https://datasheet.lcsc.com/szlcsc/Beijing-Plantower-PMSA003-C_C89095.pdf)を見てもデータを取得するコードを書く能力を持ち合わせていないので,先人たちの知恵を借ります.といってもこれは[公式ドキュメント](https://docs.m5stack.com/#/en/base/pm2.5)にサンプルプログラムのリンクも貼ってあったのでとっても簡単につかうことができるのです. [Arudinoで使うためのサンプルプログラム](https://github.com/m5stack/M5-ProductExampleCodes/tree/master/Base/PM2.5) しかしこれがとてもわかりくい.データシートと一緒に見たらなんとなくこうなのかなって感じはするんですが,今回はGitHubでとてもいいライブラリをみつけたのでそちらを使わせていただきました. [PMserial](https://github.com/avaldebe/PMserial) このライブラリはとてつもなく簡単にPMSA003を使うことができます.PMSA003を動かす簡単なサンプルコードを示します. ```c++:pmsa003.ino #include <M5Stack.h> #include <Wire.h> #include "PMserial.h" SerialPM pms(PMSA003, 16, 17); void setup() { // put your setup code here, to run once: Serial.begin(9600); pms.init(); } void loop() { // put your main code here, to run repeatedly: pms.read(); Serial.print(F("PM1.0 "));Serial.print(pms.pm01);Serial.print(F(", ")); Serial.print(F("PM2.5 "));Serial.print(pms.pm25);Serial.print(F(", ")); Serial.print(F("PM10 ")) ;Serial.print(pms.pm10);Serial.println(F(" [ug/m3]")); delay(10000); } ``` これをM5Stackに書き込むとシリアルモニタにこんな感じで出力されます. 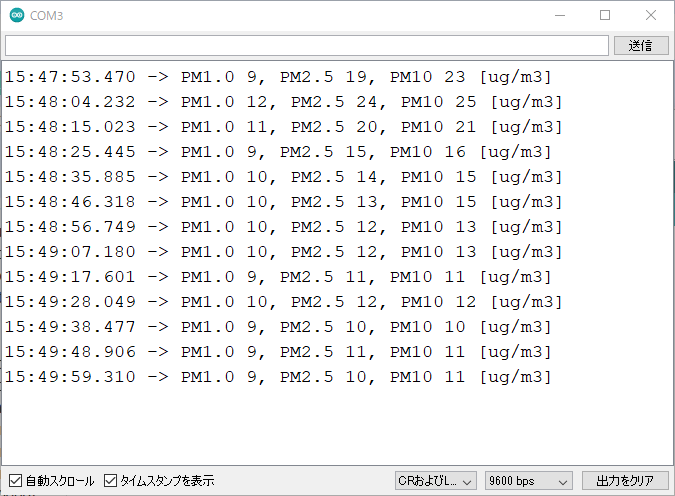 これでPMSA003が使えました. ## SHT20 温度、湿度センサを使おう では次に温度湿度センサであるSHT20を使います.こちらも先ほど一番最初に紹介したサンプルプログラムで動きます.そのサンプルプログラムは下のライブラリを使って動かしていました. [DFRobot_SHT20 Library for Arduino](https://github.com/DFRobot/DFRobot_SHT20) このライブラリを使えば簡単に温度も湿度も取得できます.しかし一つ問題があります.このSHT20は実際の温度よりも高い温度を,実際の湿度よりも低い湿度を計測するようですのであまりあてにはならなそうです.(GitHubでいろいろライブラリを探していた時にこのセンサの正確性について言及している人がいた)決して故障ではないのでその点はご注意を.ではこのライブラリを使った簡単なサンプルコードを示します. ```c++:sht20.ino #include <M5Stack.h> #include <Wire.h> #include "DFRobot_SHT20.h" DFRobot_SHT20 sht20; void setup() { M5.begin(); Serial.begin(9600); sht20.initSHT20(); delay(100); sht20.checkSHT20(); } void loop() { char humd[32]; char temp[32]; dtostrf(sht20.readHumidity(),5,2,humd); dtostrf(sht20.readTemperature(),5,2,temp); Serial.print("humd ");Serial.print(humd);Serial.print(" %, "); Serial.print("temp ");Serial.print(temp);Serial.println(" C"); delay(10000); } ``` シリアルモニタの様子 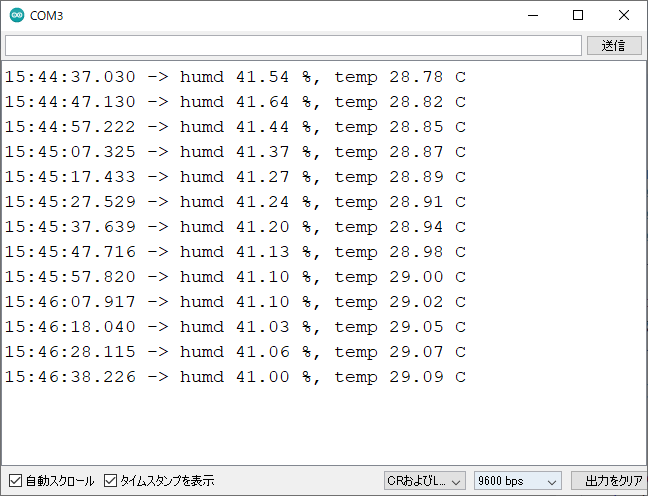 やはり温度が高く表示されているのがわかります(湿度に関しては調べるやつがなかったので比較しようがありませんでした) これでSHT20も使用できました. ## Ambientに送信してグラフを見る では次にAmbientに送信して温度や湿度のグラフをモニタリングできるようにします. [M5StackでセンサーデーターをAmbientに送る (Arduino編)](https://ambidata.io/samples/m5stack/m5stack-arduino/) Ambientが公式に出している記事を見るととても簡単にできることがわかります.とにかくデータを送り続ければあとは勝手にAmbientがグラフ化してくれるので楽ちんです.先ほどの「SHT20 温度,湿度センサを使おう」で示したサンプルコードにWi-Fiへの接続とAmbientに毎分データを送る コードを書き加えるだけです. ```c++:ambient.ino #include <M5Stack.h> #include <Wire.h> #include "DFRobot_SHT20.h" #include "Ambient.h" DFRobot_SHT20 sht20; WiFiClient client; Ambient ambient; // Ambientオブジェクトを定義 unsigned int channelId = "<AmbientのチャネルID>"; const char* writeKey = "<ライトキー>"; const char* ssid = "<Wi-FiのSSID>"; const char* password = "<Wi-Fiのパスワード>"; void setup() { // put your setup code here, to run once: M5.begin(); sht20.initSHT20(); delay(100); sht20.checkSHT20(); WiFi.begin(ssid, password); // Wi-Fi APに接続 while (WiFi.status() != WL_CONNECTED) { // Wi-Fi AP接続待ち delay(100); } ambient.begin(channelId, writeKey, &client); // チャネルIDとライトキーを指定してAmbientの初期化 } void loop() { // put your main code here, to run repeatedly: float humd = sht20.readHumidity(); float temp = sht20.readTemperature(); ambient.set(1, temp); ambient.set(2, humd); ambient.send(); } ``` これをM5Stackで実行すると下の写真のようにグラフが出力されます. 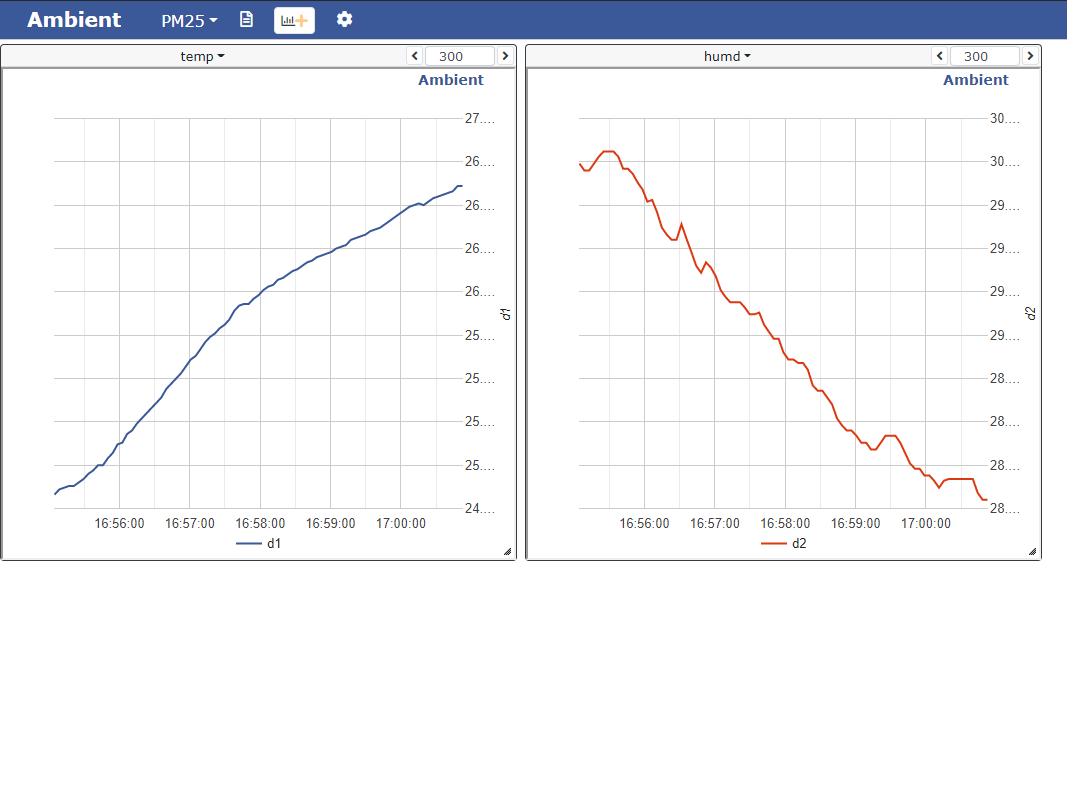 最終的にすべて統合するときには,大気質のデータもグラフ化しようと思います. 余談ですが,Wi-Fi接続がうまくいかないときがあったのでその時に参考にした記事を貼り付けておきます. [ESP32 ( ESP-WROOM-32 , M5Stack )自分的 トラブルシューティング まとめ](https://www.mgo-tec.com/blog-entry-trouble-shooting-esp32-wroom.html/2) 下の方に「9.今まで問題無かったのに、急に Wi-Fi ( WiFi )に繋がらなくなった」という項目がありますので,いろいろ試してみると解決するかもしれません. ## LINEに通知する 次にPM2.5が基準値を上回っているときにLINEに通知する仕組みを作ろうと思います.これでPM2.5がやばいときは室内に逃げ込めば大丈夫ってわけです.ここではM5Stackについている3つのボタンを押したときにLINEに通知が行くようにまずはしてみます.LINE Notifyのアクセストークンを[このリンク](https://notify-bot.line.me/ja/)から作成しておいてください.Wi-Fi接続は先ほど使ったAmbientのライブラリに含まれているもの(先ほどの章でも使ったもの)を利用します. ```c++:notify.ino #include <M5Stack.h> #include "Ambient.h" #include <ssl_client.h> #include <WiFiClientSecure.h> #include <HTTPClient.h> WiFiClient client; const char* ssid = "<Wi-FiのSSID>"; const char* password = "<Wi-Fiのパスワード>"; void send(String message) { const char* host = "notify-api.line.me"; const char* token = "<アクセストークン>"; WiFiClientSecure client; Serial.println("Try"); //LineのAPIサーバに接続 client.setInsecure(); if (!client.connect(host, 443)) { Serial.println("Connection failed"); return; } Serial.println("Connected"); //リクエストを送信 String query = String("message=") + message; String request = String("") + "POST /api/notify HTTP/1.1\r\n" + "Host: " + host + "\r\n" + "Authorization: Bearer " + token + "\r\n" + "Content-Length: " + String(query.length()) + "\r\n" + "Content-Type: application/x-www-form-urlencoded\r\n\r\n" + query + "\r\n"; client.print(request); //受信終了まで待つ while (client.connected()) { String line = client.readStringUntil('\n'); Serial.println(line); if (line == "\r") { break; } } String line = client.readStringUntil('\n'); Serial.println(line); } void setup() { // put your setup code here, to run once: M5.begin(); WiFi.begin(ssid, password); } void loop() { M5.update(); if (M5.BtnA.pressedFor(100)){ M5.Lcd.print('A'); send("A Button"); } else if (M5.BtnB.pressedFor(100)) { M5.Lcd.print('B'); send("B Button"); } else if (M5.BtnC.pressedFor(100)) { M5.Lcd.print('C'); send("C Button"); } } ``` 躓いたところが2つほどありましたのでメモ程度に. まず1つ目LINEのAPIサーバーに接続できず,シリアルモニタでずっと「connection failed」と表示されて困りました.[この記事](https://androiphone.uvs.jp/?p=3218)を参考に,```client.setInsecure();```を追加すると改善しました. 2つ目は勝手にAボタンだけ入力され続けるという問題が発生しました.サンプルプログラムのButton.inoでは発生しないのになぜか僕が書いたプログラムでは発生したんですよね...これは僕のM5Stackの問題かもしれませんが,```M5.BtnA.isPressed```を```M5.BtnA.pressedFor(100)```に書き換えることで一応発生はしなくなりました.その場しのぎ感はありますが,どうしようもないので... こんな感じでM5StackからLINEに通知することができました! 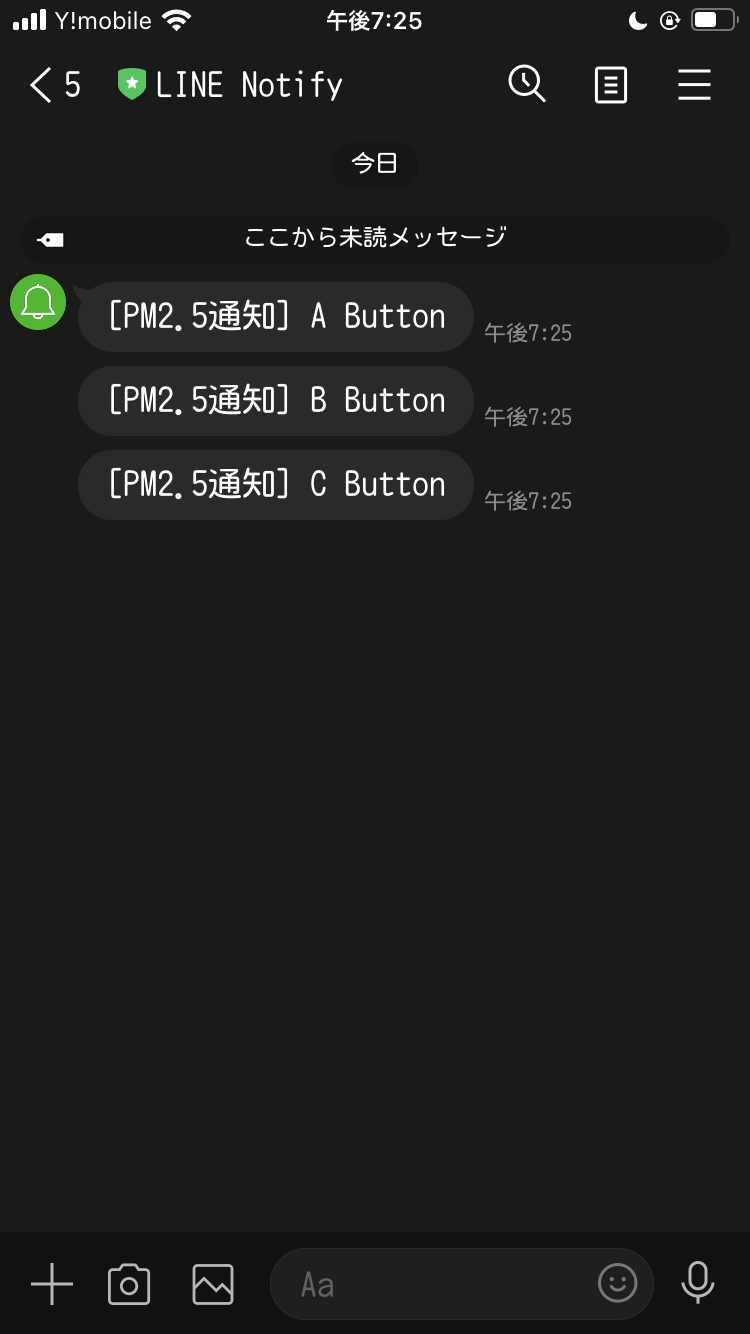 ## M5Stackのディスプレイに日本語を表示する 日本語フォントを表示させる方法はQiitaの記事を参考にさせていただきました. [M5StackでもTTFフォントが使いたい](https://qiita.com/takkaO/items/ef0e6f44aaa1ca475c85) この記事で使われているライブラリを表示しておまけのディスプレイにテキストの表示をさせようと思います. [M5 Font Render](https://github.com/takkaO/M5FontRender) これはおまけなので詳しくはそちらの記事とGitHubのREADMEでも読んでいただければと思います.ちなみにサンプルコードはこちらです.(binaryttf.hというヘッダをインクルードしています.詳しくはQiitaの記事で) ```c++:display.ino #include <M5Stack.h> #include "binaryttf.h" #include "M5FontRender.h" M5FontRender render; void setup() { // put your setup code here, to run once: M5.begin(); M5.Lcd.fillScreen(BLACK); if (!render.loadFont(binaryttf, sizeof(binaryttf))) { Serial.println("Render initialize error"); return; } render.setTextColor(WHITE); render.seekCursor(40, 50); render.setTextSize(84); render.printf("計測中\n"); render.setTextColor(RED); render.seekCursor(20, 50); render.setTextSize(40); render.printf("絶対に触れるな\n"); } void loop() { // put your main code here, to run repeatedly: } ``` # 統合 長かったですが,ようやくここまでこぎつけました.今まで分けて書いてきた機能たちを統合していきます. PM2.5の基準値を上回ったかの判断は[環境省の資料](https://www.env.go.jp/air/osen/pm/info/attach/faq.pdf)を参考に暫定的な指標値である80㎍/m^3を超えたら通知するようにします.(これが正しいのかわからないので有識者の方教えてください.) ```c++:complete.ino #include <M5Stack.h> #include <Wire.h> #include "PMserial.h" #include "DFRobot_SHT20.h" #include "Ambient.h" DFRobot_SHT20 sht20; SerialPM pms(PMSA003, 16, 17); WiFiClient client; Ambient ambient; // Ambientオブジェクトを定義 unsigned int channelId = "<AmbientのチャネルID>"; const char* writeKey = "<ライトキー>"; const char* ssid = "<Wi-FiのSSID>"; const char* password = "<Wi-Fiのパスワード>"; void send(String message) { const char* host = "notify-api.line.me"; const char* token = "<アクセストークン>"; WiFiClientSecure client; Serial.println("Try"); //LineのAPIサーバに接続 client.setInsecure(); if (!client.connect(host, 443)) { Serial.println("Connection failed"); return; } Serial.println("Connected"); //リクエストを送信 String query = String("message=") + message; String request = String("") + "POST /api/notify HTTP/1.1\r\n" + "Host: " + host + "\r\n" + "Authorization: Bearer " + token + "\r\n" + "Content-Length: " + String(query.length()) + "\r\n" + "Content-Type: application/x-www-form-urlencoded\r\n\r\n" + query + "\r\n"; client.print(request); //受信終了まで待つ while (client.connected()) { String line = client.readStringUntil('\n'); Serial.println(line); if (line == "\r") { break; } } String line = client.readStringUntil('\n'); Serial.println(line); } void setup() { M5.begin(); // display M5.Lcd.fillScreen(BLACK); if (!render.loadFont(binaryttf, sizeof(binaryttf))) { Serial.println("Render initialize error"); return; } render.setTextColor(WHITE); render.seekCursor(40, 50); render.setTextSize(84); render.printf("計測中\n"); render.setTextColor(RED); render.seekCursor(20, 50); render.setTextSize(40); render.printf("絶対に触れるな\n"); // pmsa003 pms.init(); // sht20 sht20.initSHT20(); delay(100); sht20.checkSHT20(); // amibent WiFi.begin(ssid, password); // Wi-Fi APに接続 while (WiFi.status() != WL_CONNECTED) { // Wi-Fi AP接続待ち delay(100); } ambient.begin(channelId, writeKey, &client); // チャネルIDとライトキーを指定してAmbientの初期化 } void loop() { // put your main code here, to run repeatedly: pms.read(); float temp = sht20.readHumidity(); float humd = sht20.readTemperature() ambient.set(1, temp); ambient.set(2, humd); ambient.set(3, pm01); ambient.set(4, pm25); ambient.set(5, pm10); ambient.send();
if(pm25 <= 80){
if(pm25 >= 80){
send("PM2.5に注意してください"); } } ``` これで完成です!みなさんもぜひ楽しいM5Stackライフを送って下さい! 初めての投稿で誤字や脱字,ミス等あるかもしれないのでぜひコメント等で教えていただけると幸いです.