miso.develop が 2024年10月31日12時48分25秒 に編集
初版
タイトルの変更
ルービックキューブを崩したり揃えたりできるロボット「Cube Scrambler」の作り方
タグの変更
LEGO
Nodejs
RaspberryPi
ルービックキューブ
メイン画像の変更
記事種類の変更
製作品
ライセンスの変更
(MIT) The MIT License
本文の変更
# はじめに 本記事では、ルービックキューブを自動で崩したり揃えたりできる、LEGOとRaspberry Piで作れるロボット「Cube Scrambler」のご紹介と作り方、使い方を解説します。 # Cube Scramblerとは 以下の動画のように、ルービックキューブを自動で崩したり、揃えたりできるLEGOで作れるロボットです。 @[youtube](https://youtu.be/tYaxFB-nHv4) ## できること Cube Scramblerには以下の4機能があります。 * **SCRAMBLE**: ルービックキューブをランダムに崩す * **SOLVE**: ルービックキューブを崩れた状態から揃える * **SEQUENCE**: 回転記号に沿ってルービックキューブを動かす * **STEP**: ルービックキューブの解法(CFOP法)の各ステップごとにランダムな状態に崩す ### SCRAMBLE ルービックキューブをランダムに崩します。 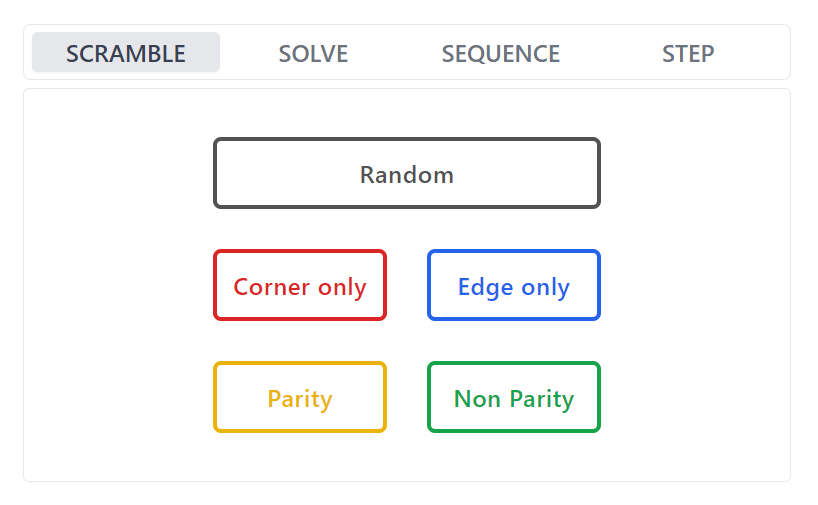 ### SOLVE ルービックキューブを揃えます。 ルービックキューブの崩れた状態をWeb UIから入力し、Solveボタンを押すと自動で揃え始めます。 ※ルービックキューブ黄色面が上、青面が前となるようセットします(真ん中のマスの色がその面の色です)  ### SEQUENCE 任意の回転記号に沿ってルービックキューブを動かします。 [➡ルービックキューブの回転記号 (TORIBO)](https://tribox.com/3x3x3/solution/notation/) 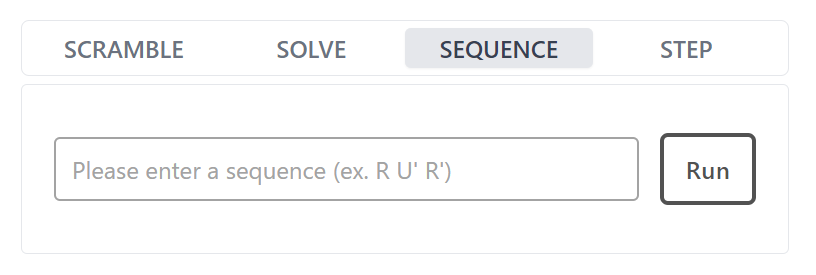 ### STEP CFOP法(※)の各ステップごとにランダムな状態に崩します。 練習したいステップを重点的に練習できます。 ※CFOP法: 最もメジャーなルービックキューブの解法 [➡解法「CFOP」とは? (Cube Voyage)](https://cubevoyage.net/how-to-solve/advanced/what-is-cfop/) 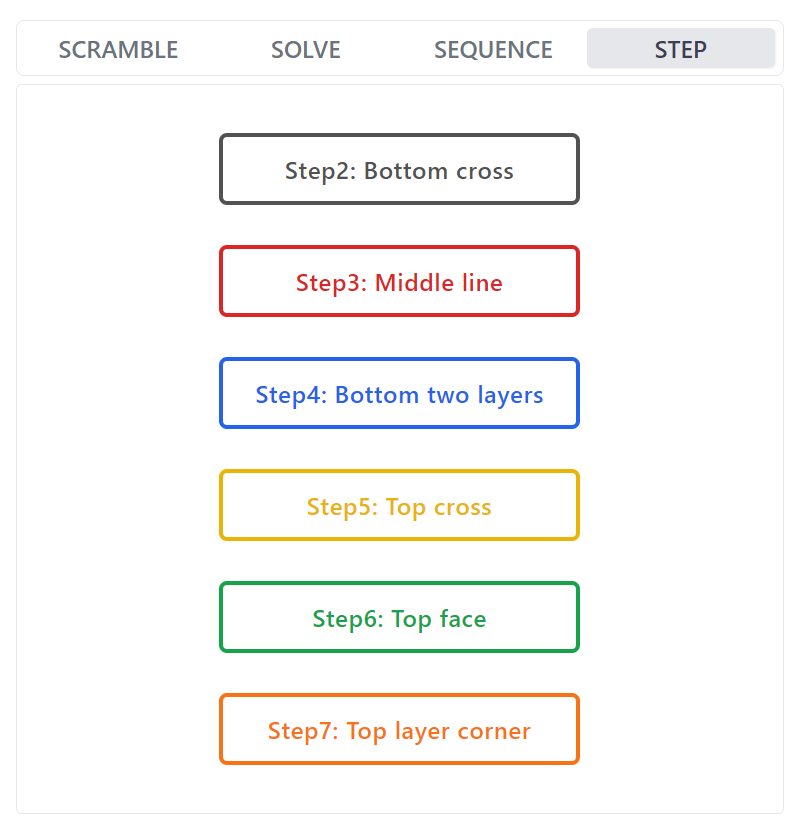 # 作り方 ## 用意するもの 0から揃える場合、Raspberry Pi、サーボモーター類が6,028円、LEGOパーツが5,693円で、合計11,721円となります。 ※金額は2024/10/28時点の税込金額です ### Raspberry Pi、サーボモーター |品名|単価|数量|小計|購入先|備考| |:--|--:|--:|--:|:-:|---| |Raspberry Pi Zero 2 WH|¥3,740|1|¥3,740|[SWITCH SCIENCE](https://www.switch-science.com/products/9812?pr_prod_strat=e5_desc&pr_rec_id=698d0a6a1&pr_rec_pid=8280386470086&pr_ref_pid=7675840594118&pr_seq=uniform)|※別途Micro SDカードをご用意ください| |GeekServo 9G Servo-Gray|¥1,034|2|¥2,068|[SWITCH SCIENCE](https://www.switch-science.com/products/6811?srsltid=AfmBOoqqUr2zlWRuBFNAENuizOMOW5qAN1k86O6sOx4pijWQe86mVeq-)|LEGOとくっつくサーボモーター| |ブレッドボード・ジャンパーワイヤ(オス-メス) 15cm|¥220|1|¥220|[秋月電子通商](https://akizukidenshi.com/catalog/g/g108935/)|10本入り(うち6本使用)| ### LEGOパーツ |パーツ|パーツID|単価|数量|小計|購入先| |:--|:-:|--:|--:|--:|:-:| |Technic, Liftarm Thick 1 x 1 (Spacer)|18654|¥10|1|¥10|[Brickers!](https://brickers.jp/search?type=product&sort_by=price-ascending&q=18654-+1+x+1)| |Plate 2 x 12|2445|¥48|7|¥336|[Brickers!](https://brickers.jp/search?type=product&sort_by=price-ascending&q=2445-+2+x+12)| |Brick 2 x 6|2456|¥48|7|¥336|[Brickers!](https://brickers.jp/search?type=product&sort_by=price-ascending&q=2456-+2+x+6)| |Brick, Modified 2 x 2 with Pins and Axle Hole|30000|¥10|1|¥10|[Brickers!](https://brickers.jp/search?type=product&sort_by=price-ascending&q=30000-+2+x+2)| |Brick 2 x 4|3001|¥38|20|¥760|[Brickers!](https://brickers.jp/search?type=product&sort_by=price-ascending&q=3001-+2+x+4)| |Brick 2 x 3|3002|¥30|3|¥90|[Brickers!](https://brickers.jp/search?type=product&sort_by=price-ascending&q=3002-+2+x+3)| |Brick 2 x 2|3003|¥18|29|¥522|[Brickers!](https://brickers.jp/search?type=product&sort_by=price-ascending&q=3003-+2+x+2)| |Brick 1 x 2|3004|¥10|6|¥60|[Brickers!](https://brickers.jp/search?type=product&sort_by=price-ascending&q=3004-+1+x+2)| |Brick 2 x 8|3007|¥98|2|¥196|[Brickers!](https://brickers.jp/search?type=product&sort_by=price-ascending&q=3007-+2+x+8)| |Brick 1 x 8|3008|¥58|2|¥116|[Brickers!](https://brickers.jp/search?type=product&sort_by=price-ascending&q=3008-+1+x+8)| |Brick 1 x 6|3009|¥33|2|¥66|[Brickers!](https://brickers.jp/search?type=product&sort_by=price-ascending&q=3009-+1+x+6)| |Brick 1 x 4|3010|¥18|9|¥162|[Brickers!](https://brickers.jp/search?type=product&sort_by=price-ascending&q=3010-+1+x+4)| |Plate 2 x 4|3020|¥16|11|¥176|[Brickers!](https://brickers.jp/search?type=product&sort_by=price-ascending&q=3020-+2+x+4)| |Plate 2 x 2|3022|¥10|2|¥20|[Brickers!](https://brickers.jp/search?type=product&sort_by=price-ascending&q=3022-+2+x+2)| |Plate 2 x 8|3034|¥28|15|¥420|[Brickers!](https://brickers.jp/search?type=product&sort_by=price-ascending&q=3034-+2+x+8)| |Plate 4 x 8|3035|¥68|3|¥204|[Brickers!](https://brickers.jp/search?type=product&sort_by=price-ascending&q=3035-+4+x+8)| |Plate 6 x 8|3036|¥68|1|¥68|[Brickers!](https://brickers.jp/search?type=product&sort_by=price-ascending&q=3036-+6+x+8)| |Slope 45 2 x 4|3037|¥18|4|¥72|[Brickers!](https://brickers.jp/search?type=product&sort_by=price-ascending&q=3037-+2+x+4)| |Slope 45 2 x 2|3039|¥8|6|¥48|[Brickers!](https://brickers.jp/search?type=product&sort_by=price-ascending&q=3039-+2+x+2)| |Tile 2 x 2|3068|¥18|1|¥18|[Brickers!](https://brickers.jp/search?type=product&sort_by=price-ascending&q=3068-+2+x+2)| |Technic, Brick 1 x 2 with Axle Hole|32064|¥10|1|¥10|[Brickers!](https://brickers.jp/search?type=product&sort_by=price-ascending&q=32064-+1+x+2)| |Technic, Liftarm Thick 1 x 15|32278|¥88|2|¥176|[Brickers!](https://brickers.jp/search?type=product&sort_by=price-ascending&q=32278-+1+x+15)| |Brick 1 x 3|3622|¥18|1|¥18|[Brickers!](https://brickers.jp/search?type=product&sort_by=price-ascending&q=3622-+1+x+3)| |Plate 1 x 3|3623|¥16|2|¥32|[Brickers!](https://brickers.jp/search?type=product&sort_by=price-ascending&q=3623-+1+x+3)| |Slope, Inverted 45 2 x 2 with Flat Bottom Pin|3660|¥10|6|¥60|[Brickers!](https://brickers.jp/search?type=product&sort_by=price-ascending&q=3660-+2+x+2)| |Technic, Brick 1 x 2 with Hole|3700|¥10|2|¥20|[Brickers!](https://brickers.jp/search?type=product&sort_by=price-ascending&q=3700-+1+x+2)| |Technic, Brick 1 x 4 with Holes|3701|¥28|2|¥56|[Brickers!](https://brickers.jp/search?type=product&sort_by=price-ascending&q=3701-+1+x+4)| |Plate 1 x 4|3710|¥12|1|¥12|[Brickers!](https://brickers.jp/search?type=product&sort_by=price-ascending&q=3710-+1+x+4)| |Plate 2 x 6|3795|¥20|9|¥180|[Brickers!](https://brickers.jp/search?type=product&sort_by=price-ascending&q=3795-+2+x+6)| |Plate 6 x 6|3958|¥48|4|¥192|[Brickers!](https://brickers.jp/search?type=product&sort_by=price-ascending&q=3958-+6+x+6)| |Plate 8 x 8|41539|¥163|5|¥815|[Brickers!](https://brickers.jp/search?type=product&sort_by=price-ascending&q=41539-+8+x+8)| |Brick, Modified 1 x 2 with Pin and Bottom Stud Holder|44865|¥8|4|¥32|[Brickers!](https://brickers.jp/search?type=product&sort_by=price-ascending&q=44865-+1+x+2)| |Brick, Modified 2 x 2 with Pin and Axle Hole|6232|¥10|6|¥60|[Brickers!](https://brickers.jp/search?type=product&sort_by=price-ascending&q=6232-+2+x+2)| |Plate, Round 1 x 1|4073|¥6|4|¥24|[Brickers!](https://brickers.jp/search?type=product&sort_by=price-ascending&q=4073-+1+x+1)| |Technic, Pin 3L with Friction Ridges|6558|¥8|1|¥8|[Brickers!](https://brickers.jp/search?type=product&sort_by=price-ascending&q=6558-+)| |Slope 30 1 x 2 x 2/3|85984|¥8|4|¥32|[Brickers!](https://brickers.jp/search?type=product&sort_by=price-ascending&q=85984-+1+x+2)| |Tile 2 x 4|87079|¥23|12|¥276|[Brickers!](https://brickers.jp/search?type=product&sort_by=price-ascending&q=87079-+2+x+4)| ## Raspberry Piのセットアップ ### Raspberry Pi OSセットアップ Raspberry Pi Imagerを使用し、Raspberry Pi OSをセットアップします。 Raspberry Pi Zero 2 WのRaspberry Pi OS Lite (64-bit)を選択し、Micro SDカードへ書き込みます。 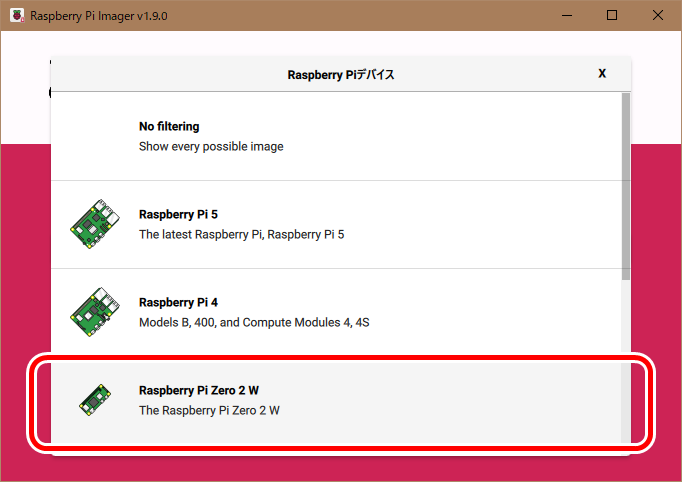 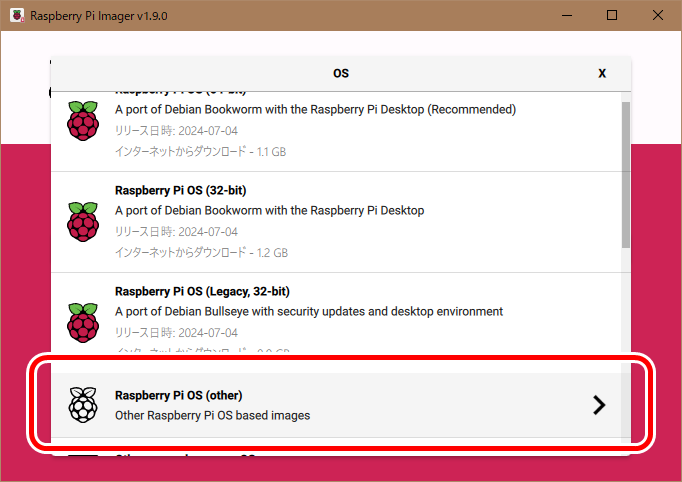 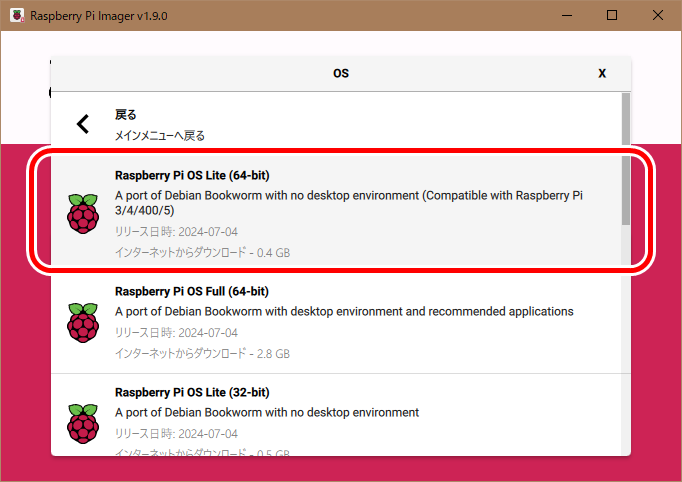 ### Gitインストール Raspberry Piを起動後、以下のコマンドにて最初にGitをインストールします。 ```sh sudo apt-get install -y git ``` ### Cube Scramblerリポジトリのクローン 続いて以下のコマンドでCube Scramblerのリポジトリをクローンします。 ```sh git clone https://github.com/miso-develop/cube-scrambler-rpi ``` ### セットアップスクリプトの実行 以下のコマンドでセットアップスクリプトを実行します。 セットアップスクリプトでは必要なアプリケーションのインストール、Cube Scramblerの依存パッケージインストールとサービス登録、Raspberry PiのAP化を行います。 ```sh cd cube-scrambler-rpi sudo bash setup.sh ``` なお`setup.sh`の内容は以下のようになります。 ```sh: setup.sh #!/bin/bash cd `dirname $0` CURRENT_DIR=$(pwd) # Setup check if [ -f "setup-completed" ]; then echo "Setup completed." exit 1 fi # App setup sudo apt-get -y update sudo apt-get -y upgrade sudo apt-get install -y nodejs npm pigpio dhcpcd hostapd dnsmasq # Cube Scrambler setup ## build npm i npm run tailwind:build npm run typescript:build ## Service setup sudo chmod 0755 ./index.sh sudo ln -s $CURRENT_DIR /opt/cube-scrambler-rpi sudo cp ./setup/cube-scrambler.service /etc/systemd/system/cube-scrambler.service sudo systemctl enable cube-scrambler # AP setup ## udev MAC=$(cat `find /sys/devices/ -name wlan0`/address) echo MAC: $MAC sudo iw phy phy0 interface add ap0 type __ap sudo ip link set ap0 address $MAC cat << EOF > /etc/udev/rules.d/99-ap0.rules SUBSYSTEM=="ieee80211", ACTION=="add|change", ATTR{macaddress}=="$MAC", KERNEL=="phy0", RUN+="/sbin/iw phy phy0 interface add ap0 type __ap", RUN+="/bin/ip link set ap0 address $MAC" EOF sudo cp ./setup/unmanaged.conf /etc/NetworkManager/conf.d/unmanaged.conf ## dnsmasq cat << EOF >> /etc/dnsmasq.conf interface=ap0 dhcp-range=192.168.10.2,192.168.10.10,255.255.255.0,12h EOF ## dhcpcd cat << EOF >> /etc/dhcpcd.conf interface ap0 static ip_address=192.168.10.1/24 nohook wpa_supplicant EOF ## hostapd sudo cp ./setup/hostapd.conf /etc/hostapd/hostapd.conf sudo systemctl unmask hostapd.service sudo systemctl enable hostapd.service ## wpa_supplicant cat << EOF >> /etc/wpa_supplicant/wpa_supplicant.conf country=JP EOF # reboot echo . > setup-completed sudo reboot ``` ## サーボモーターの接続 Raspberry Piの電源を落とした状態で、ジャンパーワイヤを使って2つのサーボモーター(GeekServo)を接続します。 サーボモーターにはGND (茶色), 5V (赤), 信号 (黄色)の3本の線があります。 下図が`pinout`コマンドの出力結果となり、出力内容に合わせ以下のように接続します。 * サーボモーター1 * 5V (4) * GND (6) * GPIO14 (8) * サーボモーター2 * 5V (2) * GND (14) * GPIO15 (10) 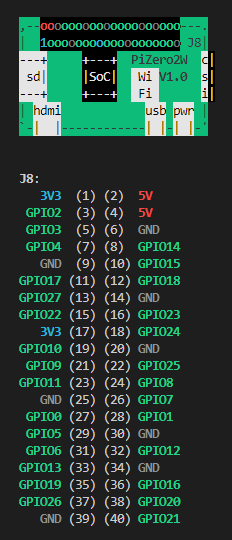 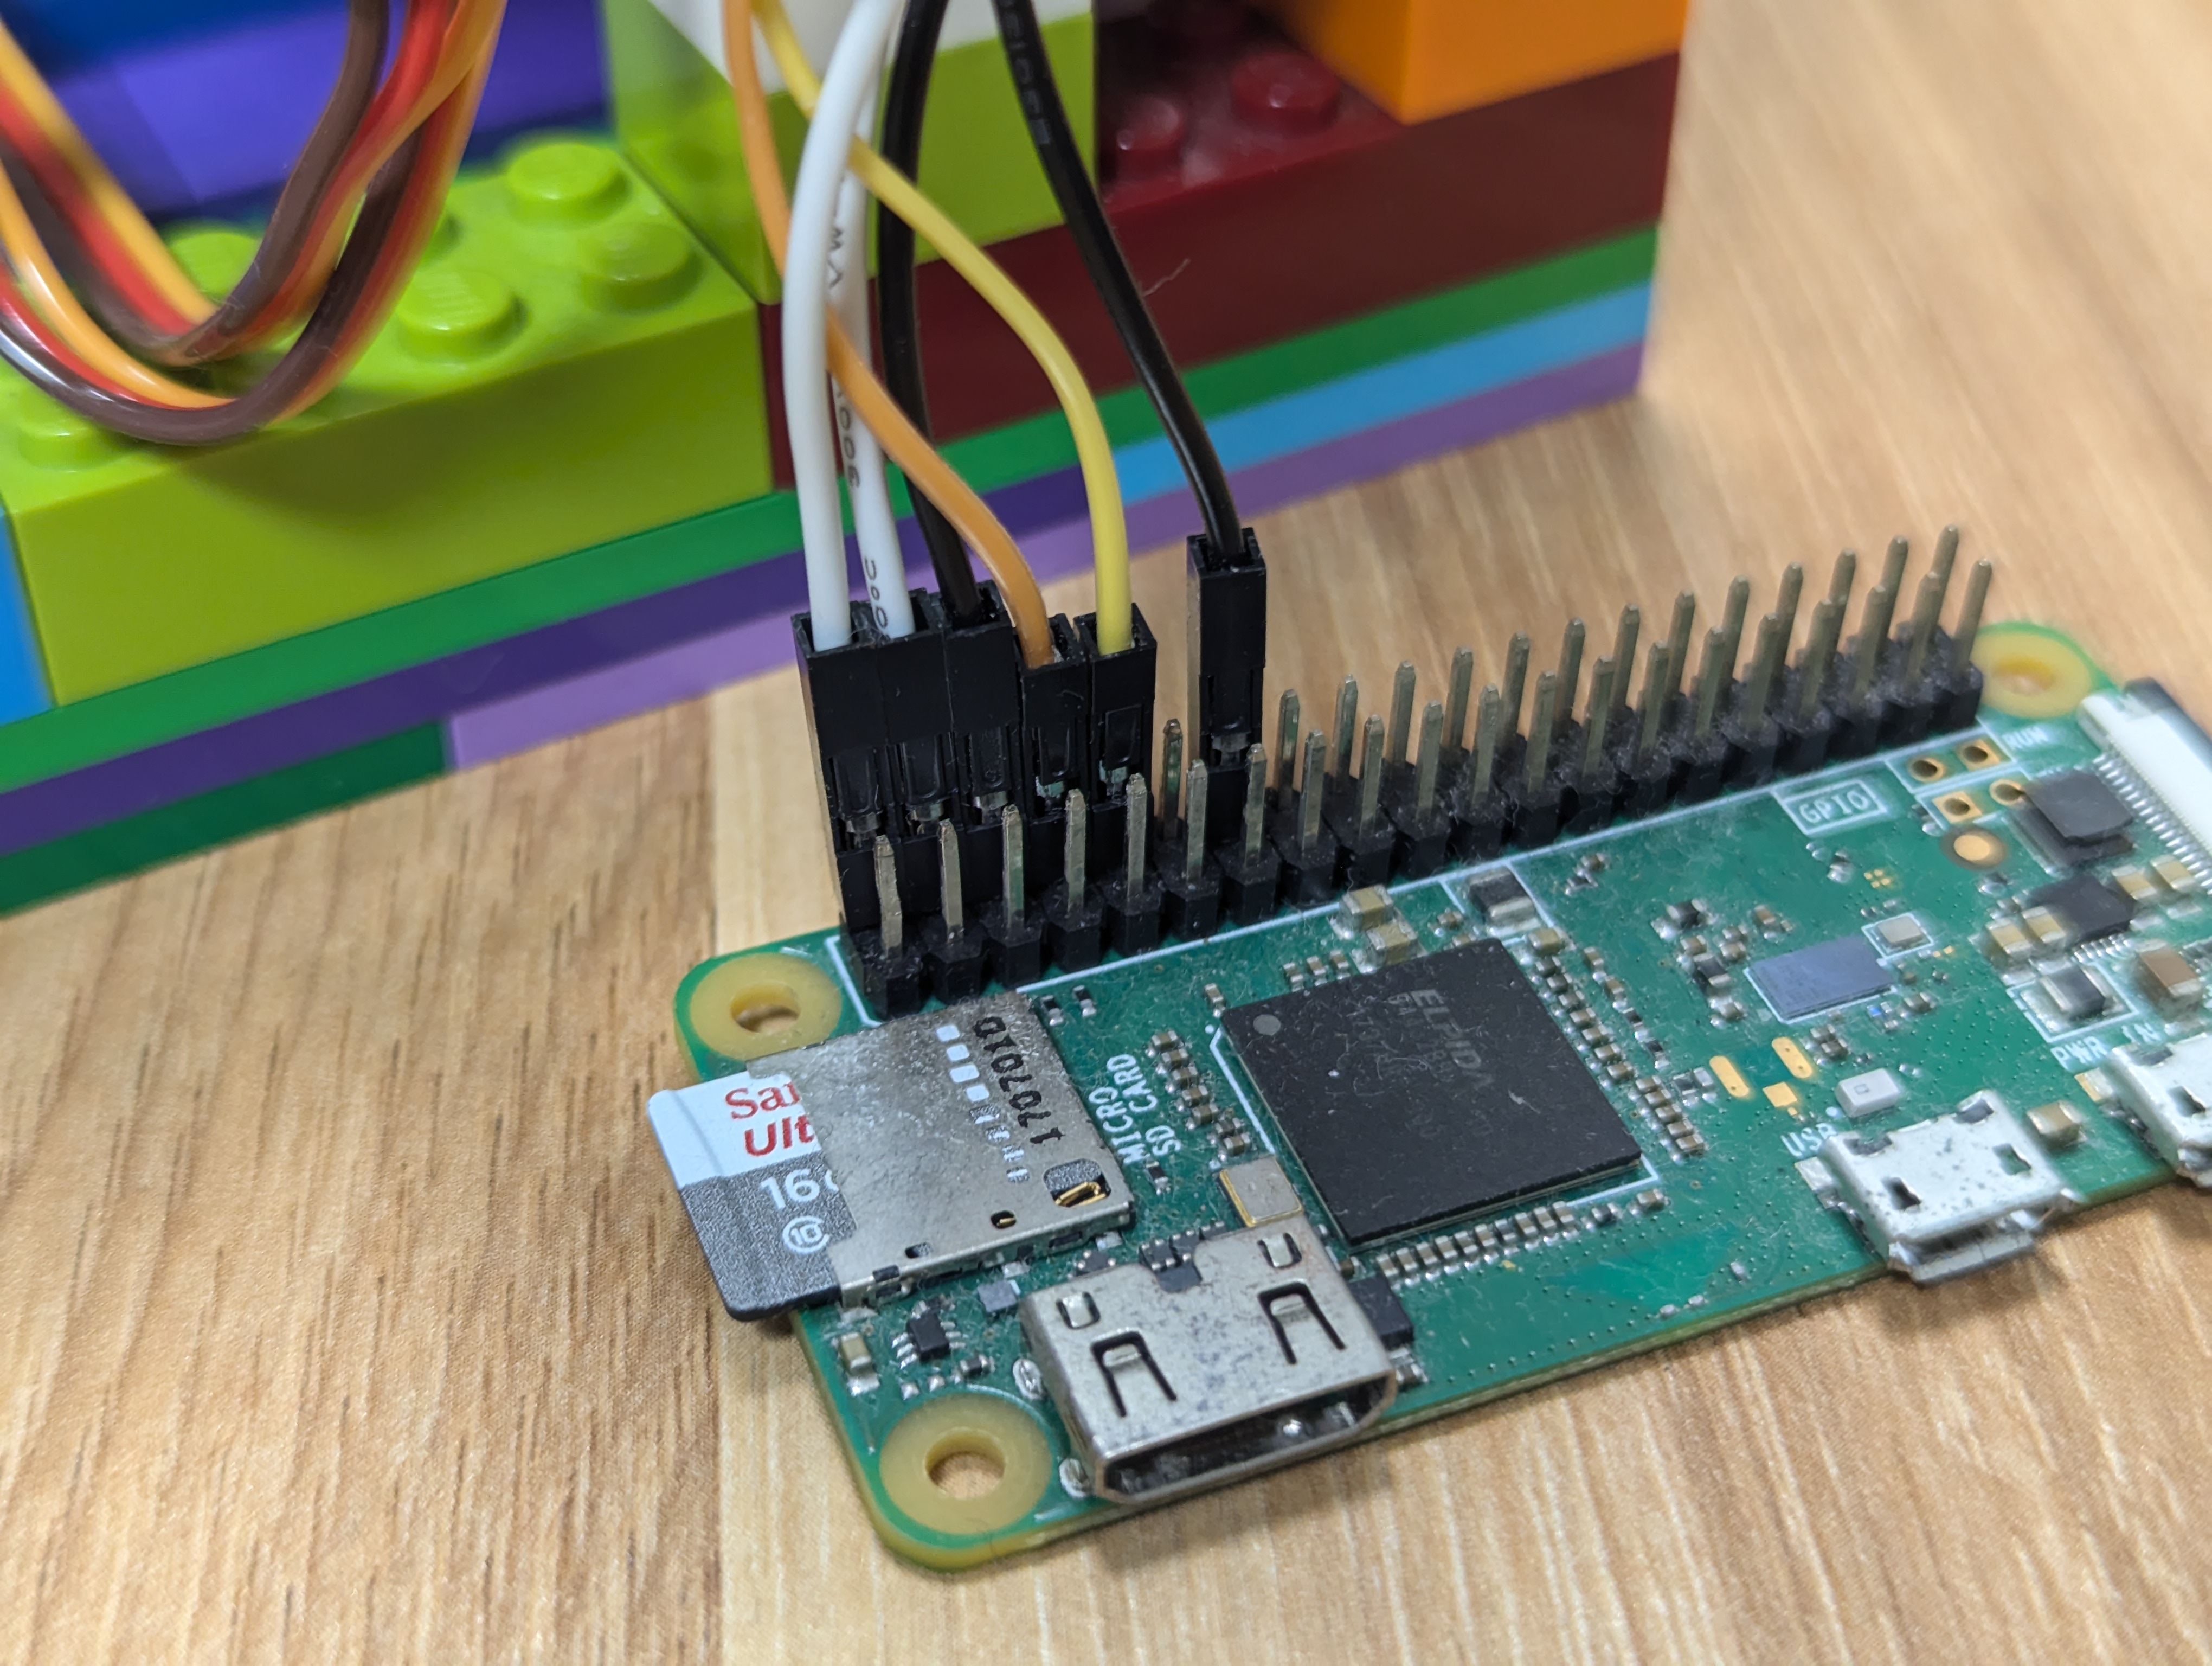 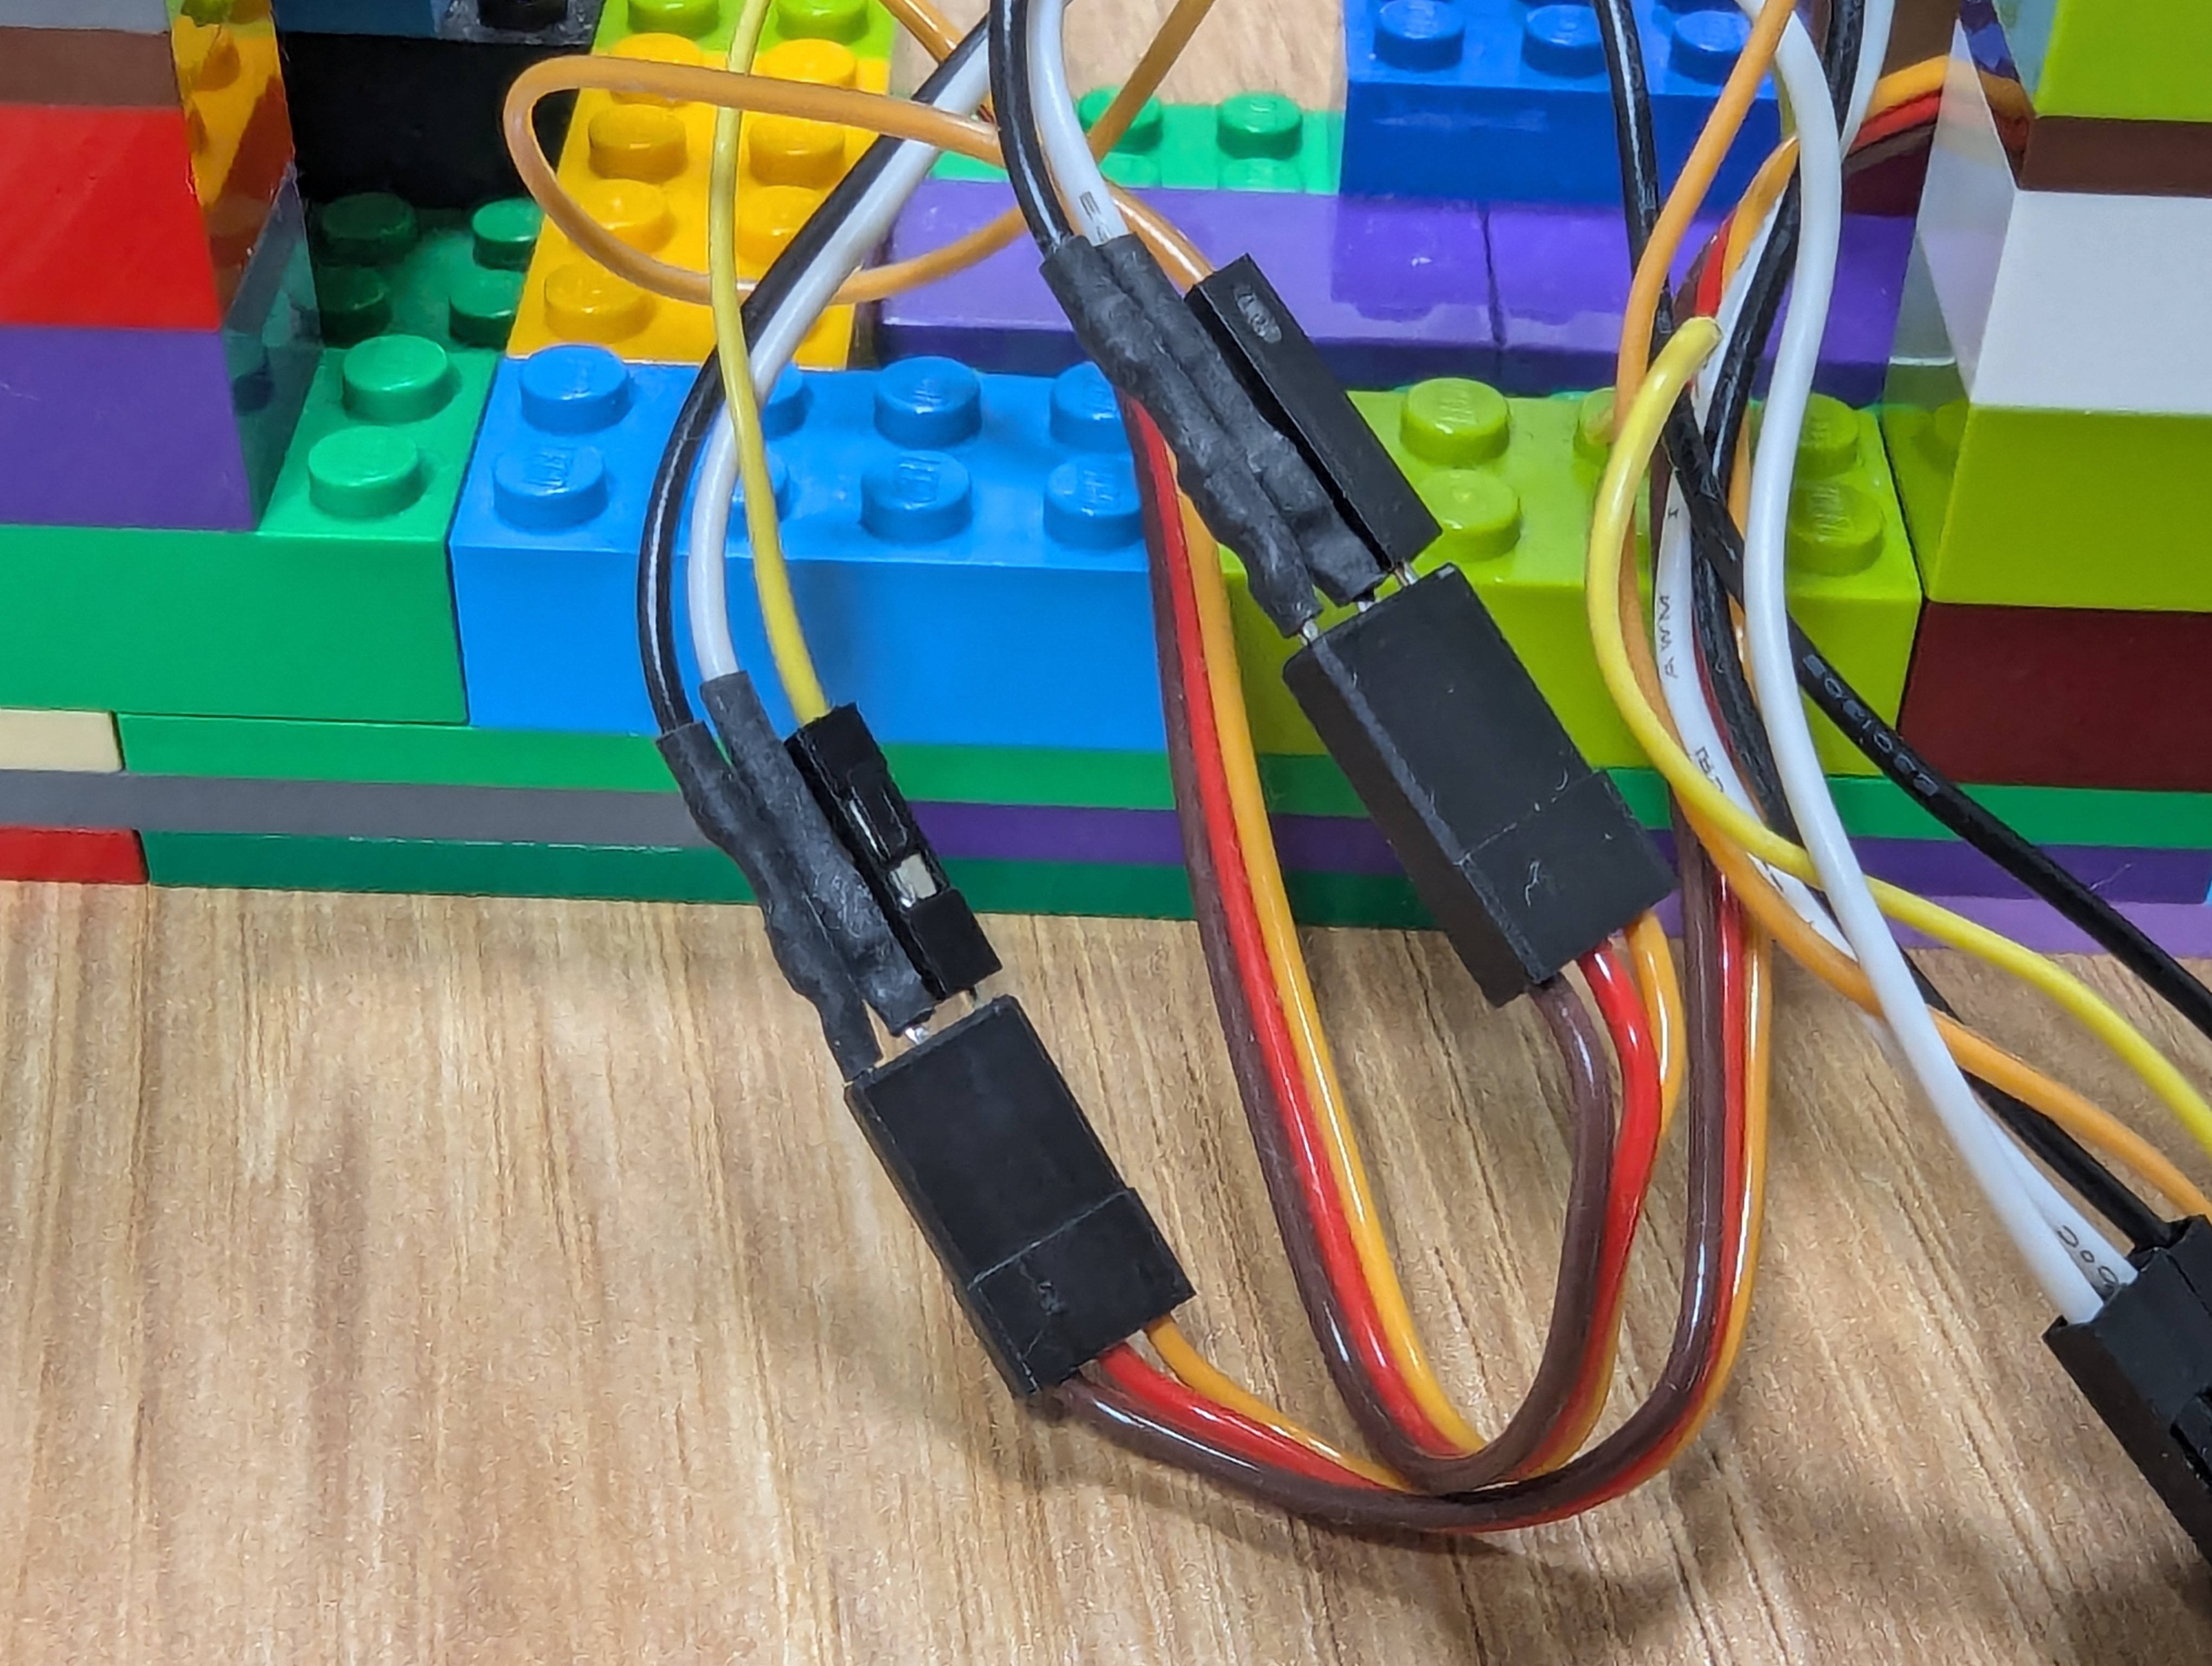 サーボモーター接続後にRaspberry Piを起動し、サーボモーターの角度を初期位置にしておきます。 ## LEGOの組み立て LEGOの組み立て説明書のPDFを公開しています。 この説明書に沿ってLEGOを組み立てていきます。 サーボモーターも組み立ての中に含まれており、スタンド側とアーム側で分かれます。 GPIO14 (8) ピンへ接続しているサーボモーターがスタンド側、GPIO15 (10) ピンへ接続しているサーボモーターがアーム側となるよう注意してください。 **➡ [LEGOの組み立て方](https://drive.google.com/file/d/1LfaUZmzZbCQRWulfV_bqecyGe_8wCMht/view)** 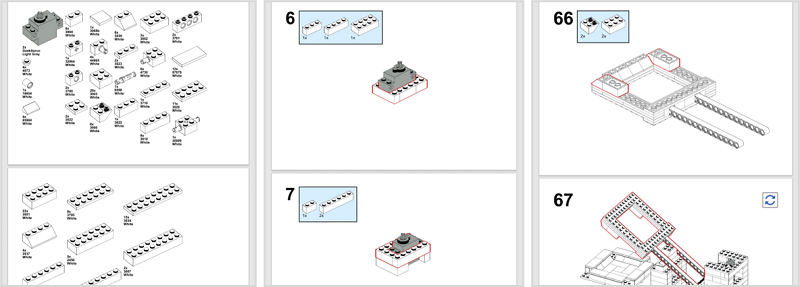 LEGOの組み立てまで完了しましたらCube Scramblerは完成です🎉 # 使い方 Raspberry Piから提供されるWeb UIから操作を行います。 ## Raspberry PiのAPへ接続 PCもしくはスマートフォンのWi-FiをRaspberry PiのAPへ接続します。 SSID: CubeScrambler パスワード: cubescrambler ## Web UIへアクセス 以下のURLへアクセスするとWeb UIが表示されます。 ※Androidの場合SIM通信が有効になっているとアクセスできないため、SIM通信を無効にしてください http://192.168.10.1/ # おわりに Cube Scramblerはもともとはサーボ制御にM5Stackデバイスを使い、それを[opniz](https://github.com/miso-develop/opniz-sdk-nodejs)サーバーを実行するPCで制御する構成でした。 しかし、この構成だと作品を展示する場で厳しい構成ではないかと考えました。 電子作品の展示イベントではWi-Fiが繋がりにくくなるという話を伺ったことがあり、上記の構成だとWeb UI <-> PC (opnizサーバー) <-> M5Stackデバイスと、Wi-Fi通信を2度経由する必要があるためです。 このWi-Fi多重経由問題の対策として実装したのがRaspberry Pi対応版Cube Scramblerとなります。 サーボ制御とWeb UI配信、Web APIサーバーの実行をRaspberry Piのみで行うことによって、Wi-Fi通信はWeb UI <-> Raspberry Pi間のみとなりました。 実際、Raspberry Pi対応のおかげで今年3回参加した展示イベントのいずれも安定した動作を行うことができました。