mikecat が 2022年12月04日19時43分45秒 に編集
初版
タイトルの変更
CalicoCPU で Xorshift による乱数生成
タグの変更
CalicoCPU
Xorshift
乱数生成
自作CPU
メイン画像の変更
記事種類の変更
製作品
ライセンスの変更
(CC BY 4+) Creative Commons Attribution CC BY version 4.0 or later
本文の変更
++[自作CPU Advent Calendar 2022](https://qiita.com/advent-calendar/2022/diycpu) 4日目++ [CalicoCPU](https://elchika.com/article/f38275fc-1f46-4e77-bc30-c172971ecf0f/) で [Xorshift](https://ja.wikipedia.org/wiki/Xorshift) による乱数生成を行った。 # 3-Digit 7seg Board |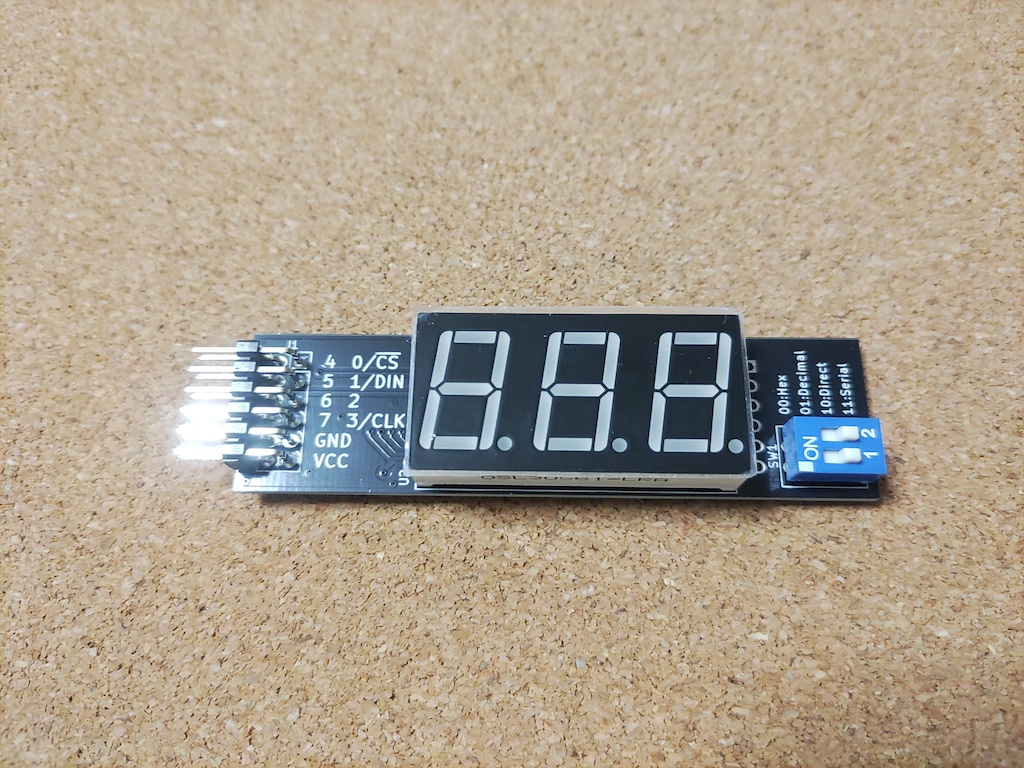|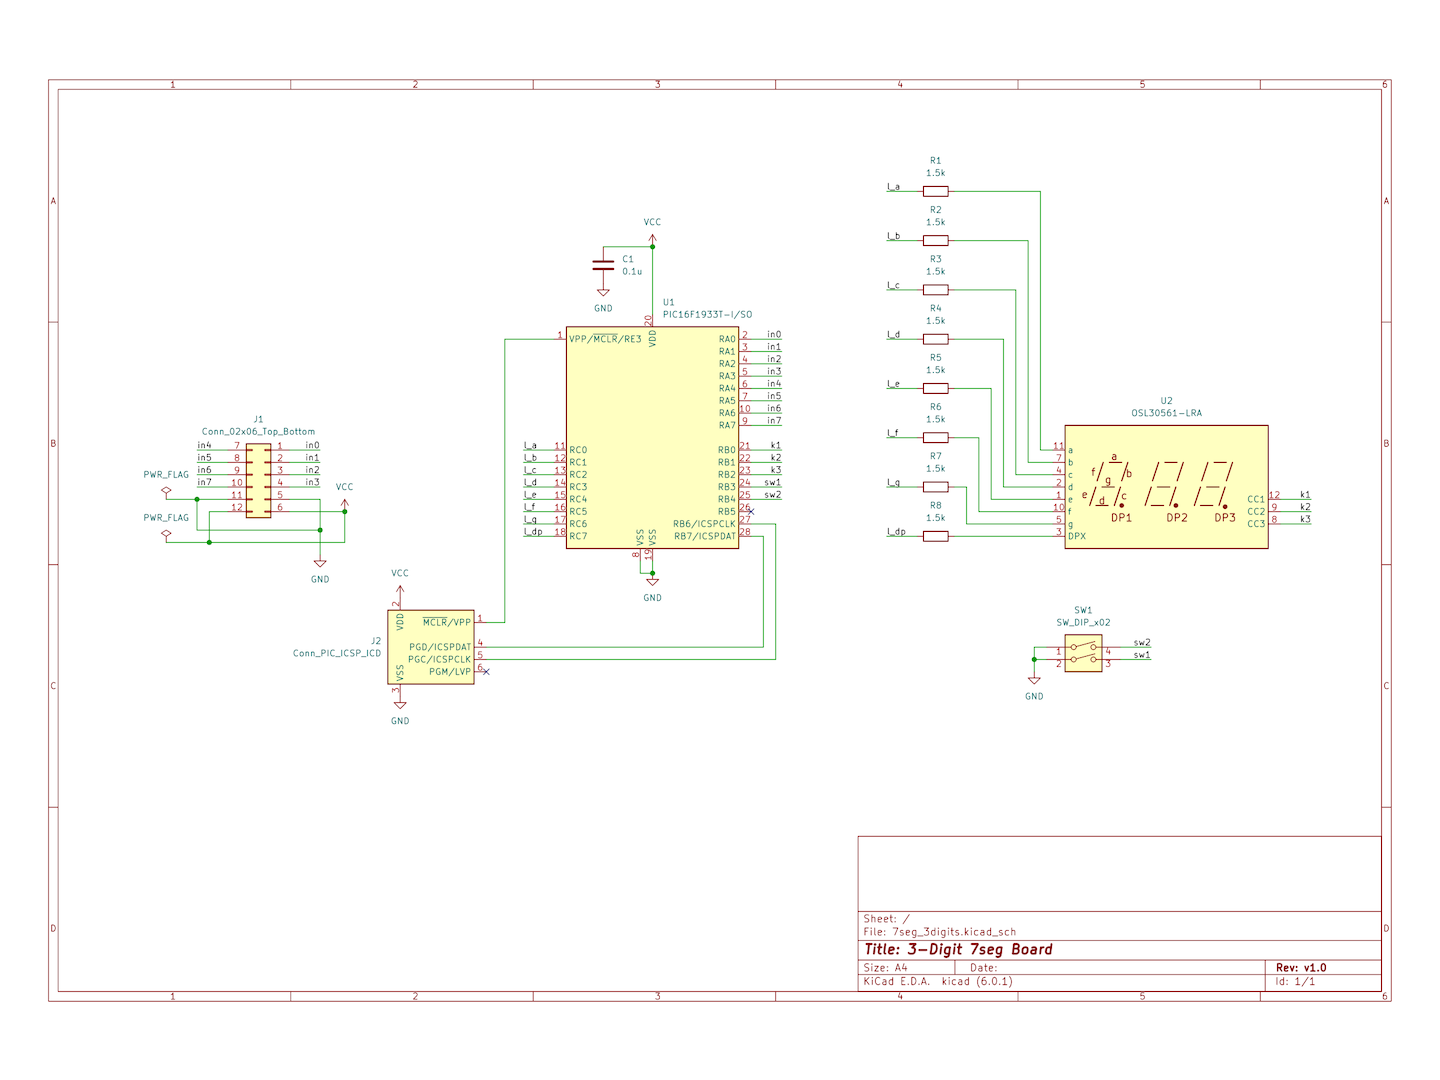| |---|---| [基板設計データ](https://github.com/mikecat/hardware_cpu/releases/tag/20221008-boards-v1.0) | [ソフトウェア](https://github.com/mikecat/hardware_cpu/tree/main/software/io/7seg_3digits) 8ビットの入力値を7セグメントLEDで表示する。以下のモードがある。 * 16進数 (左の2桁を使用) * 10進数 (3桁を使用) * 直接制御 (左の1桁を使用) * シリアル通信による直接制御 (3桁を使用) # 方針 [8bit用xorshift乱数発生アルゴリズム - Sim's blog](https://blog.goo.ne.jp/sim00/e/33b576696be51efbb3eab4b5c61ffb87) を参考にする。 今回の環境では周期65535 (= 2^16 - 1) がちょうどよさそうだが、この周期はこのサイトには載っていない。 そこで、「周期が16777215 (= 2^24 - 1)」をベースに、自分で適切な A, B, C の値を探索することにした。 以下のアルゴリズムを用いる。 ```c uint8_t x, y, t; t = x ^ x << a; x = y; y ^= y >> c ^ t ^ t >> b; return z; ``` 以下のC言語のプログラムで探索を行う。 ```c #include <stdio.h> #include <string.h> char visited[1 << 16]; int main(void) { int a, b, c; for (a = 0; a < 8; a++) { for (b = 0; b < 8; b++) { for (c = 0; c < 8; c++) { unsigned char x = 0, y = 1, t; int count = 0; memset(visited, 0, sizeof(visited)); while (!visited[x + y * 256]) { count++; visited[x + y * 256] = 1; t = x ^ (x << a); x = y; y ^= (y >> c) ^ t ^ (t >> b); } if (count == (1 << 16) - 1) { printf("%d %d %d\n", a, b, c); } } } } return 0; } ``` 以下の7通りの A, B, C の組が得られた。 ``` 3 2 5 3 2 7 5 1 2 5 1 3 5 4 3 7 1 2 7 6 1 ``` 今回は、この中から (A, B, C) = (5, 4, 3) を採用した。 以下のC言語のプログラムにより、出力するべき値が得られる。 ```c #include <stdio.h> int main(void) { unsigned char x = 255, y = 0, t; int i; for (i = 0; i < 100; i++) { t = x ^ (x << 5); x = y; y ^= (y >> 3) ^ t ^ (t >> 4); printf("%03d\n", y); } return 0; } ``` このプログラムの出力の冒頭は、以下のようになった。 ``` 030 029 205 098 005 037 142 018 090 006 ``` # 実装 以下が [MikeAssembler](https://mikecat.github.io/mike_assembler/) 用のプログラムである。 ``` target calico movi a, -1 drive 0, a ; A: x, B: y loop_start: ; t = x ^ (x << 5) mov c, a shl c, 5 xor c, a, d ; // y ^= (y >> 3) ^ t ^ (t >> 4) ; t ^= t >> 4 mov a, c shr a, 4 xor c, a, d ; t ^= y >> 3 mov a, b shr a, 3 xor c, a, d ; x = y mov a, b ; y ^= t xor b, c, d ; return y out 0, b ; proceed to next iteration movi d, loop_start jnz d, d ``` 以下が、機械語をHEX形式で表したものである。 ``` :10000000203F16808789C8C28EC28E080F0FC8C2D3 :100010008EC28E040F0BC8C28EC28E04C4CA4ECAD2 :040020004E52E3DF7A :00000001FF ``` # 実行結果 3-Digit 7seg Board を用いて、生成した乱数を10進数で表示する。 @[youtube](https://www.youtube.com/watch?v=x5bmfclp3YA&feature=youtu.be) 乱数の値が計算できている。