mongonta555 が 2021年05月08日16時58分00秒 に編集
初版
タイトルの変更
obnizとMaixBit+ステッピングモータで360°監視カメラを作る
タグの変更
obnizIoTコンテスト
obniz
obnizBoard1Y
MaixBit
MaixPy
JavaScript
メイン画像の変更
本文の変更
# はじめに obniz IoT 2021に向けて、obnizを使うとステッピングモーターをドライバなしで駆動できる点を活かして360°の監視カメラを作ってみました。 # デモ動画と結果画面 @[youtube](https://www.youtube.com/watch?v=29Z6dL_a_Ag) MaixBitと画角45°のOV2640を利用してこのように、アイテムを配置し360°撮影してみます。  ## ## 結果画面 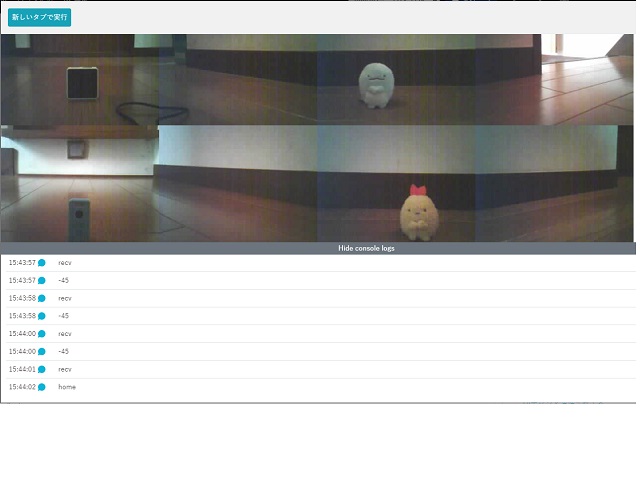 # 使用した機器 - [obniz Board 1Y](https://obniz.com/ja/products/obnizboard) - [Sipeed MaixBit(スイッチサイエンス)](https://www.switch-science.com/catalog/5702/) - [ステッピングモーター 17PM-K044-AKZ(秋月電子通商)](https://akizukidenshi.com/catalog/g/gP-06578/) MaixBitはUnitVまたはM5StickVでも代替可能ですが、確認していないので保証はできません。(MaixPy側のスクリプトを書き換える必要があります。) 最初はUnitVかM5StickVを使う予定だったのですがGroveで速度が出ないためMaixBitに変更しました。 ## 配線 360°曲がるので、高屈曲性ケーブルとデュポンコネクタを用意して自作しました。 [協和ハーモネット シールドスリムロボットケーブル(Amazon)](https://www.amazon.co.jp/gp/product/B01HARBHW0/) # 接続 ## obnizとMaixBitの接続 obnizとMaixBitはUART通信を行うため下記のように配線します。MaixBitは消費電力が大きくobnizのピンからは電力供給できなかったのでVCC5V(+)とGND(-)に接続しています。 | | obniz | MaixBit | |:---:|:---|:---| | VCC(5V) | + | 5V | | GND | - | GND | | UART | TX(10) | RX(IO25) | | UART | RX(11) | TX(IO24) | ## obnizとステッピングモーターの接続 下記のように接続します。 | obniz | ステッピングモーター | |:---:|:---| | 0 | a(赤) | | 1 | aa(黄) | | 2 | b(青) | | 3 | bb(橙) | # プログラム 今回制作過程をTwitterでつぶやいていたところ[ハセグルさん](https://twitter.com/haseguru)がUnitV向けのパーツライブラリを作成していたので、それを参考にさせていただきました。 @[twitter](https://twitter.com/haseguru/status/1386316095477276680) ## パーツライブラリ(Grove_UnitVAICamera.js) [リポジトリ](https://obniz.io/users/2489/repo/Grove_UnitVAICamera.js)に公開しています。 ``` "use strict"; class Grove_UnitVAICamera { // Constants // Header of a receive packet static get _HOP() { return [0xFF, 0xD8, 0xEA, 0x01]; } // "Take a picture" instruction static get _TAP() { return [0xFF, 0xD8, 0xEA, 0x00]; } constructor() { this.keys = ["vcc", "cam_tx", "cam_rx", "gnd", "baud", "grove"]; this.requiredKeys = ["cam_tx", "cam_rx"]; this.ioKeys = this.keys; this.displayName = "Cam"; this.displayIoNames = { cam_tx: "camTx", cam_rx: "camRx" }; } static info() { return { name: "Grove_UnitVAICamera", }; } wired(obniz) { this.obniz = obniz; if (this.params.grove) { this.uart = this.params.grove.getUart(this.params.baud, "3v"); } else { this.obniz.setVccGnd(this.params.vcc, this.params.gnd, "5v"); this.uart = obniz.getFreeUart(); this.uart.start({ tx: this.params.cam_tx, rx: this.params.cam_rx, baud: this.params.baud, bits: this.params.bits, parity: this.params.parity, stop: this.params.stop, }); } } arrayToBase64(array) { //return Buffer.from(array).toString("base64"); // this line just work in obniz.js let uint8Array = new Uint8Array(array.length); for(let i = 0; i < uint8Array.length; i++) { uint8Array[i] = array[i]; } return btoa(String.fromCharCode(...new Uint8Array(uint8Array))); } async _drainUntil(uart, search, recv) { this.log("_drainUntil" + search); if (!recv) { recv = []; } this.log("recv:" + recv + ":" ); while (true) { const readed = uart.readBytes(); recv = recv.concat(readed); this.log("recv:" + recv + ":" ); const tail = this._seekTail(search, recv); if (tail >= 0) { recv.splice(0, tail); return recv; } await this.obniz.wait(10); } } _seekTail(search, src) { let f = 0; for (let i = 0; i < src.length; i++) { if (src[i] === search[f]) { f++; if (f === search.length) { this.log("find"); return i + 1; } } else { f = 0; } } return -1; } log(value) { // HTMLの<div id="log">log</div>にログを表示します。 // var target = document.getElementById("log"); // var text = target.innerHTML + "<BR>" + value; // target.innerHTML = text; } async takeContinuousWait() { this.log("takeContinuousWait") const uart = this.uart; let recv = await this._drainUntil(uart, Grove_UnitVAICamera._HOP); let databytes; while (true) { console.log("uartRecv"); const readed = uart.readBytes(); recv = recv.concat(readed); if (recv.length >= 6) { databytes = (recv[0] << 16) | (recv[1] << 8) | recv[2]; // size of JPEG data break; } await this.obniz.wait(10); } console.log("image: " + databytes + " Bytes"); recv.splice(0, 6); // remove tail of packet header from the received data while (true) { const readed = uart.readBytes(); recv = recv.concat(readed); if (recv.length >= databytes) { break; } await this.obniz.wait(10); } recv = recv.splice(0, databytes); // remove tail console.log(recv); return recv; } async takeOneTimeWait() { const uart = this.uart; uart.send(Grove_UnitVAICamera._TAP); // send "Take a picture" instruction this.log("Request") let recv = await this._drainUntil(uart, Grove_UnitVAICamera._HOP); this.log("Request Recv") let databytes; while (true) { const readed = uart.readBytes(); recv = recv.concat(readed); if (recv.length >= 6) { databytes = (recv[0] << 16) | (recv[1] << 8) | recv[2]; // size of JPEG data break; } await this.obniz.wait(10); } //console.log("image: " + databytes + " Bytes"); recv.splice(0, 6); // remove tail of packet header from the received data while (true) { const readed = uart.readBytes(); recv = recv.concat(readed); if (recv.length >= databytes) { break; } await this.obniz.wait(10); } recv = recv.splice(0, databytes); // remove tail return recv; } } if (typeof module === 'object') { module.exports = Grove_UnitVAICamera; } ``` ## MaixBit側のPythonスクリプト メモリが足らないのでファームウェアは最小を使います(ただし_threadは必要) ``` import sensor from fpioa_manager import fm from machine import UART import _thread import time,sys BOARD_NAME = "MAIXBIT" # M5STICKV or UNITV if BOARD_NAME == "M5STICKV": import lcd from board import board_info from Maix import GPIO elif BOARD_NAME == "UNITV": from modules import ws2812 class_ws2812 = ws2812(8,100) elif BOARD_NAME == "MAIXBIT": print("MAIXBIT") ##### User settings section Begin ##### # Baud rate(should be matched with obniz.) BAUD_RATE = 115200 # Shooting mode # When SHOOTING_MODE_ONE_TIME is True, Wait for "take a picture" instruction from obniz. SHOOTING_MODE_ONE_TIME = True # JPEG Compression Quality(0-100) JPEG_COMP_QUALITY = 50 # Camera Resolution(sensor.VGA, QVGA, QQVGA ...) CAMERA_RESOLUTION = sensor.QVGA # Use LED indicator USE_LED = False ##### User settings section End ##### # Send Flag SEND_MODE = False # RGB LED Settings BRIGHTNESS = 0x10 LED_INTERVAL = 100 # msec # Initialize of UART fm.register(24, fm.fpioa.UART1_TX, force=True) fm.register(25, fm.fpioa.UART1_RX, force=True) #uart_Port = UART(UART.UART1, BAUD_RATE, 8, UART.PARITY_ODD, 1, timeout=1000, read_buf_len= 4096) uart_Port = UART(UART.UART1, BAUD_RATE, 8, None, 1, timeout=1000, read_buf_len= 4096) uart_Port.init() # camera sensor.reset() sensor.set_framesize(CAMERA_RESOLUTION) sensor.set_pixformat(sensor.RGB565) if BOARD_NAME == "M5STICKV": lcd.init(type=3) # type=3 is required for maixpy 0.6.0 and above. lcd.rotation(2) fm.register(board_info.LED_W, fm.fpioa.GPIO3) led_w = GPIO(GPIO.GPIO3, GPIO.OUT) led_w.value(1) #RGBW LEDs are Active Low fm.register(board_info.LED_R, fm.fpioa.GPIO4) led_r = GPIO(GPIO.GPIO4, GPIO.OUT) led_r.value(1) #RGBW LEDs are Active Low fm.register(board_info.LED_G, fm.fpioa.GPIO5) led_g = GPIO(GPIO.GPIO5, GPIO.OUT) led_g.value(1) #RGBW LEDs are Active Low fm.register(board_info.LED_B, fm.fpioa.GPIO6) led_b = GPIO(GPIO.GPIO6, GPIO.OUT) led_b.value(1) #RGBW LEDs are Active Low def BlinkLED(r, g, b): # M5StickV can't control brightness if r > 0: led_r.value(0) if g > 0: led_g.value(0) if b > 0: led_b.value(0) time.sleep_ms(LED_INTERVAL) led_r.value(1) led_g.value(1) led_b.value(1) time.sleep_ms(LED_INTERVAL) elif BOARD_NAME == "UNITV": sensor.set_vflip(1) sensor.set_hmirror(1) class_ws2812 = ws2812(8, 1) a = class_ws2812.set_led(0, (100, 0, 100)) a = class_ws2812.display() time.sleep(1) a = class_ws2812.set_led(0, (0, 0, 0)) a = class_ws2812.display() # Blink RGB LED def BlinkLED(r,g,b): if USE_LED == True: class_ws2812.set_led(0,(r,g,b)) class_ws2812.display() time.sleep_ms(LED_INTERVAL) class_ws2812.set_led(0,(0,0,0)) class_ws2812.display() time.sleep_ms(LED_INTERVAL) elif BOARD_NAME == "MAIXBIT": def BlinkLED(r,g,b): time.sleep_ms(100) # sensor.skip_frames(1, 300) sensor.set_brightness(1) sensor.set_auto_whitebal(1) sensor.set_auto_exposure(1) sensor.run(1) def take(shooting_mode): global SEND_MODE if USE_LED == True: # Turn on the red LED during the process. BlinkLED(BRIGHTNESS,0,0) img = sensor.snapshot() if BOARD_NAME == "M5STICKV": lcd.display(img) if (SEND_MODE == True or SHOOTING_MODE_ONE_TIME == False): if BOARD_NAME == "M5STICKV": img.draw_string(320, 240 , "Send", color=lcd.RED) lcd.display(img) # Lowering the quality value increases the frame rate. #img = sensor.snapshot() img.compress(quality=JPEG_COMP_QUALITY) sendImage(img) if USE_LED == True: BlinkLED(0,0,BRIGHTNESS) def sendImage(p_buf): global SEND_MODE # Packet header buf_size1 = (p_buf.size()& 0xFF0000)>>16 buf_size2 = (p_buf.size()& 0x00FF00)>>8 buf_size3 = (p_buf.size()& 0x0000FF)>>0 data_packet = bytearray([0xFF,0xD8,0xEA,0x01,buf_size1,buf_size2,buf_size3,0x00,0x00,0x00]) #data_packet = bytearray([0x02,0xD8,0xEA,0x01,buf_size1,buf_size2,buf_size3,0x00,0x00,0x00]) uart_Port.write(data_packet) # Transmit image data. uart_Port.write(p_buf) print("Data Sent") #time.sleep(0.5) if SHOOTING_MODE_ONE_TIME == True: SEND_MODE = False def recvData(uart_Port): global SEND_MODE while True: print("recvdata") while uart_Port.any() == False: #print("data wait") time.sleep_ms(100) recv_data = uart_Port.read() #recv_str = recv_data.decode('utf-8') print(recv_data) if (recv_data == bytearray([0x00, 0xFF, 0xD8, 0xEA, 0x00])) or \ (recv_data == bytearray([0xFF, 0xD8, 0xEA, 0x00])): SEND_MODE = True time.sleep_ms(100) if SHOOTING_MODE_ONE_TIME == True: # SINGLE SHOT _thread.start_new_thread(recvData, (uart_Port,)) try: while True: #print("Take Picture") take(SHOOTING_MODE_ONE_TIME) time.sleep_ms(500) except Exception as e: uart_Port.deinit() del _thread sys.print_exception(e) sys.exit() ``` ## obniz側のブラウザプログラム [obnizクラウド](https://obniz.com/ja/webapp/4194)で公開しています。(まだ公開の仕方がよくわかっていないので説明文書がありません。) 下記の2ステップを繰り返した後、元に戻ります。(初期状態では45°毎に8回) ・写真を撮る ・ステッピングモーターの回転 ``` <html> <head> <meta charset="utf-8" /> <meta name="viewport" content="width=device-width, initial-scale=1" /> <link rel="stylesheet" href="https://stackpath.bootstrapcdn.com/bootstrap/4.3.1/css/bootstrap.min.css" /> <script src="https://code.jquery.com/jquery-3.2.1.min.js"></script> <script src="https://unpkg.com/obniz@3.x/obniz.js" crossorigin="anonymous" ></script> <script src="https://obniz.io/users/2489/repo/Grove_UnitVAICamera.js"></script> <script src="bower_components/console-log-div/console-log-div.js"></script> </head> <body> <div id="obniz-debug"></div> <script> console.log("Start") var obniz = new Obniz("OBNIZ_ID_HERE"); // called on online obniz.onconnect = async function() { // パーツライブラリの登録 Obniz.PartsRegistrate(Grove_UnitVAICamera); obniz.display.clear(); obniz.display.print("360 Camera"); var cam = obniz.wired("Grove_UnitVAICamera", { gnd:8, vcc:9, cam_rx:10, cam_tx:11, baud:115200, parity:"off", stop:1 }); // var cam = obniz.wired("Grove_UnitVAICamera", { grove: obniz.grove0, baud:115200 }); // Groveの場合(未検証) var motor = obniz.wired("StepperMotor", {a:0, aa:1, b:2, bb:3}); motor.rotationStepCount = 200; const image_area = [ "image0", "image1", "image2", "image3", "image4", "image5", "image6", "image7" ]; const rotation = [ -45, -45, -45, -45, -45, -45, -45, -45 ]; //if the "Take Picture" clicked $("#take_picture").on("click", async function() { //show input text on obniz display obniz.display.clear(); obniz.display.print("Take Picture"); all_rotation = 0; for (let i = 0; i < image_area.length; i++) { console.log(rotation[i]); await motor.rotateWait(rotation[i]); const jpegData = await cam.takeOneTimeWait(); console.log("recv"); // <img id="image?">に表示 document.getElementById(image_area[i]).src = "data:image/jpeg;base64," + cam.arrayToBase64(jpegData); all_rotation = all_rotation + rotation[i]; }; await obniz.wait(500); console.log("home") await motor.rotateWait(-1 * all_rotation); }); // called while online. obniz.onloop = async function() { }; }; // called on offline obniz.onclose = async function() { }; </script> <button class="btn btn-primary" id="take_picture">Take Picture</button> <hr> <img id="image0"><img id="image1"><img id="image2"><img id="image3"><img id="image4"><img id="image5"><img id="image6"><img id="image7"> <hr> <div id="log"></div> </body> </html> ``` # 終わりに K210というAIチップ搭載のMaixBitをカメラとして使うので、人の検出をしたら撮影開始等の機能も埋め込みたかったのですが、今回はメモリ不足のようでうまく動かないため組み込めませんでした。また、時間ができたらリベンジしてみます。 obnizとJavaScriptの経験が浅いので、間違っている実装もあると思いますがその点はご了承ください。