siroitori0413 が 2021年02月03日22時36分14秒 に編集
初版
タイトルの変更
とびだすおじさんの箱『USB and RF Bomber』
タグの変更
秋葉原2021
M5Stack
ソレノイド
RFID
USB
3Dプリンター
メイン画像の変更
本文の変更
# 『USB and RF Bomber』 USBプラグやFRIDカードで遊べる電子工作おもちゃを作りました。 遊び方は2とおり。 【USBプラグで遊ぶ】 箱についている4つのUSBコネクタにUSBプラグを差し込みます。どれか1つだけ、おじさんが飛び出すコネクタがあります。 【RFIDカードで遊ぶ】 箱の前面にRFカードをかざします。どれか1枚だけかざすとおじさんが飛び出すカードがあります。 順番にUSBプラグを刺したりカードをかざしたりして「飛び出すのかな飛び出さないのかな」と、遊びます。 # 材料 - ユニバーサル基板 × 1個 - USB typeA コネクター(メス)× 4個 - USB typeB コネクター(メス)× 1個 - USBケーブル(Aオス-Bオス) - M5Stack Basic × 1個 - Grove接続 RFIDリーダー× 1個 - ソレノイド CB12500080 × 1個 - 箱(3Dプリンターで出力・PETG) # 作り方 ## 基盤とUSBコネクター 図のように配線します。 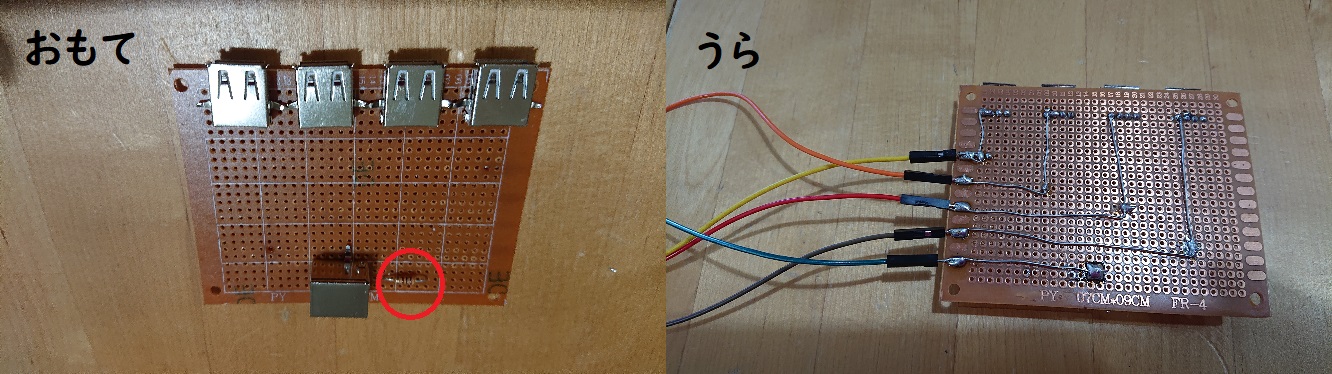 ※上記赤丸をつけた箇所の抵抗は不要だったため後で外しています。 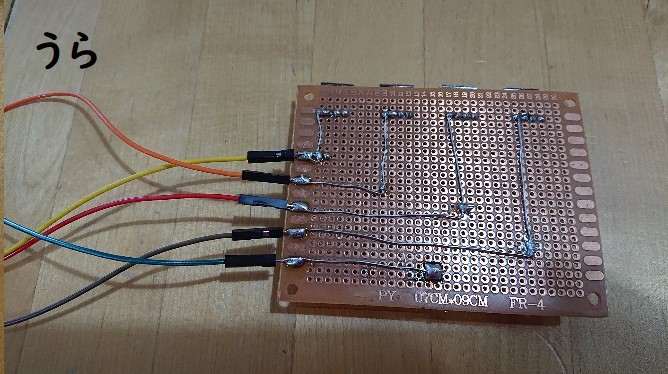 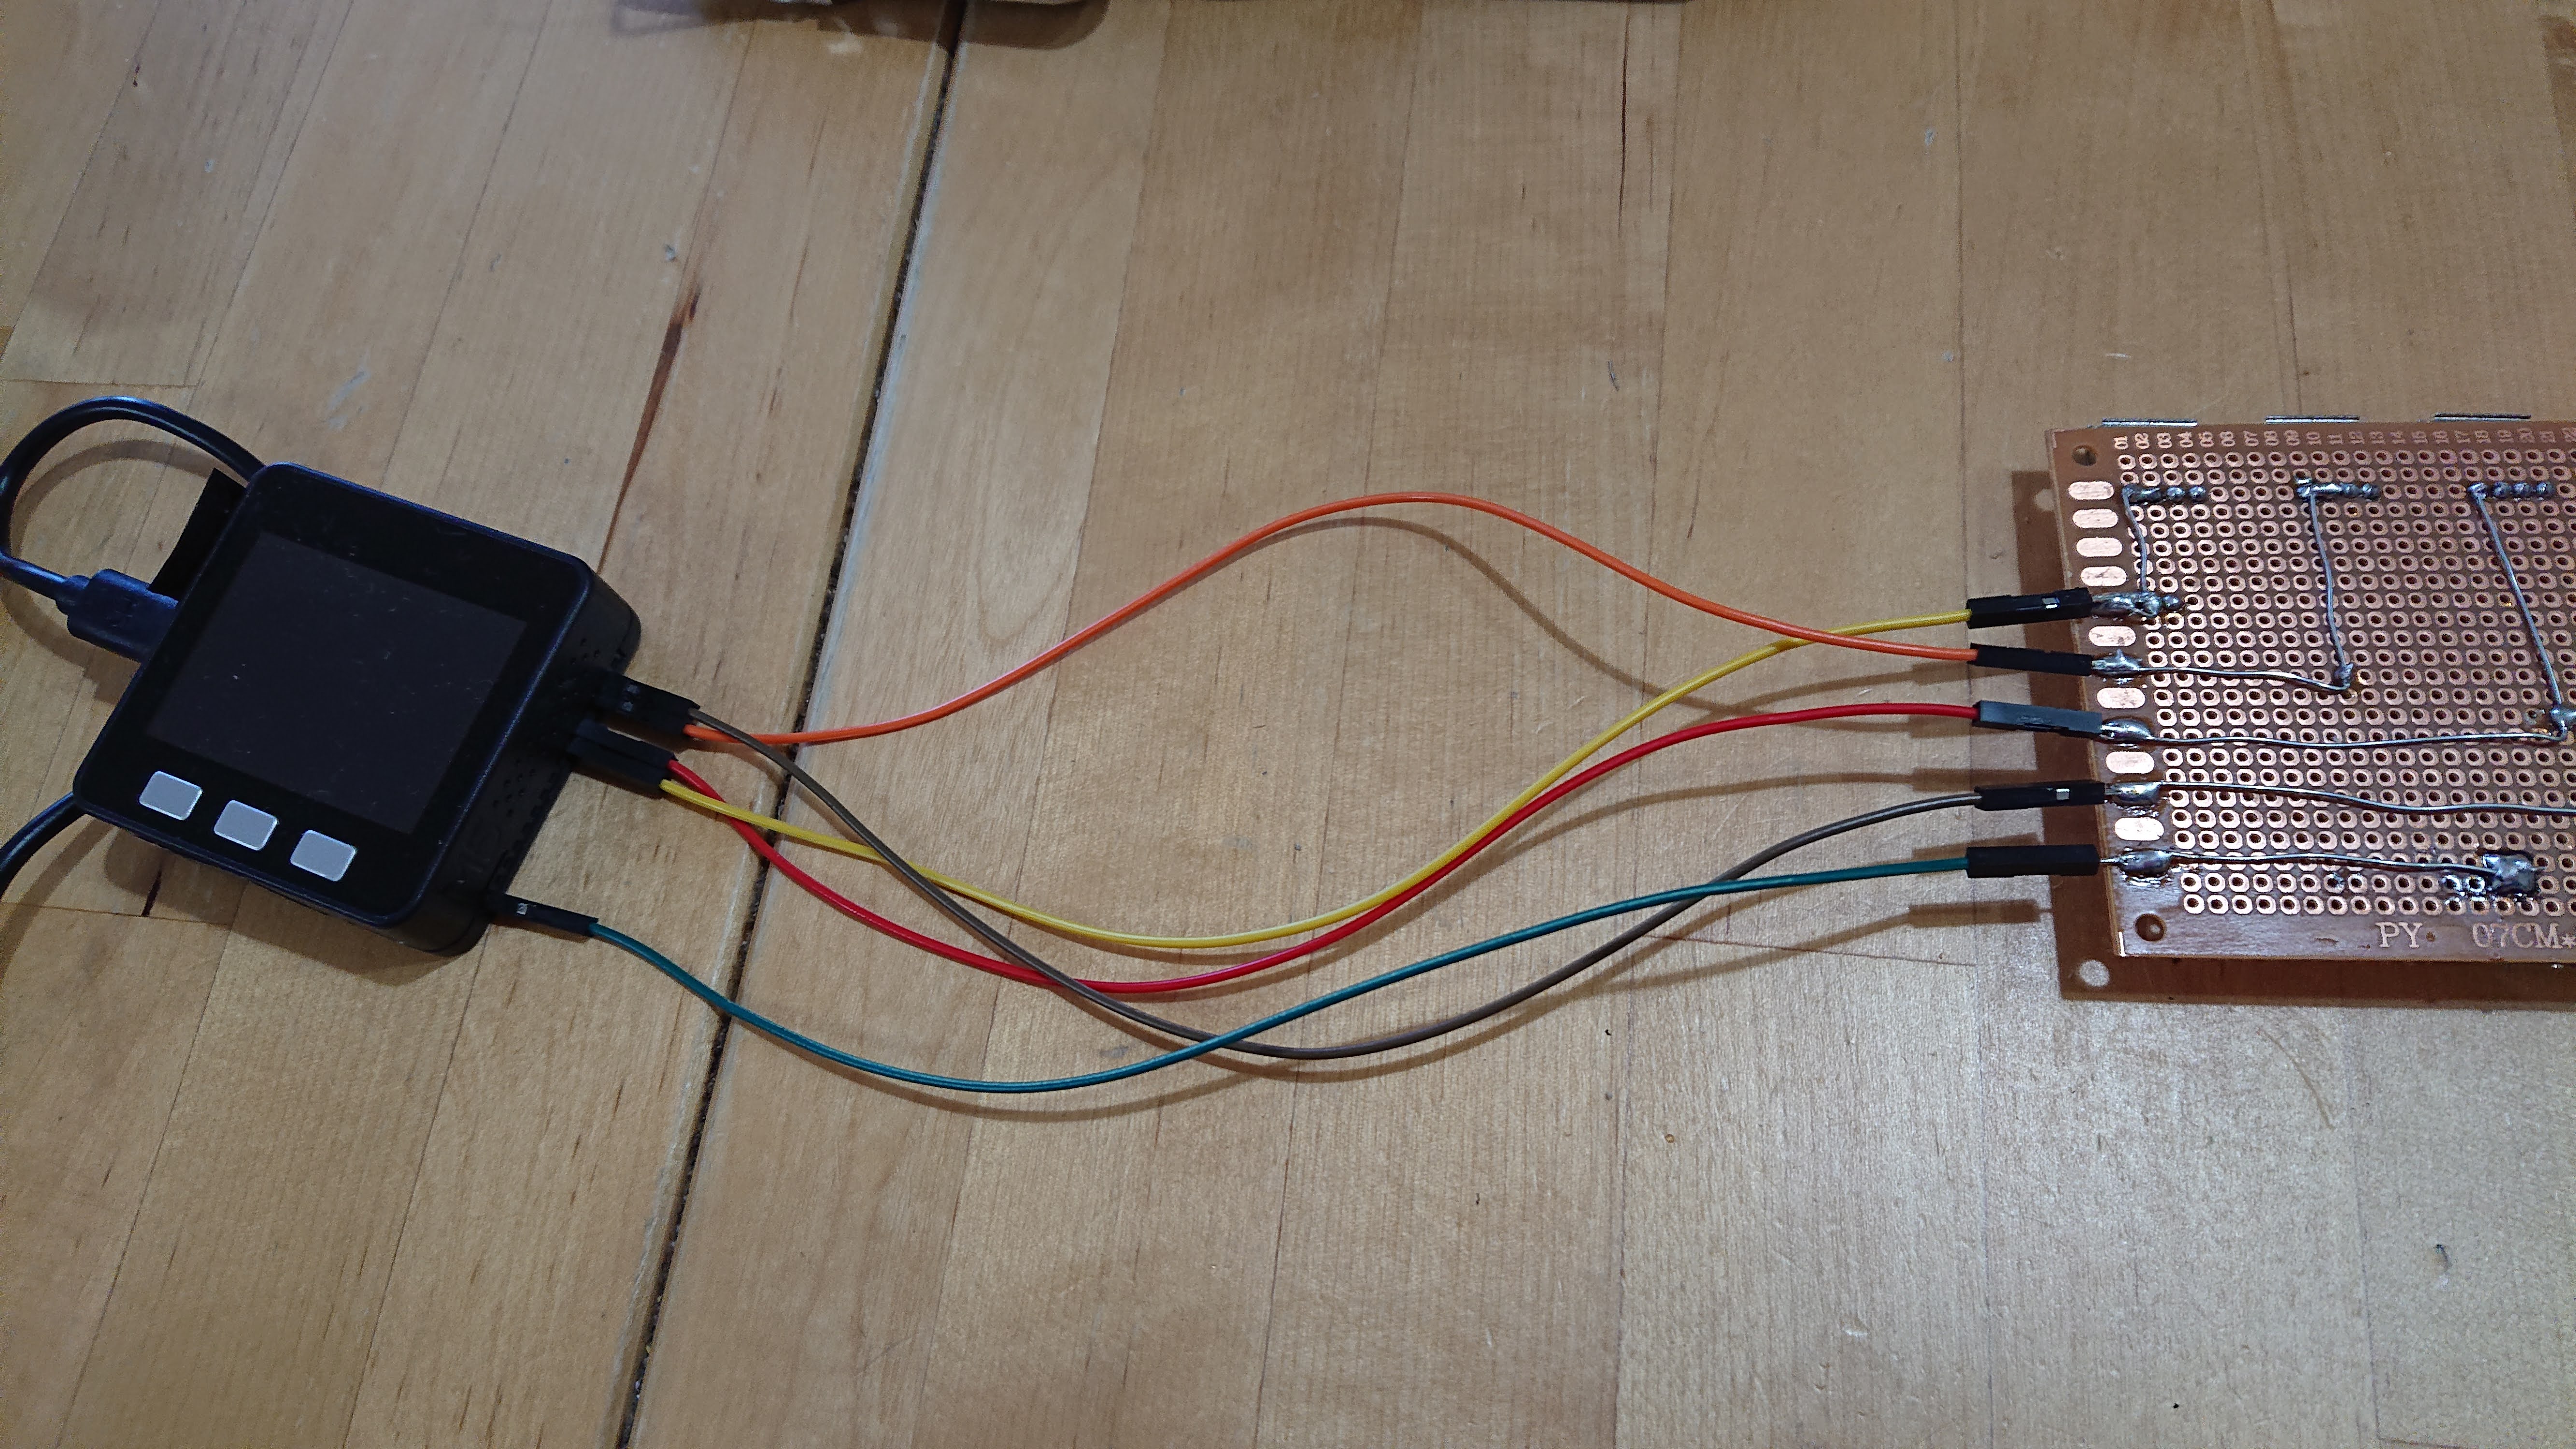 ## 筐体と組み立て 箱はTinkerCADで設計し、3Dプリンターで出力しました。 STLデータはThingiverseに公開しています。 [https://www.thingiverse.com/thing:4747217](https://www.thingiverse.com/thing:4747217) 7つのパーツから構成されており、下から ①M5 USBBomber Power Bottom.stl ②M5 USBBomber Power Body1.stl ③M5 USBBomber Power Body2.stl ④M5 USBBomber Power Body3.stl ⑤M5 USBBomber Power Body4.stl ⑥M5 USBBomber Power Body5.stl ⑦M5 USBBomber Power Top.stl の順に積み上げていきます。 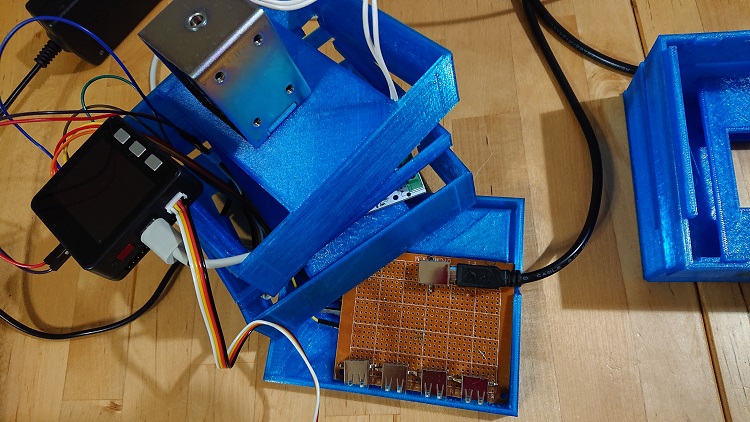 ①に基板、②にマルチコントローラーA、③にソレノイドの芯、④にソレノイドの本体部分をセットします。 またマルチコントローラーに繋がる電源ケーブル、M5Stackに繋がる充電ケーブル(※)、基板に繋がるUSBケーブル(刺して遊ぶUSBプラグがついているケーブル)の3本(※2本)は①と②の間の2か所左右にある溝から外に出るようにします。 ※ M5Stackを充電のみで使う場合はケーブル不要 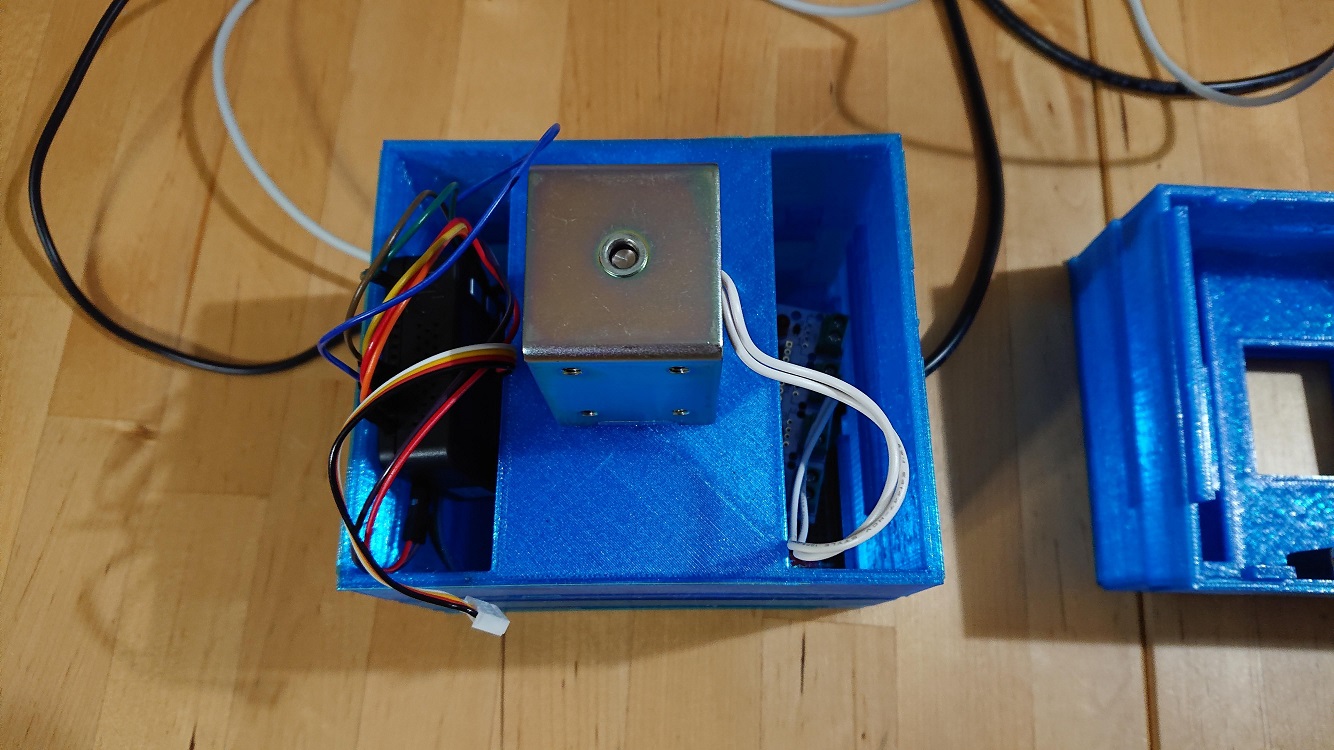 M5Stackやワイヤー類は左右の隙間に収納します。 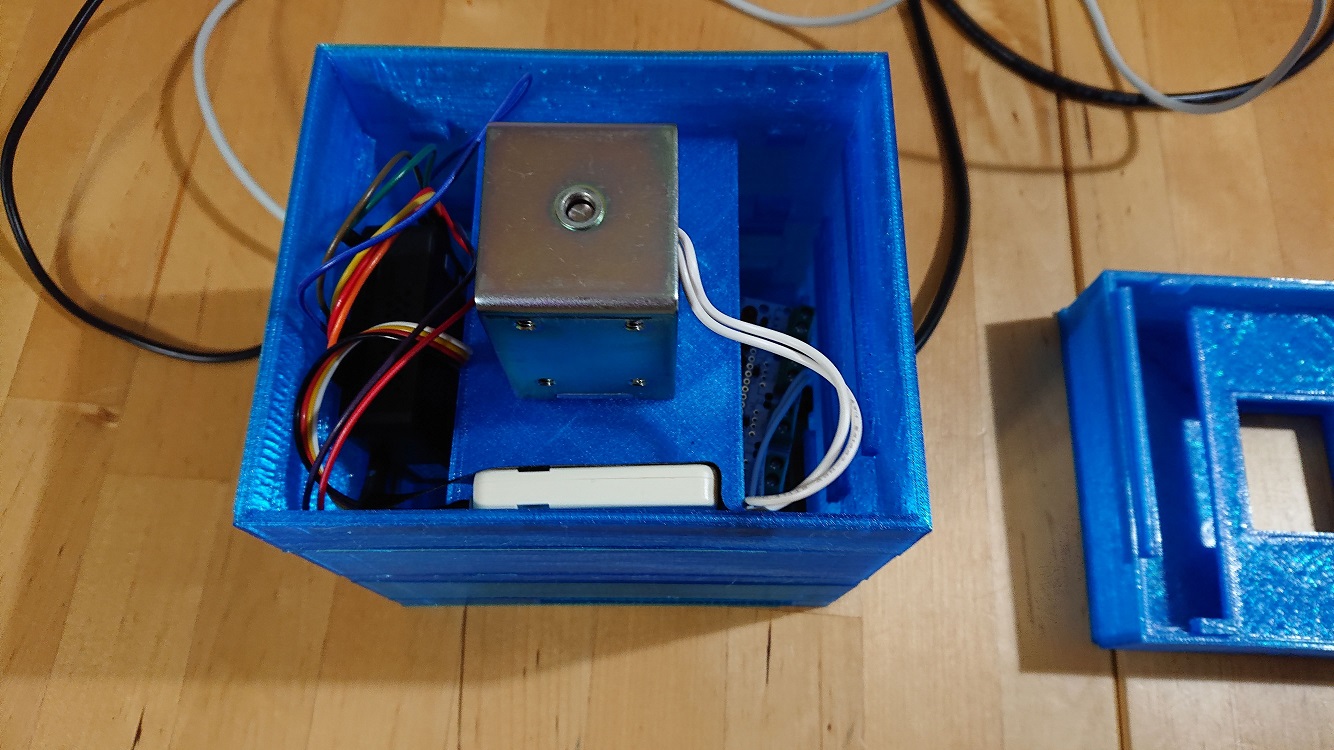 ⑤の手前部分にRFIDリーダーを貼り付けます。  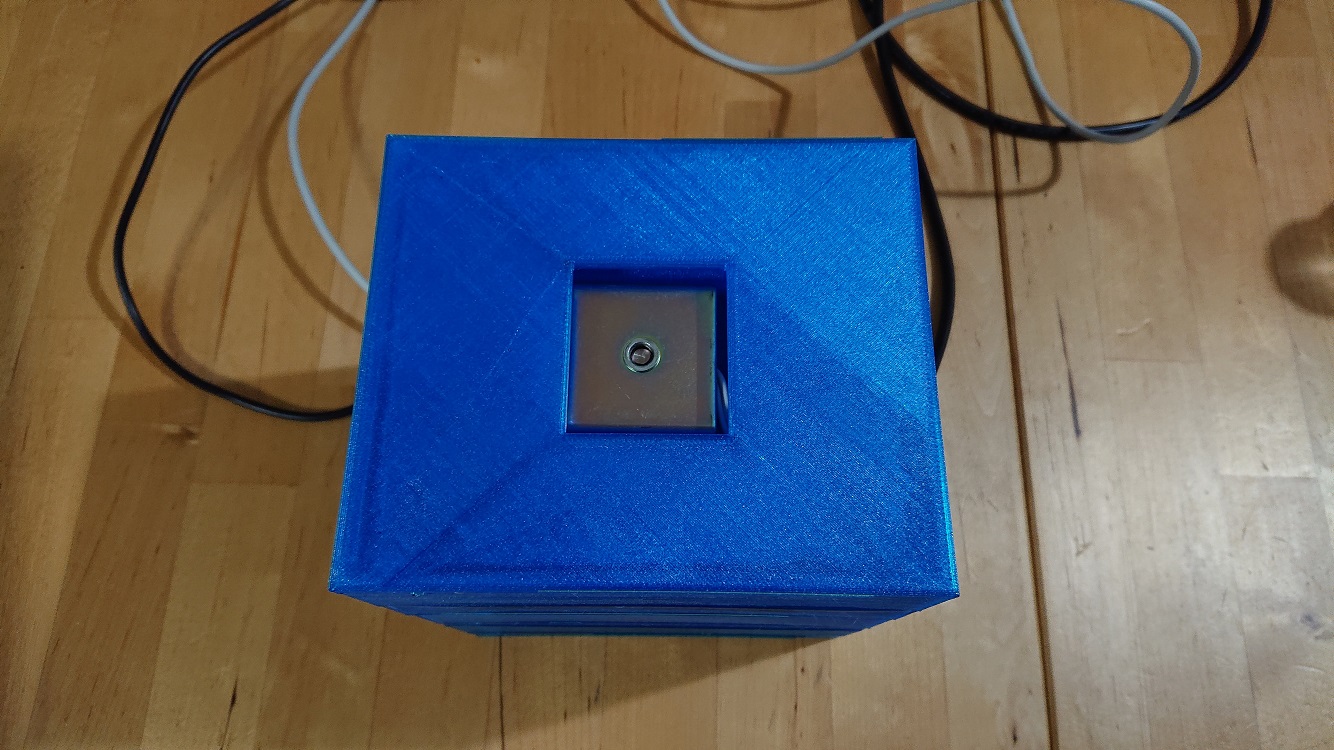 飛び出すおじさんはLEGO(デュプロ)のキャラクターがちょうど良いサイズです。 ## 構成・配線 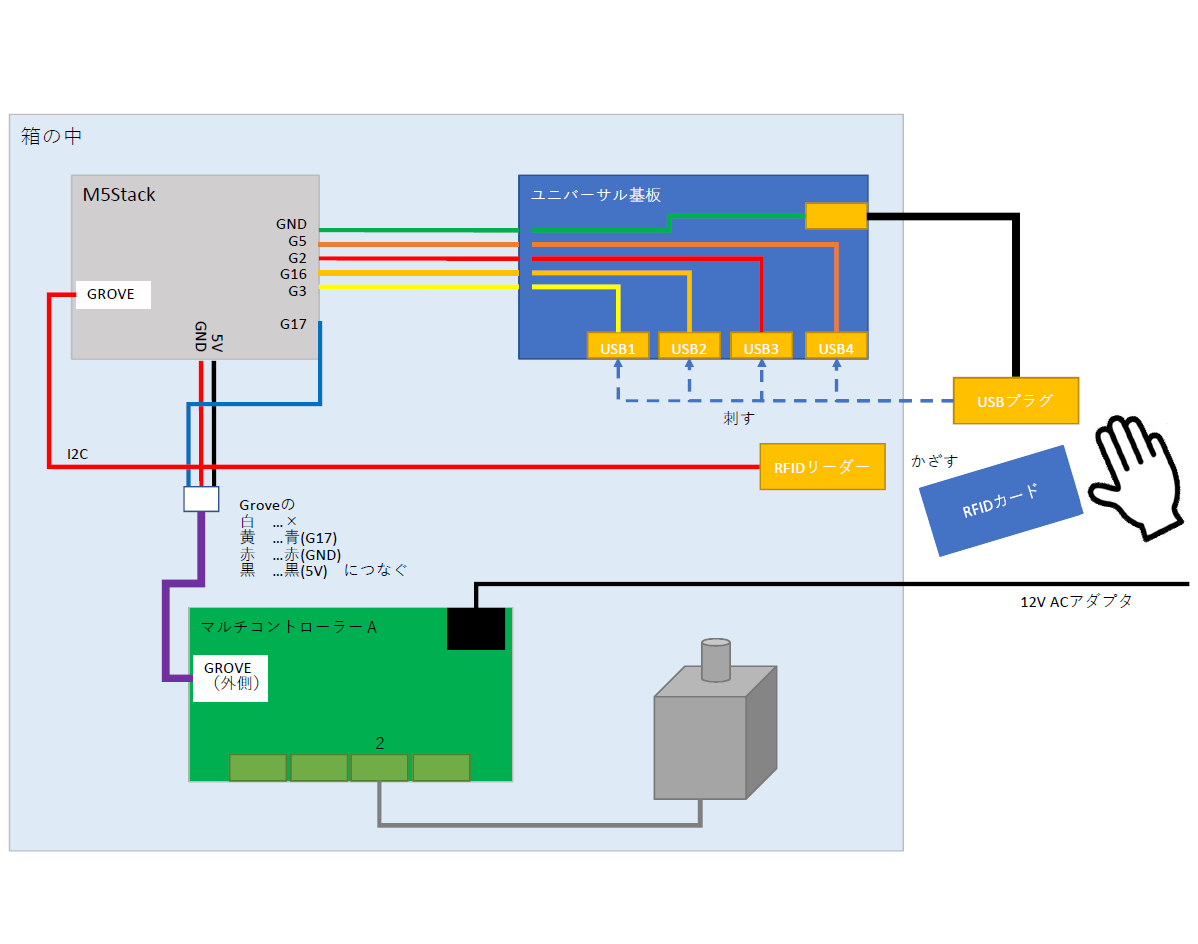 ## プログラム ```arduino: #include <M5Stack.h> // M5Stack #include <Wire.h> //For RFID #include "MFRC522_I2C.h" //For RFID #include "AudioFileSourceSD.h" #include "AudioFileSourceID3.h" #include "AudioGeneratorMP3.h" #include "AudioOutputI2S.h" // 0x28 is i2c address on SDA. Check your address with i2cscanner if not match. MFRC522 mfrc522(0x28); // Create MFRC522 instance. bool isAudioSet = false; AudioGeneratorMP3 *mp3; AudioFileSourceSD *file; AudioOutputI2S *out; AudioFileSourceID3 *id3; const int buttonON = LOW; // ボタンが押されているとピンの値はLOW const int buttonOFF = HIGH; // ボタンが押されていないとピンの値はHIGH const int buttonPin1 = 3; // 1番目のピン オレンジ const int buttonPin2 = 2; // 2番目のピン 黄 const int buttonPin3 = 16; // 3番目のピン 赤 const int buttonPin4 = 5; // 4番目のピン 茶 const int groveSoPin = 17; // Groveの代わりにG17を使用 const String hitId = "********"; // 当たりのRFID int hitNumber; // 当たり番号 void MP3Task(void* arg) { while (true) { if (isAudioSet) { if (!mp3->loop()) { isAudioSet = false; mp3->stop(); } } else { vTaskDelay(50); } } } void playMP3(char *filename) { file = new AudioFileSourceSD(filename); id3 = new AudioFileSourceID3(file); out = new AudioOutputI2S(0, 1); // Output to builtInDAC out->SetOutputModeMono(true); out->SetGain(2.0); mp3 = new AudioGeneratorMP3(); mp3->begin(id3, out); // タスク処理 isAudioSet = true; // while(mp3->isRunning()) { // if (!mp3->loop()) mp3->stop(); // } } void setup() { M5.begin(); Serial.begin(115200); // M5.Power.begin(); // これを生かしておくとソレノイドへの制御ができなかった! // pinModeの設定 pinMode(buttonPin1, INPUT_PULLUP); pinMode(buttonPin2, INPUT_PULLUP); pinMode(buttonPin3, INPUT_PULLUP); pinMode(buttonPin4, INPUT_PULLUP); pinMode(groveSoPin, OUTPUT); // ピンを出力に設定 digitalWrite(groveSoPin, LOW); // 当たりが何番かを決める decideHitNumber(); Serial.println("M5Stack MFRC522"); Wire.begin(); // Initialize I2C mfrc522.PCD_Init(); // Init MFRC522 ShowReaderDetails(); // Show details of PCD - MFRC522 Card Reader details Serial.println(F("Scan PICC to see UID, type, and data blocks...")); // 音を鳴らす用のタスクを裏で動かしておく xTaskCreatePinnedToCore(MP3Task, "MP3Task", 2048, NULL, 1, NULL, 0); } void ShowReaderDetails() { // Get the MFRC522 software version byte v = mfrc522.PCD_ReadRegister(mfrc522.VersionReg); Serial.print(F("MFRC522 Software Version: 0x")); Serial.print(v, HEX); if (v == 0x91) Serial.print(F(" = v1.0")); else if (v == 0x92) Serial.print(F(" = v2.0")); else Serial.print(F(" (unknown)")); Serial.println(""); // When 0x00 or 0xFF is returned, communication probably failed if ((v == 0x00) || (v == 0xFF)) { Serial.println(F("WARNING: Communication failure, is the MFRC522 properly connected?")); } } // 当たりが何番かをランダムで決める void decideHitNumber() { randomSeed(micros()); // ランダムシード値はmicro()を指定 hitNumber = random(1, 5); // 1から4の乱数を生成 Serial.print("hitNumber ="); Serial.println(hitNumber); } // おじさんを飛ばす void jumpHige() { digitalWrite(groveSoPin, HIGH); waitAudioTaskEnd(); digitalWrite(groveSoPin, LOW); } void waitAudioTaskEnd() { while (isAudioSet) vTaskDelay(300); } void array_to_string(byte array[], unsigned int len, char buffer[]) { for (unsigned int i = 0; i < len; i++) { byte nib1 = (array[i] >> 4) & 0x0F; byte nib2 = (array[i] >> 0) & 0x0F; buffer[i * 2 + 0] = nib1 < 0xA ? '0' + nib1 : 'A' + nib1 - 0xA; buffer[i * 2 + 1] = nib2 < 0xA ? '0' + nib2 : 'A' + nib2 - 0xA; } buffer[len * 2] = '\0'; } void loop() { M5.update(); if (M5.BtnC.wasPressed()) { Serial.println("BtnC.wasPressed"); } else if (M5.BtnA.wasPressed()) { // Aボタンが押されたとき:リセット処理 decideHitNumber(); playMP3("/decision1.mp3"); waitAudioTaskEnd(); } else { // どこに刺さっているか確認 int buttonState1 = digitalRead(buttonPin1); int buttonState2 = digitalRead(buttonPin2); int buttonState3 = digitalRead(buttonPin3); int buttonState4 = digitalRead(buttonPin4); if (buttonState1 != buttonON && buttonState2 != buttonON && buttonState3 != buttonON && buttonState4 != buttonON) { // どこにも刺さっていない } else if ((hitNumber == 1 && buttonState1 == buttonON) || (hitNumber == 2 && buttonState2 == buttonON) || (hitNumber == 3 && buttonState3 == buttonON) || (hitNumber == 4 && buttonState4 == buttonON)) { // 爆発のポートに刺さっている Serial.println("爆発のポートに刺さっている"); playMP3("/bomb1.mp3"); jumpHige(); } else { // セーフのポートに刺さっている Serial.println("セーフのポートに刺さっている"); playMP3("/correct1.mp3"); waitAudioTaskEnd(); } // RFIDカードのチェック // Look for new cards, and select one if present if (mfrc522.PICC_IsNewCardPresent() && mfrc522.PICC_ReadCardSerial() ) { // Now a card is selected. The UID and SAK is in mfrc522.uid. // Dump UID Serial.print(F("Card UID:")); char str[32] = ""; array_to_string(mfrc522.uid.uidByte, 4, str); //Insert (byte array, length, char array for output) Serial.println(str); //Print the output uid string if (hitId == str) { Serial.println("爆発のカードがかざされた"); playMP3("/bomb1.mp3"); jumpHige(); } else { Serial.println("セーフのカードがかざされた"); playMP3("/correct1.mp3"); waitAudioTaskEnd(); } } } } ``` 当たり番号のRFIDは使用するIDに変えてください。 const String hitId = "********"; // 当たりのRFID また、このほかに以下のプログラムファイルが必要です。 MFRC522_I2C.cpp MFRC522_I2C.h これら2ファイルに関しては下記Githubのものをそのまま使用しています。 [https://github.com/m5stack/M5Stack/tree/master/examples/Unit/RFID_RC522](https://github.com/m5stack/M5Stack/tree/master/examples/Unit/RFID_RC522) # 完成品 @[youtube](https://youtu.be/Ta6Tlg7-GO8)