

daikon.berry が 2026年08月15日10時55分46秒 に編集
初版
タイトルの変更
自作PCのCPU/GPU負荷を物理表示!ArduinoとC#で作ってみた「4連アナログメーター」
タグの変更
Arduino
SG90
3Dプリンタ
CPU
GPU
メイン画像の変更
記事種類の変更
製作品
ライセンスの変更
(MIT) The MIT License
本文の変更
## 1.はじめに 休みで暇なので、ゲーミングPCの負荷を可視化できる表示器を作成しました。 自作PCのモニタリングといえばデスクトップ上のオーバーレイや液晶モニターが定番ですが、 「やっぱりインテリアとしてもロマンがある物理的なメーターで動かしたい!」と思い、 3DプリンターとArduino(SG90サーボモーター)を使ってPCの4大リソース(CPU・GPU・MEMORY・NETWORK)をリアルタイム表示する4連アナログメーターを自作しました。 この記事では、ハードウェアの構成から、C#(LibreHardwareMonitor)を使ったデータ取得・変換、そしてArduinoのスケッチまで、一連の制作プロセスをまとめます。 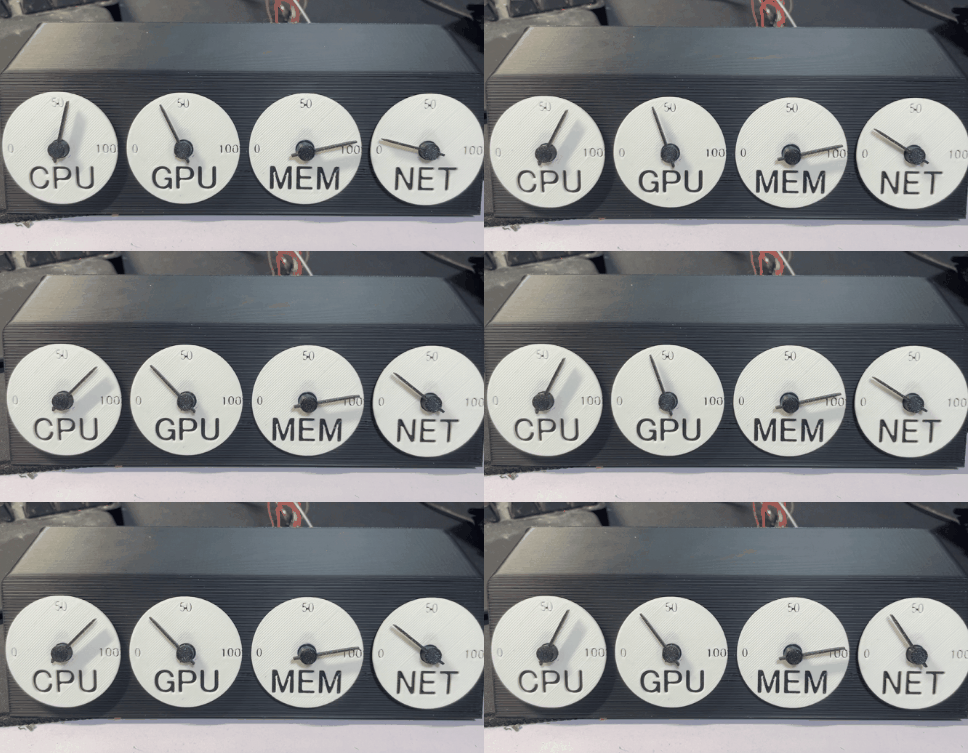 ## 2.全体像と仕組み PC側: C#で常駐プログラムを動かし、オープンソースの「LibreHardwareMonitor」経由でCPU使用率・GPU使用率・メモリ使用率・ネットワークスループットを毎秒取得。 通信: シリアル通信(USB)を介して、計算済みの値をArduinoへ送信。 制御側: Arduino Nanoが値を受け取り、SG90サーボモーターを駆動して物理的な針を動かす。 筐体: 3Dプリンターで自作した専用ケース。 ## 3.部品構成(パーツリスト) Arduino Nano (互換機)1個:マイコン制御用 ¥600 SG90 サーボモーター:4個針を動かすアクチュエータ ¥999 3Dプリンター製ケース・メーター部品1式自作 材料代数百円 接続用USBケーブル2本:PCとの通信・給電用 そこらへんに落ちていたやつ プライスレス ちなみに、SG90を4個駆動するとArduinoからの電力供給では不足するため、給電用のUSBケーブルを付けました ## 4.ハードウェアの配線 サーボモーターのPWM信号線は、Arduinoの以下のデジタルピンに接続しました。 サーボ1 (CPU) : D3 番ピン サーボ2 (GPU) : D5 番ピン サーボ3 (Memory): D6 番ピン サーボ4 (Network): D9 番ピン ## 5.Arduino側のスケッチ(プログラム) Arduino側では、起動時にすべての針を一度「0度(原点)」に合わせる初期化処理(原点出し)を行い、シリアル経由で届いた4つのカンマ区切りの数値(0〜100)をサーボの角度にマッピングして動かします。 ``` #include <Servo.h> Servo sCPU; Servo sGPU; Servo sMEM; Servo sNET; void setup() { sCPU.attach(3); sGPU.attach(5); sMEM.attach(6); sNET.attach(9); // 起動時の原点出し(0度にセット) sCPU.write(0); sGPU.write(0); sMEM.write(0); sNET.write(0); delay(1000); Serial.begin(9600); } void loop() { if (Serial.available() > 0) { String data = Serial.readStringUntil('\n'); data.trim(); int firstComma = data.indexOf(','); int secondComma = data.indexOf(',', firstComma + 1); int thirdComma = data.lastIndexOf(','); if (firstComma != -1 && secondComma != -1 && thirdComma != -1) { int cpuVal = data.substring(0, firstComma).toInt(); int gpuVal = data.substring(firstComma + 1, secondComma).toInt(); int memVal = data.substring(secondComma + 1, thirdComma).toInt(); int netVal = data.substring(thirdComma + 1).toInt(); sCPU.write(map(constrain(cpuVal, 0, 100), 0, 100, 0, 180)); sGPU.write(map(constrain(gpuVal, 0, 100), 0, 100, 0, 180)); sMEM.write(map(constrain(memVal, 0, 100), 0, 100, 0, 180)); sNET.write(map(constrain(netVal, 0, 100), 0, 100, 0, 180)); } } } ``` ## 6.PC側アプリ(C#)の実装 実装時に苦労したのがネットワーク速度の取得です。普通に HardwareType.Network のスループットを拾いに行くと、普段使っていない仮想アダプタ(QoS Packet SchedulerやWFPネイティブMAC層フィルタなど)の速度まで合算されてしまい、実際の通信量が正しく取れない現象が発生しました。 そのため、対象とするセンサーを絞り込み、不要な仮想アダプタの名前を除外するフィルター処理を入れています。 ``` using System; using System.IO.Ports; using System.Collections.Generic; using System.Linq; using System.Threading; using LibreHardwareMonitor.Hardware; class Program { static Queue<double>[] history = Enumerable.Range(0, 4).Select(_ => new Queue<double>()).ToArray(); const int filterSize = 5; public class UpdateVisitor : IVisitor { public void VisitComputer(IComputer computer) { computer.Traverse(this); } public void VisitHardware(IHardware hardware) { hardware.Update(); foreach (var subHardware in hardware.SubHardware) subHardware.Accept(this); } public void VisitSensor(ISensor sensor) { } public void VisitParameter(IParameter parameter) { } } static void Main(string[] args) { string portName = "COM9"; // デバイスマネージャーで設定したポートを指定 var computer = new Computer { IsCpuEnabled = true, IsGpuEnabled = true, IsMemoryEnabled = true, IsNetworkEnabled = true }; computer.Open(); computer.Accept(new UpdateVisitor()); using (SerialPort serialPort = new SerialPort(portName, 9600)) { try { serialPort.Open(); while (true) { computer.Accept(new UpdateVisitor()); double cpuUsage = 0, gpuUsage = 0, memUsage = 0, netBytesPerSec = 0; foreach (var hw in computer.Hardware) { hw.Update(); foreach (var s in hw.Sensors) { if (hw.HardwareType == HardwareType.Cpu && s.SensorType == SensorType.Load && s.Name == "CPU Total") cpuUsage = s.Value ?? 0; if ((hw.HardwareType == HardwareType.GpuNvidia || hw.HardwareType == HardwareType.GpuAmd || hw.HardwareType == HardwareType.GpuIntel) && s.SensorType == SensorType.Load && s.Name.Contains("Core")) gpuUsage = Math.Max(gpuUsage, s.Value ?? 0); if (hw.HardwareType == HardwareType.Memory && s.SensorType == SensorType.Load && s.Name == "Memory") memUsage = s.Value ?? 0; // ネットワークスループットの取得と仮想NIC除外フィルター if (hw.HardwareType == HardwareType.Network && s.SensorType == SensorType.Throughput) { if (!hw.Name.Contains("QoS") && !hw.Name.Contains("WFP") && !hw.Name.Contains("Native MAC")) { netBytesPerSec += (s.Value ?? 0); } } } } double netMbps = netBytesPerSec * 8.0 / 1000000.0; double netScaled = CalculateLogNetSpeed(netMbps); // 移動平均で針のブレを抑える double[] rawValues = { cpuUsage, gpuUsage, memUsage, netScaled }; string output = string.Join(",", rawValues.Select((val, i) => { history[i].Enqueue(val); if (history[i].Count > filterSize) history[i].Dequeue(); return (int)Math.Round(history[i].Average()); })); serialPort.WriteLine(output); Console.WriteLine($"Sent: {output}"); Thread.Sleep(1000); } } catch (Exception ex) { Console.WriteLine($"Error: {ex.Message}"); } } } static double CalculateLogNetSpeed(double mbps) { if (mbps < 0.1) return 0; // 1Mbps〜10Gbpsの範囲を対数スケールに変換 double logVal = Math.Log10(Math.Max(mbps, 1)) / Math.Log10(10000.0) * 100.0; return Math.Min(logVal, 100.0); } } ``` ## 7.ケースと表示板のモデリング SG90の寸法を測定し、ケースのモデリング 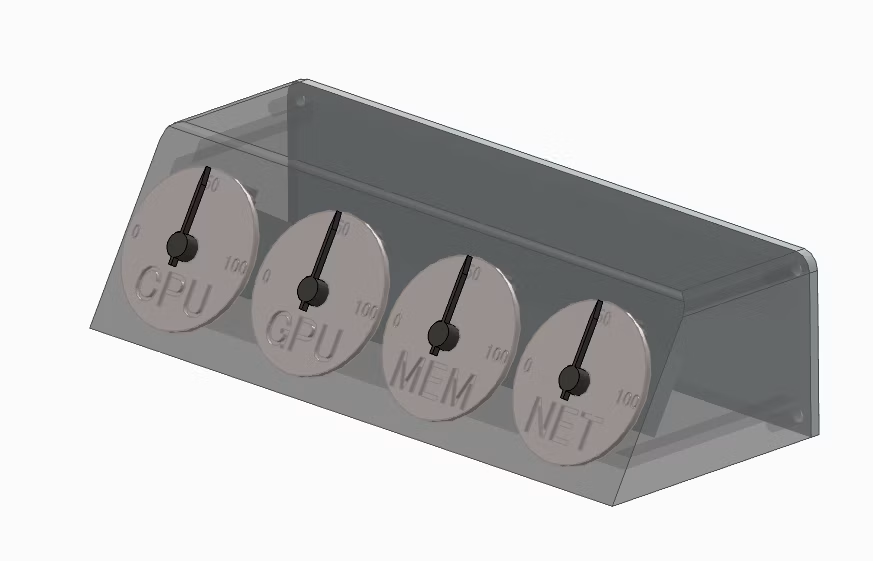 ## 8.3Dプリンタで造形 メーター部の文字を表示したかったので、造形途中で一時停止し、フィラメントの色を交換 ↓はケースを造形中の写真です 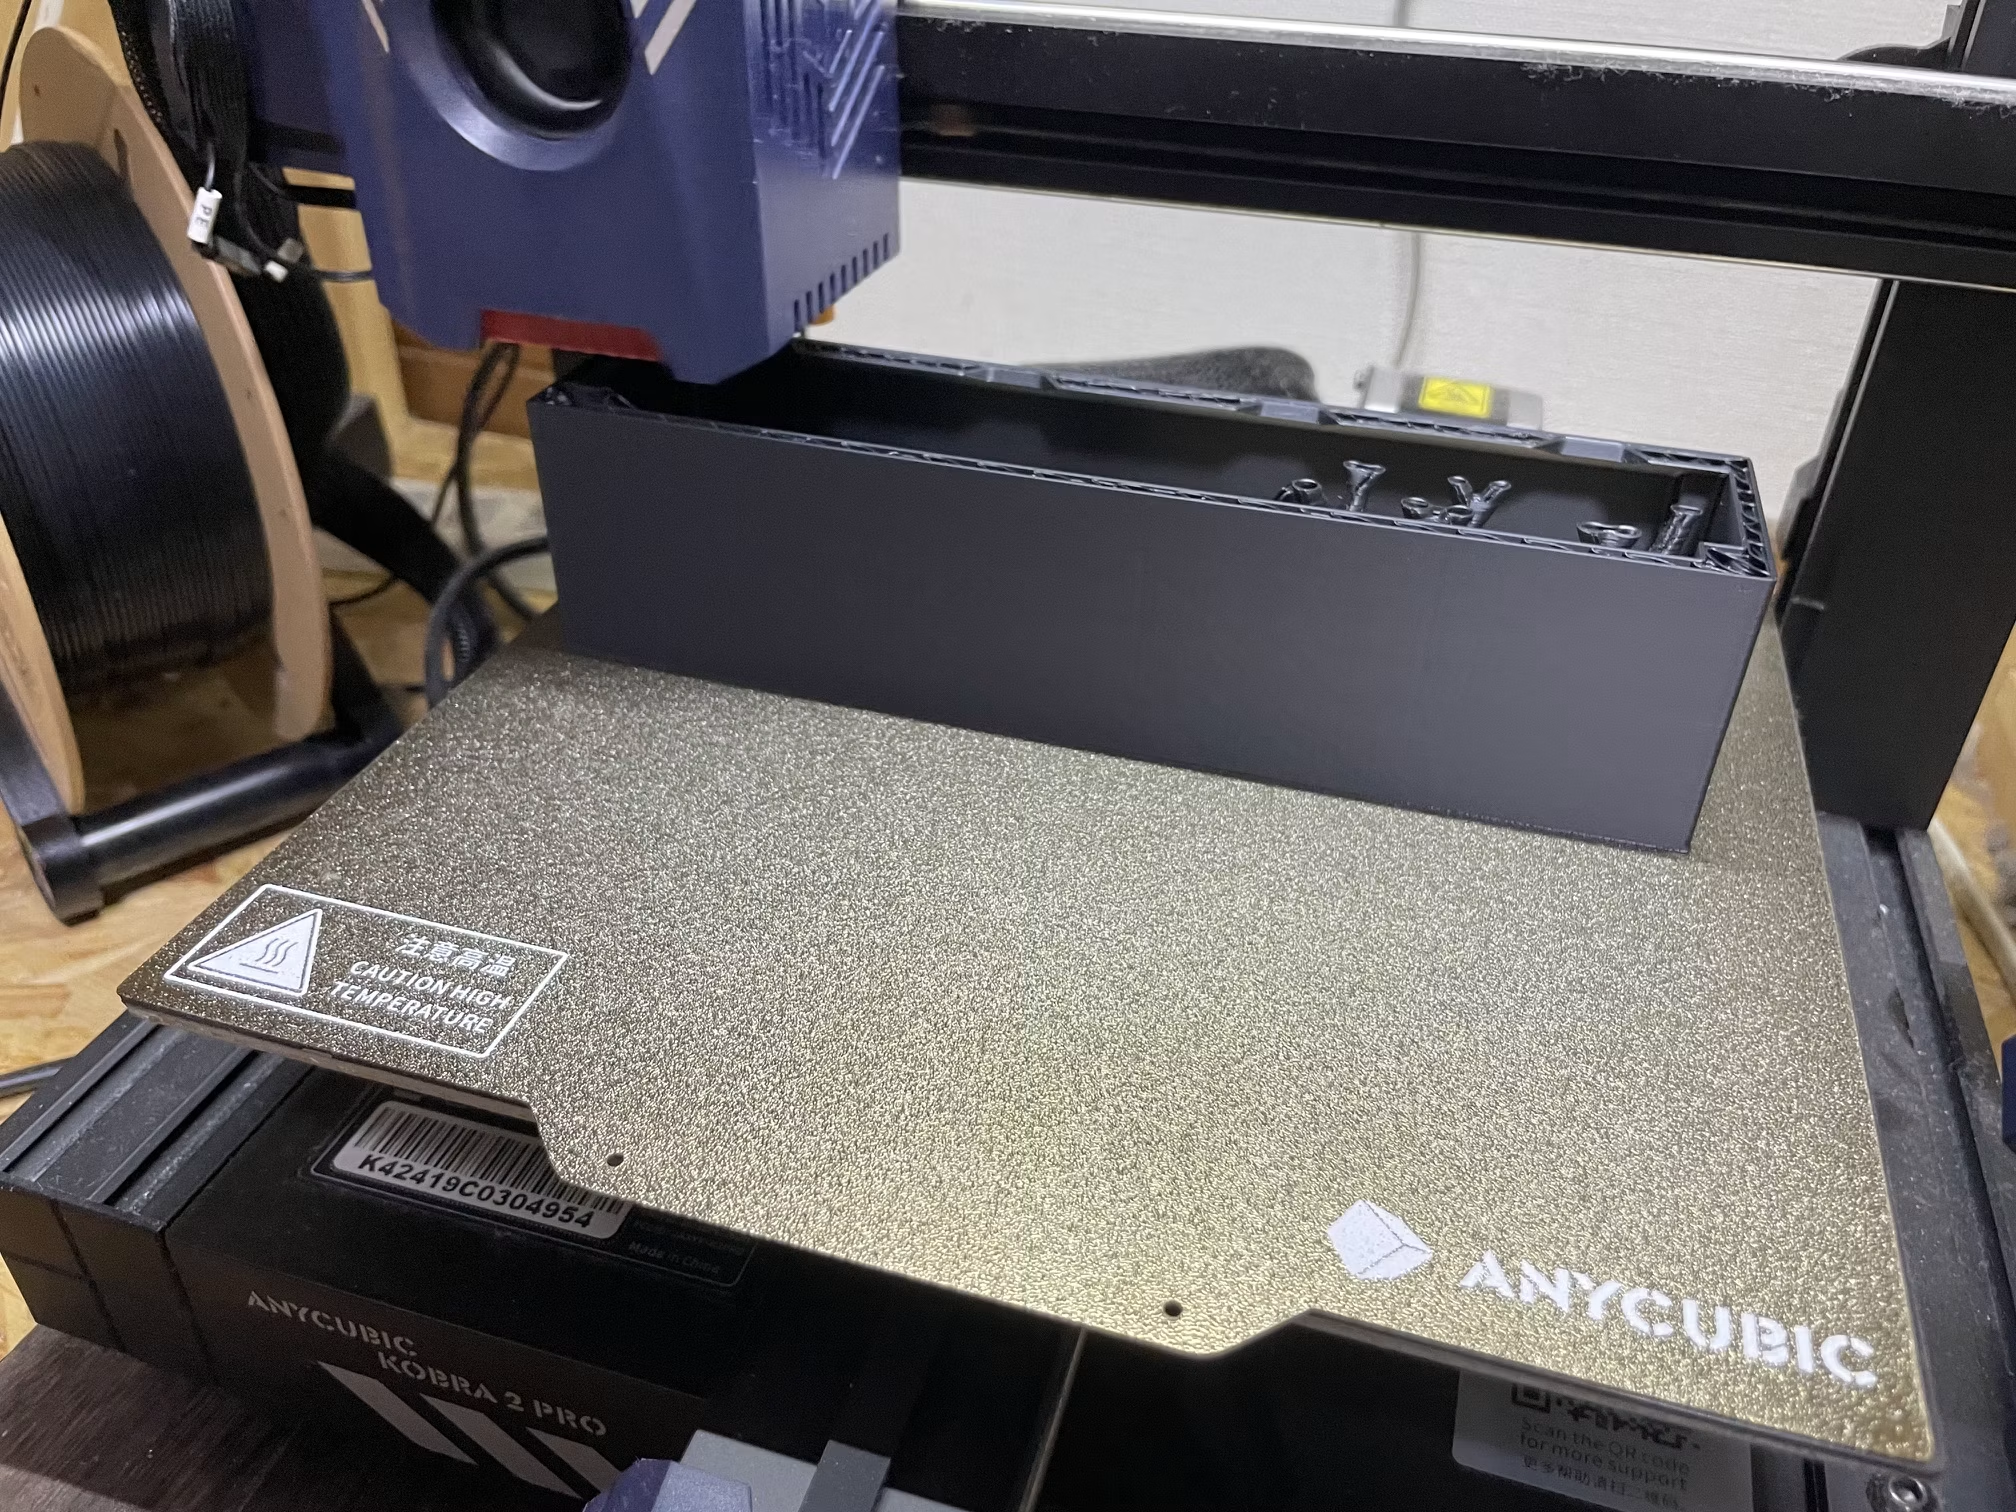 ## 9.組付け 休日の趣味の工作のため、配線は美しくない。 Arduinoの固定場所作るの忘れたので、両面テープで固定 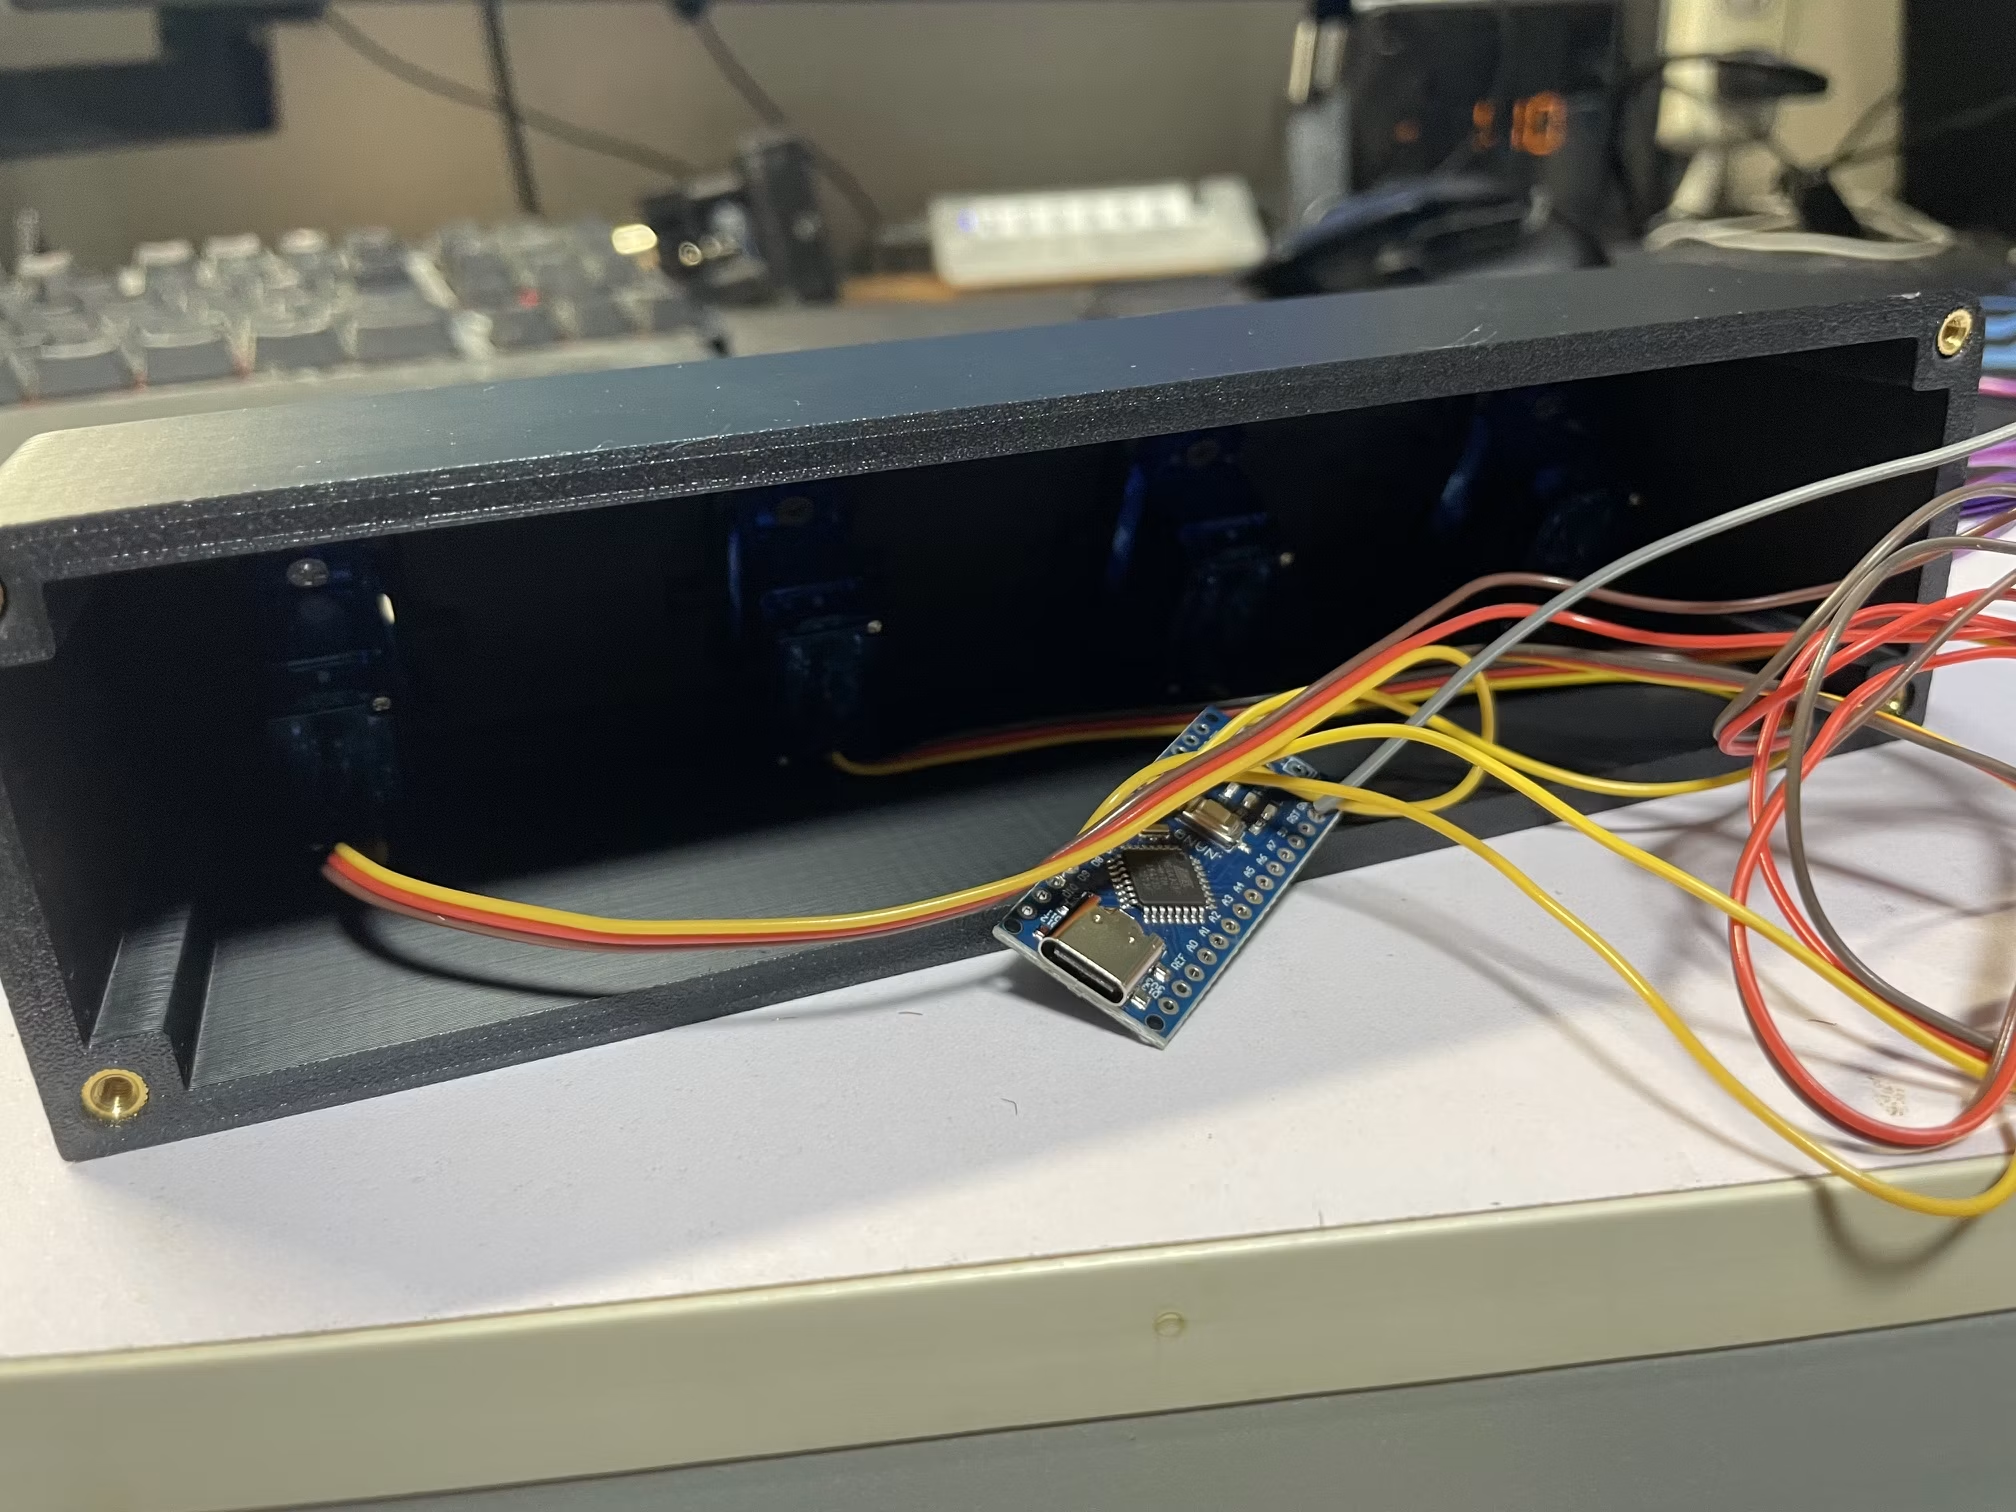 ## 10.完成 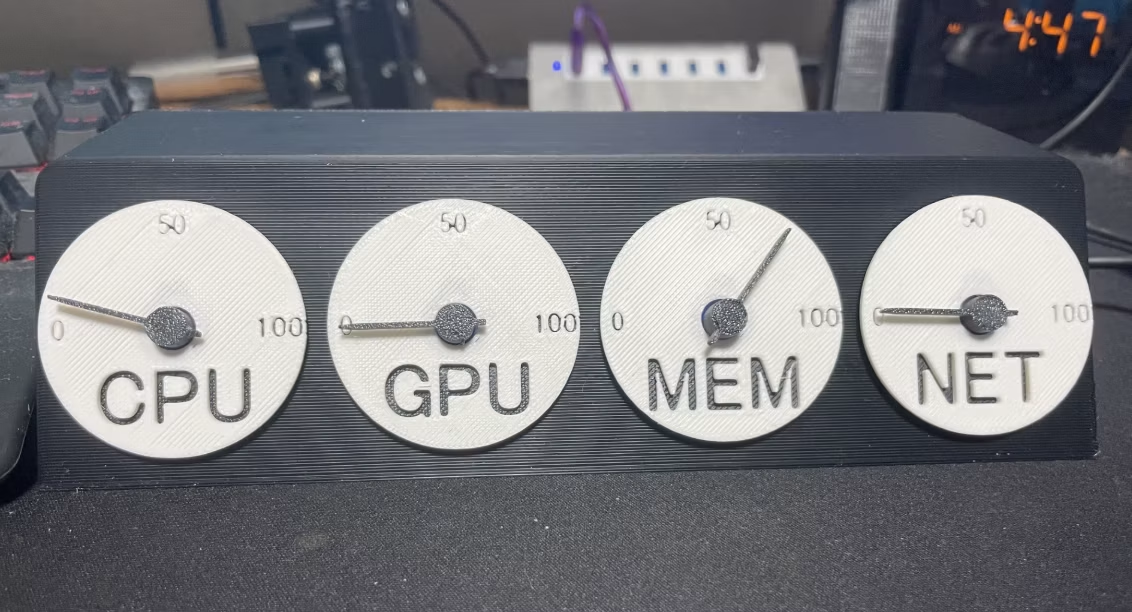 あくまでも趣味の工作なので、正しくないかもしれません。誰かの参考になれば幸いです。 そして、メモリは16GBだけど、上限張り付きが判明。増設したいけど、高いですな。