

はじめに
はじめまして、TOPPANデジタル株式会社所属 Unity/XRエンジニアの高原と申します。
業務ではUnity を使って XR 系のアプリ開発をしています(最近は Apple Vision Pro を用いた開発、検証を行っています)。
普段はハードウェア系の開発には携わっていないのですが、今回、弊社で SPRESENSE™ 活用コンテストに参加するという話があり、Unity/XR エンジニアとしてコンテンツ開発に協力することになりました。
本記事では、コンテストに応募するために制作した「空間監視カメラ」について解説します。
空間監視カメラとは?
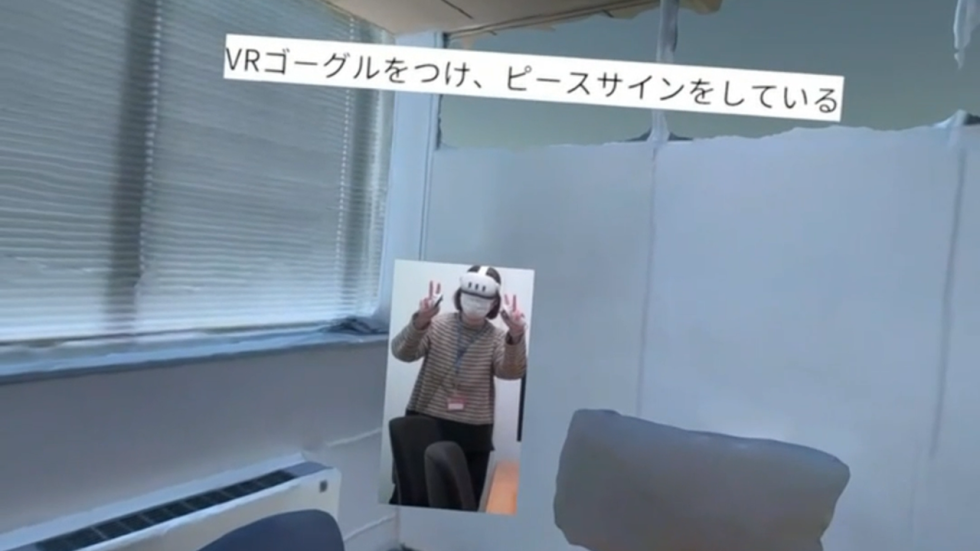
空間監視カメラは、SONY の SPRESENSE(Spresense カメラボード)を活用し、通常は 2D でしか見られない監視カメラ映像を 3D 空間内の情報として確認できる「監視カメラ VR ビューワーアプリ」(Quest3 スタンドアロン VR アプリ)です。
通常の監視カメラではカメラのある地点からの映像しか確認できませんが、空間監視カメラは物理的なカメラ設置位置に左右されることなく、3D 空間内の自由な視点から監視を行うことが可能となります。
具体的な仕組みとしては、まず監視対象となる空間をあらかじめ 3D スキャンして 3D モデルを作成します。次に、Spresense カメラボードによるリアルタイムの監視映像から動体を検出し、2D画像として3D 空間上に反映します。このとき、動体の深度情報も計測することで 3D 空間内の正しい位置に配置できるようにしています。ユーザーは VR アプリ内で監視対象空間を自由な視点から確認可能です。
さらに、今回はビューワーにカメラ映像を表示するだけでなく、生成AIに監視カメラ映像を入力し、カメラに写っている内容を文章で説明する機能も実装しました。
カメラハードウェア側構成
現実空間に配置したカメラに使用した部品は下記になります。
| 部品名 | 個数 | 役割 |
|---|---|---|
| SPRESENSEメインボード[CXD5602PWBMAIN1] | 1 | 制御用メインボード |
| SPRESENSEカメラボード [CXD5602PWBCAM1] | 1 | カメラモジュール |
| ToFセンサーボード(SPRESENSE用)(MM-S50MV) | 1 | 深度情報取得 |
| SPRESENSE Wi-Fi Add-onボード iS110B | 1 | 画像、深度情報送信用 |
| 筐体 | 1 | 3Dプリンタで作成 |
| Raspberry Pi 4 | 1 | WEBサーバー用 |
物体検知には、YOLOv5という深層学習モデルを使用しました。YOLOv5は、高速かつ高精度で物体を検出するためのアルゴリズムであり、特にリアルタイム処理に適しています。SpresenseからHTTPでアップロードされたタイミングで、YOLOv5を用いてフレーム内の人物を検出します。
検出された人物は、OpenCVを使用して切り抜かれます。OpenCVでは、検出された人物のバウンディングボックス(検出領域)を利用して、その部分を画像から抽出します。この切り抜き処理により、人物の画像のみを取り出すことができます。
最後に、切り抜いた人物の画像はPNG形式で保存され、Raspberry Piに格納されます。この一連の流れにより、物体検知から画像の保存までを行っております。
また、WEBサーバーはFlaskを使っています。
ソースコード
#include <HttpGs2200.h>
#include <TelitWiFi.h>
#include "config.h"
#include <RTC.h>
#include <Camera.h>
#include <time.h>
#include <LowPower.h>
#include <Watchdog.h>

static TelitWiFi gs2200;
static TWIFI_Params gsparams;

static HttpGs2200 theHttpGs2200(&gs2200);
static HTTPGS2200_HostParams hostParams;


/**
 * @brief GPIO割り込み処理
 *
 */
void irq_sensor()
{
  detachInterrupt(PIN_D14);
}

/**
 * @brief カメラ初期化
 *
 */
void initCam() {
  CamErr err;

  // begin
  // Serial.println("Prepare camera");
  err = theCamera.begin();
  if (err != CAM_ERR_SUCCESS) {
    exit(0);
  }
  // ホワイトバランス設定
  // Serial.println("Set Auto white balance parameter");
  err = theCamera.setAutoWhiteBalanceMode(CAM_WHITE_BALANCE_FLUORESCENT);
  if (err != CAM_ERR_SUCCESS) {
    exit(0);
  }
  // サイズ設定
  // Serial.println("Set still picture format");
  err = theCamera.setStillPictureImageFormat(
    CAM_IMGSIZE_HD_H,
    CAM_IMGSIZE_HD_V,
    CAM_IMAGE_PIX_FMT_JPG);
  if (err != CAM_ERR_SUCCESS) {
    exit(0);
  }
}

/**
 * @brief Wi-Fiモジュール初期化
 *
 */
void initHttp() {
  // GS2200 タイプC SPI初期化
  Init_GS2200_SPI_type(iS110B_TypeC);

  // GS2200初期化
  gsparams.mode = ATCMD_MODE_STATION;
  gsparams.psave = ATCMD_PSAVE_DEFAULT;
  if (gs2200.begin(gsparams)) {
    Serial.println("GS2200 Initilization Fails");
    while (1)
      ;
  }

  // GS2200 アクセスポイント接続
  if (gs2200.activate_station(AP_SSID, PASSPHRASE)) {
    Serial.println("Association Fails");
    while (1)
      ;
  }

  // HTTPクライアント初期化
  hostParams.host = (char *)HTTP_SRVR_IP;
  hostParams.port = (char *)HTTP_PORT;
  theHttpGs2200.begin(&hostParams);

  // HTTPヘッダ設定
  theHttpGs2200.config(HTTP_HEADER_AUTHORIZATION, "Basic dGVzdDp0ZXN0MTIz");
  theHttpGs2200.config(HTTP_HEADER_TRANSFER_ENCODING, "chunked");
  theHttpGs2200.config(HTTP_HEADER_HOST, HTTP_SRVR_IP);
}

/**
 * @brief ToFセンサ初期化
 *
 */
void initToF() {
  // 低速モード
  Serial2.println("EB 10 01 01 ED");
  delay(500);
  // 短距離モード
  Serial2.println("EB 12 01 00 ED");
  delay(500);
  // 標準モード
  Serial2.println("EB 00 01 00 ED");
  delay(500);
  // Activeモード
  Serial2.println("EB 80 01 00 ED");
  delay(500);

  // ヘッダー受信待ち
  while (true) {
    String line = Serial2.readStringUntil('\n');
    if (line.length() > 10) break;
  }
}

/**
 * @brief 初期化処理
 *
 */
void setup() {
  // リセット原因取得
  LowPower.begin();
  bootcause_e bc = LowPower.bootCause();
  if (bc == COLD_GPIO_IRQ36) {
    LowPower.reboot();
  }

  // GPIO初期化
  pinMode(LED0, OUTPUT);
  pinMode(LED1, OUTPUT);
  pinMode(LED2, OUTPUT);
  pinMode(LED3, OUTPUT);
  pinMode(PIN_D14, INPUT_PULLUP);
  digitalWrite(LED0, HIGH);
  digitalWrite(LED1, HIGH);
  digitalWrite(LED2, HIGH);
  digitalWrite(LED3, HIGH);

  // RTC初期化
  RTC.begin();

  // シリアル通信初期化
  Serial.begin(115200);
  Serial2.begin(115200);

  // watch dogスタート
  Watchdog.begin();
  Watchdog.start(35 * 1000);

  // Wi-Fiモジュール初期化
  Watchdog.kick();
  initHttp();

  // カメラ初期化
  Watchdog.kick();
  initCam();

  // ToFセンサ初期化
  Watchdog.kick();
  initToF();

  // setup完了
  Watchdog.kick();
  digitalWrite(LED0, LOW);
}

/**
 * @brief メインループ
 *
 */
void loop() {
  char rx[500];

  Watchdog.kick();

  // ToF取得
  String line = Serial2.readStringUntil('\n');
  // Serial.println(line);
  // Stanbyモード
  Serial2.println("EB 80 01 01 ED");

  digitalWrite(LED1, LOW);
  Watchdog.kick();

  // 撮影
  CamImage img = theCamera.takePicture();
  // Serial.printf("getImgBuffSize = %d\n", img.getImgBuffSize());
  if (img.getImgBuffSize() <= 0) {
    initCam();
    return;
  }

  digitalWrite(LED2, LOW);
  Watchdog.kick();

  // HTTP通信 接続
  if(!theHttpGs2200.connect()) {
    initHttp();
    return;
  }
  WiFi_InitESCBuffer();

  Watchdog.kick();

  // 画像POST
  theHttpGs2200.config(HTTP_HEADER_CONTENT_TYPE, "image/jpeg");
  if (theHttpGs2200.send(HTTP_METHOD_POST, 30 * 1000, HTTP_POST_CAM, img.getImgBuff(), img.getImgBuffSize())) {
    Watchdog.kick();
    // Serial.println("theHttpGs2200.send");
    while (true) {
      if (theHttpGs2200.receive(30 * 1000)) {
        // Serial.println("theHttpGs2200.receive");
        memset(rx, 0, sizeof(rx));
        theHttpGs2200.read_data(rx, sizeof(rx));
        // Serial.print(rx);
      } else {
        // AT+HTTPSEND command is done
        // Serial.println();
        break;
      }
    }
  }

  Watchdog.kick();

  // ToF POST
  theHttpGs2200.config(HTTP_HEADER_CONTENT_TYPE, "application/json");
  if (theHttpGs2200.post(HTTP_POST_TOF, line.c_str())) {
    Watchdog.kick();
    // Serial.println("theHttpGs2200.post");
    while (true) {
      if (theHttpGs2200.receive(30 * 1000)) {
        // Serial.println("theHttpGs2200.receive");
        memset(rx, 0, sizeof(rx));
        theHttpGs2200.read_data(rx, sizeof(rx));
        // Serial.print(rx);
      } else {
        // AT+HTTPSEND command is done
        // Serial.println();
        break;
      }
    }
  }

  // HTTP通信 切断
  Watchdog.kick();
  theHttpGs2200.end();

  Serial.println("go to sleep");
  Serial.flush();

  // シリアル通信のクリア
  Serial.flush();
  Serial2.flush();
  // while (Serial2.available()) {
  //   Serial2.read();
  // }

  // delay(1000);
  digitalWrite(LED3, LOW);  // turn on LED

  // watch dog停止
  Watchdog.stop();

  // GPIO割り込み設定
  attachInterrupt(PIN_D14, irq_sensor, FALLING);
  // 低消費電力モード
  LowPower.coldSleep(600);
}
from flask import Flask, request, send_from_directory
import os
import torch
import torchvision
from torchvision.models.detection import ssd300_vgg16
from torchvision.transforms import functional as F
import cv2
import numpy as np
import threading
import json
# 画像を保存するディレクトリ
SAVE_DIR = "./data"
# 画像のファイル名
IMAGE_FILE_NAME = "image.jpg"
YOLO_FILE_NAME = "yolo.png"
# ToFデータを保存するファイル名
TOF_FILE_NAME = "tof.json"
def yolov5_detect():
# Model
model = torch.hub.load(
"ultralytics/yolov5", "yolov5s"
)
# しきい値
model.conf = 0.5
with condition:
while True:
condition.wait()
print("yolo detected start")
# Inference on images
img = cv2.imread(os.path.join(SAVE_DIR, IMAGE_FILE_NAME))
# Run inference
results = model(img)
# 透過画像
img_alpha = cv2.cvtColor(img, cv2.COLOR_BGR2BGRA)
img_alpha[..., 3] = 0
for *box, conf, cls in results.xyxy[0]:
if int(cls) == 0:
x1, y1, x2, y2 = map(int, (b.cpu() for b in box))
img_alpha[y1:y2, x1:x2, :3] = img[y1:y2, x1:x2, :]
img_alpha[y1:y2, x1:x2, 3] = 255
cv2.imwrite(os.path.join(SAVE_DIR, YOLO_FILE_NAME), img_alpha)
print("yolo detected end")
condition = threading.Condition()
yolo_thread = threading.Thread(target=yolov5_detect)
yolo_thread.start()
app = Flask(__name__)
# 保存ディレクトリが存在しない場合は作成する
if not os.path.exists(SAVE_DIR):
os.makedirs(SAVE_DIR)
@app.route("/")
def index():
return "Hello, world!"
@app.route("/cam", methods=["POST", "GET"])
def cam():
if request.method == "POST":
# 画像データを取得
image_data = request.data
# 画像を保存
image_path = os.path.join(SAVE_DIR, IMAGE_FILE_NAME)
with open(image_path, "wb") as f:
f.write(image_data)
condition.acquire()
condition.notify()
condition.release()
return "Image saved successfully!"
elif request.method == "GET":
# 画像を送信
return send_from_directory(SAVE_DIR, IMAGE_FILE_NAME)
@app.route("/tof", methods=["POST", "GET"])
def tof():
if request.method == "POST":
# ToFデータを取得
tof_data = request.data.decode("utf-8") # バイトデータを文字列に変換
# 解析
tof_data_list = tof_data.strip().split("\t")
dist_list = tof_data_list[7:39]
dist_list = np.array(dist_list).reshape(8, 4).tolist()
print(dist_list)
# ToFデータを保存
tof_path = os.path.join(SAVE_DIR, TOF_FILE_NAME)
data = {"distance": dist_list}
with open(tof_path, mode="wt", encoding="utf-8") as f:
json.dump(data, f)
return "ToF data saved successfully!"
elif request.method == "GET":
# ToFデータを送信
return send_from_directory(SAVE_DIR, TOF_FILE_NAME)
@app.route("/ssd", methods=["GET"])
def ssd():
if request.method == "GET":
# 画像を送信
return send_from_directory(SAVE_DIR, YOLO_FILE_NAME)
if __name__ == "__main__":
# thread
app.run(debug=False, host="0.0.0.0")Unityソフトウェア側構成
VR アプリは Unity 6000.0.23f1(URP)で作成し、VR 機能面は Meta XR Core SDK を利用しています。
シーン構成
シーン内にはあらかじめ3Dスキャンを行った空間モデルを配置しています。
かつ現実空間においてあるカメラ位置をVRアプリ内でも把握することで、
動体画像(切り抜いた人物画像)を VR 空間内で適切な位置に表示できます。
スクリプト詳細
VR操作機能
VRでの操作はシンプルにコントローラを使った移動と回転のみ実装しています。
using UnityEngine;

public class VRLocomotion : MonoBehaviour
{
    [SerializeField]
    private Transform cameraRig;

    [SerializeField]
    private Transform head;

    [SerializeField]
    private float moveSpeed = 2f;

    [SerializeField]
    private float rotationAngle = 45f;

    private bool canRotate = true;

    private void Update()
    {
        // 左スティックで移動
        HandleMovement();
        // 右スティックで回転
        HandleRotation();
    }

    private void HandleMovement()
    {
        Vector2 leftStick = OVRInput.Get(OVRInput.RawAxis2D.LThumbstick);
        Vector3 forward = new Vector3(head.forward.x, 0f, head.forward.z).normalized;
        Vector3 right = new Vector3(head.right.x, 0f, head.right.z).normalized;
        Vector3 moveDirection = forward * leftStick.y + right * leftStick.x;
        cameraRig.position += moveDirection * moveSpeed * Time.deltaTime;
    }

    private void HandleRotation()
    {
        Vector2 rightStick = OVRInput.Get(OVRInput.RawAxis2D.RThumbstick);
        bool isRotating = Mathf.Abs(rightStick.x) > 0.5f;
        if (isRotating && canRotate)
        {
            cameraRig.Rotate(0f, rotationAngle * Mathf.Sign(rightStick.x), 0f);
            canRotate = false;
        }
        if (!isRotating)
        {
            canRotate = true;
        }
    }
}
カメラ画像の受信
Web サーバー(Raspberry Pi)から HTTPS 経由でカメラ画像をダウンロードし、テクスチャとして取り込んでいます。
using UnityEngine;
using UnityEngine.Networking;
using Cysharp.Threading.Tasks;
using static Constants;
using System;

public class ImageDownloader
{
    public async UniTask<(ImageResult, bool)> DownloadImageAsync()
    {
        var result = new ImageResult();

        try
        {
            string url = $"{MonitorSSDUrl}?time={DateTime.UtcNow.Ticks}";

            using (UnityWebRequest request = UnityWebRequestTexture.GetTexture(url))
            {
                await request.SendWebRequest();

                if (request.result != UnityWebRequest.Result.Success)
                {
                    Debug.LogError($"画像のダウンロードに失敗しました: {request.error}");
                    return (result, false);
                }

                result.Image = DownloadHandlerTexture.GetContent(request);
                return (result, true);
            }
        }
        catch (Exception ex)
        {
            Debug.LogError($"例外が発生しました: {ex.Message}");
            return (result, false);
        }
    }
}
深度情報の受信
動体の深度情報(JSON)も同様に Web サーバーからダウンロードし、該当する深度値を解析して VR 空間の動体画像の配置位置に反映させています。
using System;
using Cysharp.Threading.Tasks;
using UnityEngine;
using UnityEngine.Networking;
using Newtonsoft.Json;

public static class DepthInfoDownloader
{
    // 差異の深度情報(JSON)をダウンロードする
    public static async UniTask<(DepthResult depthResult, bool isSuccess)> FetchDepthInfoAsync()
    {
        DepthResult depthResult = null;
        try
        {
            using (var request = UnityWebRequest.Get(Constants.MonitorTOFUrl))
            {
                await request.SendWebRequest();

                if (request.result != UnityWebRequest.Result.Success)
                {
                    Debug.LogError($"Depth info download failed: {request.error}");
                    return (depthResult, false);
                }

                string jsonText = request.downloadHandler.text;
                depthResult = JsonConvert.DeserializeObject<DepthResult>(jsonText);
                bool success = depthResult != null && depthResult.distance != null;
                return (depthResult, success);
            }
        }
        catch (Exception ex)
        {
            Debug.LogError($"Exception during depth info download: {ex.Message}");
            return (depthResult, false);
        }
    }
}
下記は送られてくる深度情報(JSON)のサンプルになります。
カメラ画像の511.000000 は深度を計測できなかった場合の値で、それ以外の値が含まれている区域を「動体あり」の区域として扱っています。
{
	"distance": [
		[
			"511.000000",
			"511.000000",
			"511.000000",
			"511.000000"
		],
		[
			"511.000000",
			"511.000000",
			"511.000000",
			"511.000000"
		],
		[
			"511.000000",
			"511.000000",
			"511.000000",
			"511.000000"
		],
		[
			"511.000000",
			"511.000000",
			"511.000000",
			"511.000000"
		],
		[
			"3.809655",
			"3.866323",
			"3.679776",
			"511.000000"
		],
		[
			"511.000000",
			"3.692517",
			"3.667131",
			"3.683865"
		],
		[
			"3.556268",
			"3.670649",
			"3.556743",
			"3.667796"
		],
		[
			"2.890043",
			"3.223393",
			"3.033804",
			"3.564159"
		]
	]
}
AI画像解析、AIコメント生成
Amazon Bedrockという様々なAIモデルを利用できるサービスで画像やテキストの入力ができるClaude 3.5 sonnetというAIモデルをAPI経由で利用し、画像解析と文章生成を行っています。
using System;
using System.Collections.Generic;
using System.IO;
using Amazon.BedrockRuntime;
using Amazon.BedrockRuntime.Model;
using Amazon.Util;
using Cysharp.Threading.Tasks;
using Newtonsoft.Json;
using UnityEngine;

public class BedrockChatService : MonoBehaviour
{
    [SerializeField]
    private BedrockSettings bedrockSettings;

    [SerializeField]
    private ClaudePrompt claudePrompt;

    // 画像データを元にAIで画像の説明コメントを生成する
    // ※6MB以上だとエラーになるので注意
    public async UniTask<string> GetImageCommentAsync(byte[] imageData)
    {
        string imageComment = await SendChatMessageAsync(
            textPrompt: claudePrompt.userPrompt,
            role: Role.User,
            systemPrompt: claudePrompt.systemPrompt,
            imageData: imageData,
            imageMediaType: "image/jpeg"
        );

        return imageComment;
    }

    private async UniTask<string> SendChatMessageAsync(
        string textPrompt,
        Role role,
        string systemPrompt,
        byte[] imageData = null,
        string imageMediaType = "image/jpeg",
        float temperature = 0.5f,
        int maxTokens = 10000
    )
    {
        List<BedrockContent> contents = new List<BedrockContent>();

        if (imageData != null && imageData.Length > 0)
        {
            string base64Image = Convert.ToBase64String(imageData);
            contents.Add(new BedrockContent
            {
                type = "image",
                source = new ImageSource
                {
                    type = "base64",
                    media_type = imageMediaType,
                    data = base64Image
                }
            });
        }

        contents.Add(new BedrockContent
        {
            type = "text",
            text = textPrompt
        });

        List<BedrockMessage> messages = new List<BedrockMessage>
        {
            new BedrockMessage
            {
                role = RoleToString(role),
                content = contents
            }
        };

        object payload = BuildRequestPayload(messages, systemPrompt, temperature, maxTokens);
        string responseText = await InvokeBedrockModelAsync(payload);
        return responseText;
    }

    private string RoleToString(Role role)
    {
        return role == Role.User ? "user" : "assistant";
    }

    private object BuildRequestPayload(
        List<BedrockMessage> messages,
        string systemPrompt,
        float temperature,
        int maxTokens
    )
    {
        return new
        {
            anthropic_version = "bedrock-2023-05-31",
            anthropic_beta = new[] { "computer-use-2024-10-22" },
            max_tokens = maxTokens,
            temperature,
            stop_sequences = new string[0],
            system = systemPrompt,
            messages
        };
    }

    private async UniTask<string> InvokeBedrockModelAsync(object payload)
    {
        string payloadJson = JsonConvert.SerializeObject(payload);

        using var client = new AmazonBedrockRuntimeClient(bedrockSettings.Credentials, bedrockSettings.Region);

        try
        {
            Debug.Log("Request JSON: " + payloadJson);
            var response = await client.InvokeModelAsync(new InvokeModelRequest
            {
                ModelId = bedrockSettings.MODEL_ID,
                Body = AWSSDKUtils.GenerateMemoryStreamFromString(payloadJson),
                ContentType = "application/json",
                Accept = "application/json"
            });

            if (response.HttpStatusCode == System.Net.HttpStatusCode.OK)
            {
                using var reader = new StreamReader(response.Body);
                string responseJson = await reader.ReadToEndAsync();
                Debug.Log("Response JSON: " + responseJson);

                BedrockResponse bedrockResponse = JsonConvert.DeserializeObject<BedrockResponse>(responseJson);
                if (bedrockResponse != null && bedrockResponse.content != null && bedrockResponse.content.Count > 0)
                {
                    return bedrockResponse.content[0].text;
                }
                else
                {
                    Debug.LogWarning("BedrockResponse or its content is null");
                    return string.Empty;
                }
            }
            else
            {
                Debug.LogError($"InvokeModelAsync failed. HTTP {(int)response.HttpStatusCode}");
                return $"InvokeModelAsync failed. HTTP {(int)response.HttpStatusCode}";
            }
        }
        catch (AmazonBedrockRuntimeException ex)
        {
            Debug.LogError("BedrockRuntimeError: " + ex.Message);
            return $"BedrockRuntimeError: {ex.Message}";
        }
    }
}
システムプロンプト(AIに前提として渡す前提、設定、指示)とユーザープロンプト(行わせたい作業の指示)は下記になります。
おわりに
今回はリアルタイムで監視するビューワーアプリの開発を行いましたが、さらに DB に動体の画像やコメントを時系列で記録する機能を追加すれば、カメラ 1 台で監視している空間で何か事故や災害があったとき、その事象がどのような流れで発生したかを空間的に振り返る記録アプリにも応用できると感じました。
また、今回のコンテスト参加を通じて、ハードウェア部分をカスタマイズしながらソフトウェア開発を進めることで、ソフトウェア単体の開発では得られないさまざまな知見が得られました。今後もこのようなコンテストの機会があれば、ぜひ参加してみたいと思います。
以上が「空間監視カメラ」の紹介でした。最後までお読みいただき、ありがとうございました。

-
S1TA
さんが
2024/11/05
に
編集
をしました。
(メッセージ: 初版)
-
S1TA
さんが
2024/11/05
に
編集
をしました。
-
S1TA
さんが
2024/11/20
に
編集
をしました。
-
S1TA
さんが
2024/11/20
に
編集
をしました。
-
S1TA
さんが
2024/11/20
に
編集
をしました。
-
S1TA
さんが
2025/01/24
に
編集
をしました。
-
S1TA
さんが
2025/01/24
に
編集
をしました。
-
S1TA
さんが
2025/01/24
に
編集
をしました。
-
S1TA
さんが
2025/01/27
に
編集
をしました。
-
S1TA
さんが
2025/01/27
に
編集
をしました。
-
S1TA
さんが
2025/01/27
に
編集
をしました。
-
S1TA
さんが
2025/01/27
に
編集
をしました。
-
S1TA
さんが
2025/01/27
に
編集
をしました。
-
S1TA
さんが
2025/01/27
に
編集
をしました。
-
S1TA
さんが
2025/01/27
に
編集
をしました。
-
S1TA
さんが
2025/01/27
に
編集
をしました。
-
toppan_matsumaru
さんが
2025/01/27
に送った
編集リクエスト
が受理されました。
-
toppan_matsumaru
さんが
2025/01/28
に
編集
をしました。
-
S1TA
さんが
2025/01/28
に
編集
をしました。
-
S1TA
さんが
2025/01/28
に
編集
をしました。
-
S1TA
さんが
2025/01/28
に
編集
をしました。
-
toppan_matsumaru
さんが
2025/01/28
に送った
編集リクエスト
が受理されました。
-
toppan_matsumaru
さんが
2025/01/28
に
編集
をしました。
-
S1TA
さんが
2025/01/31
に
編集
をしました。
-
S1TA
さんが
2025/01/31
に
編集
をしました。
-
S1TA
さんが
2025/01/31
に
編集
をしました。
-
S1TA
さんが
2025/01/31
に
編集
をしました。
-
S1TA
さんが
2025/01/31
に
編集
をしました。
ログインしてコメントを投稿する