
imm が 2022年09月26日04時13分00秒 に編集
初版
タイトルの変更
SPRESENSEでタイムラプスカメラを作る
タグの変更
SPRESENSE
spresense
CAMERA
メイン画像の変更
記事種類の変更
製作品
本文の変更
## 概要 SPRESENSE活用コンテストで、カメラボードを使ったものが作りたくて考えました。 タイムラプス動画はスマホでも手軽に撮影することはできます。 短時間なら良いですが、3Dプリンタの造形など、何時間にも及ぶ長い作業の撮影となるとその間ずっと撮影のために独占することはできないでしょう。そこで、タイムラプス動画を撮影する専用のカメラを作ることにしました。 SPRESENSEメインボード、拡張ボード、液晶と3つのボタンでトータルの撮影時間と撮影間隔を設定することができる液晶付きカメラを開発しました。 ## 必要なもの - SPRESENSEメインボード - SPRESENSE拡張ボード - SPRESENSEカメラボード - SDカード - [ILI9341搭載2.8インチSPI制御タッチパネル付TFT液晶 MSP2807](https://akizukidenshi.com/catalog/g/gM-16265/) - タクトスイッチ ×3 - 抵抗 ×3 - 各種配線 - (シールド化のための部品) - ユニバーサル基板 - ピンソケット(14ピン) - ピンヘッダ ×13 - すずメッキ線など - はんだ付けセット ## 組み立て チュートリアルに従ってセッティング、カメラボードの接続まで行います。 LCDも[こちら](https://developer.sony.com/develop/spresense/docs/arduino_tutorials_ja.html#_tutorial_camera)のチュートリアルを参考に繋ぎます。今回はタッチパネル機能は使わないのでLCD部分のみ接続します。 さらに、タクトスイッチ1〜3をそれぞれメインボードのD23〜25で検出するように接続した様子がこちら。 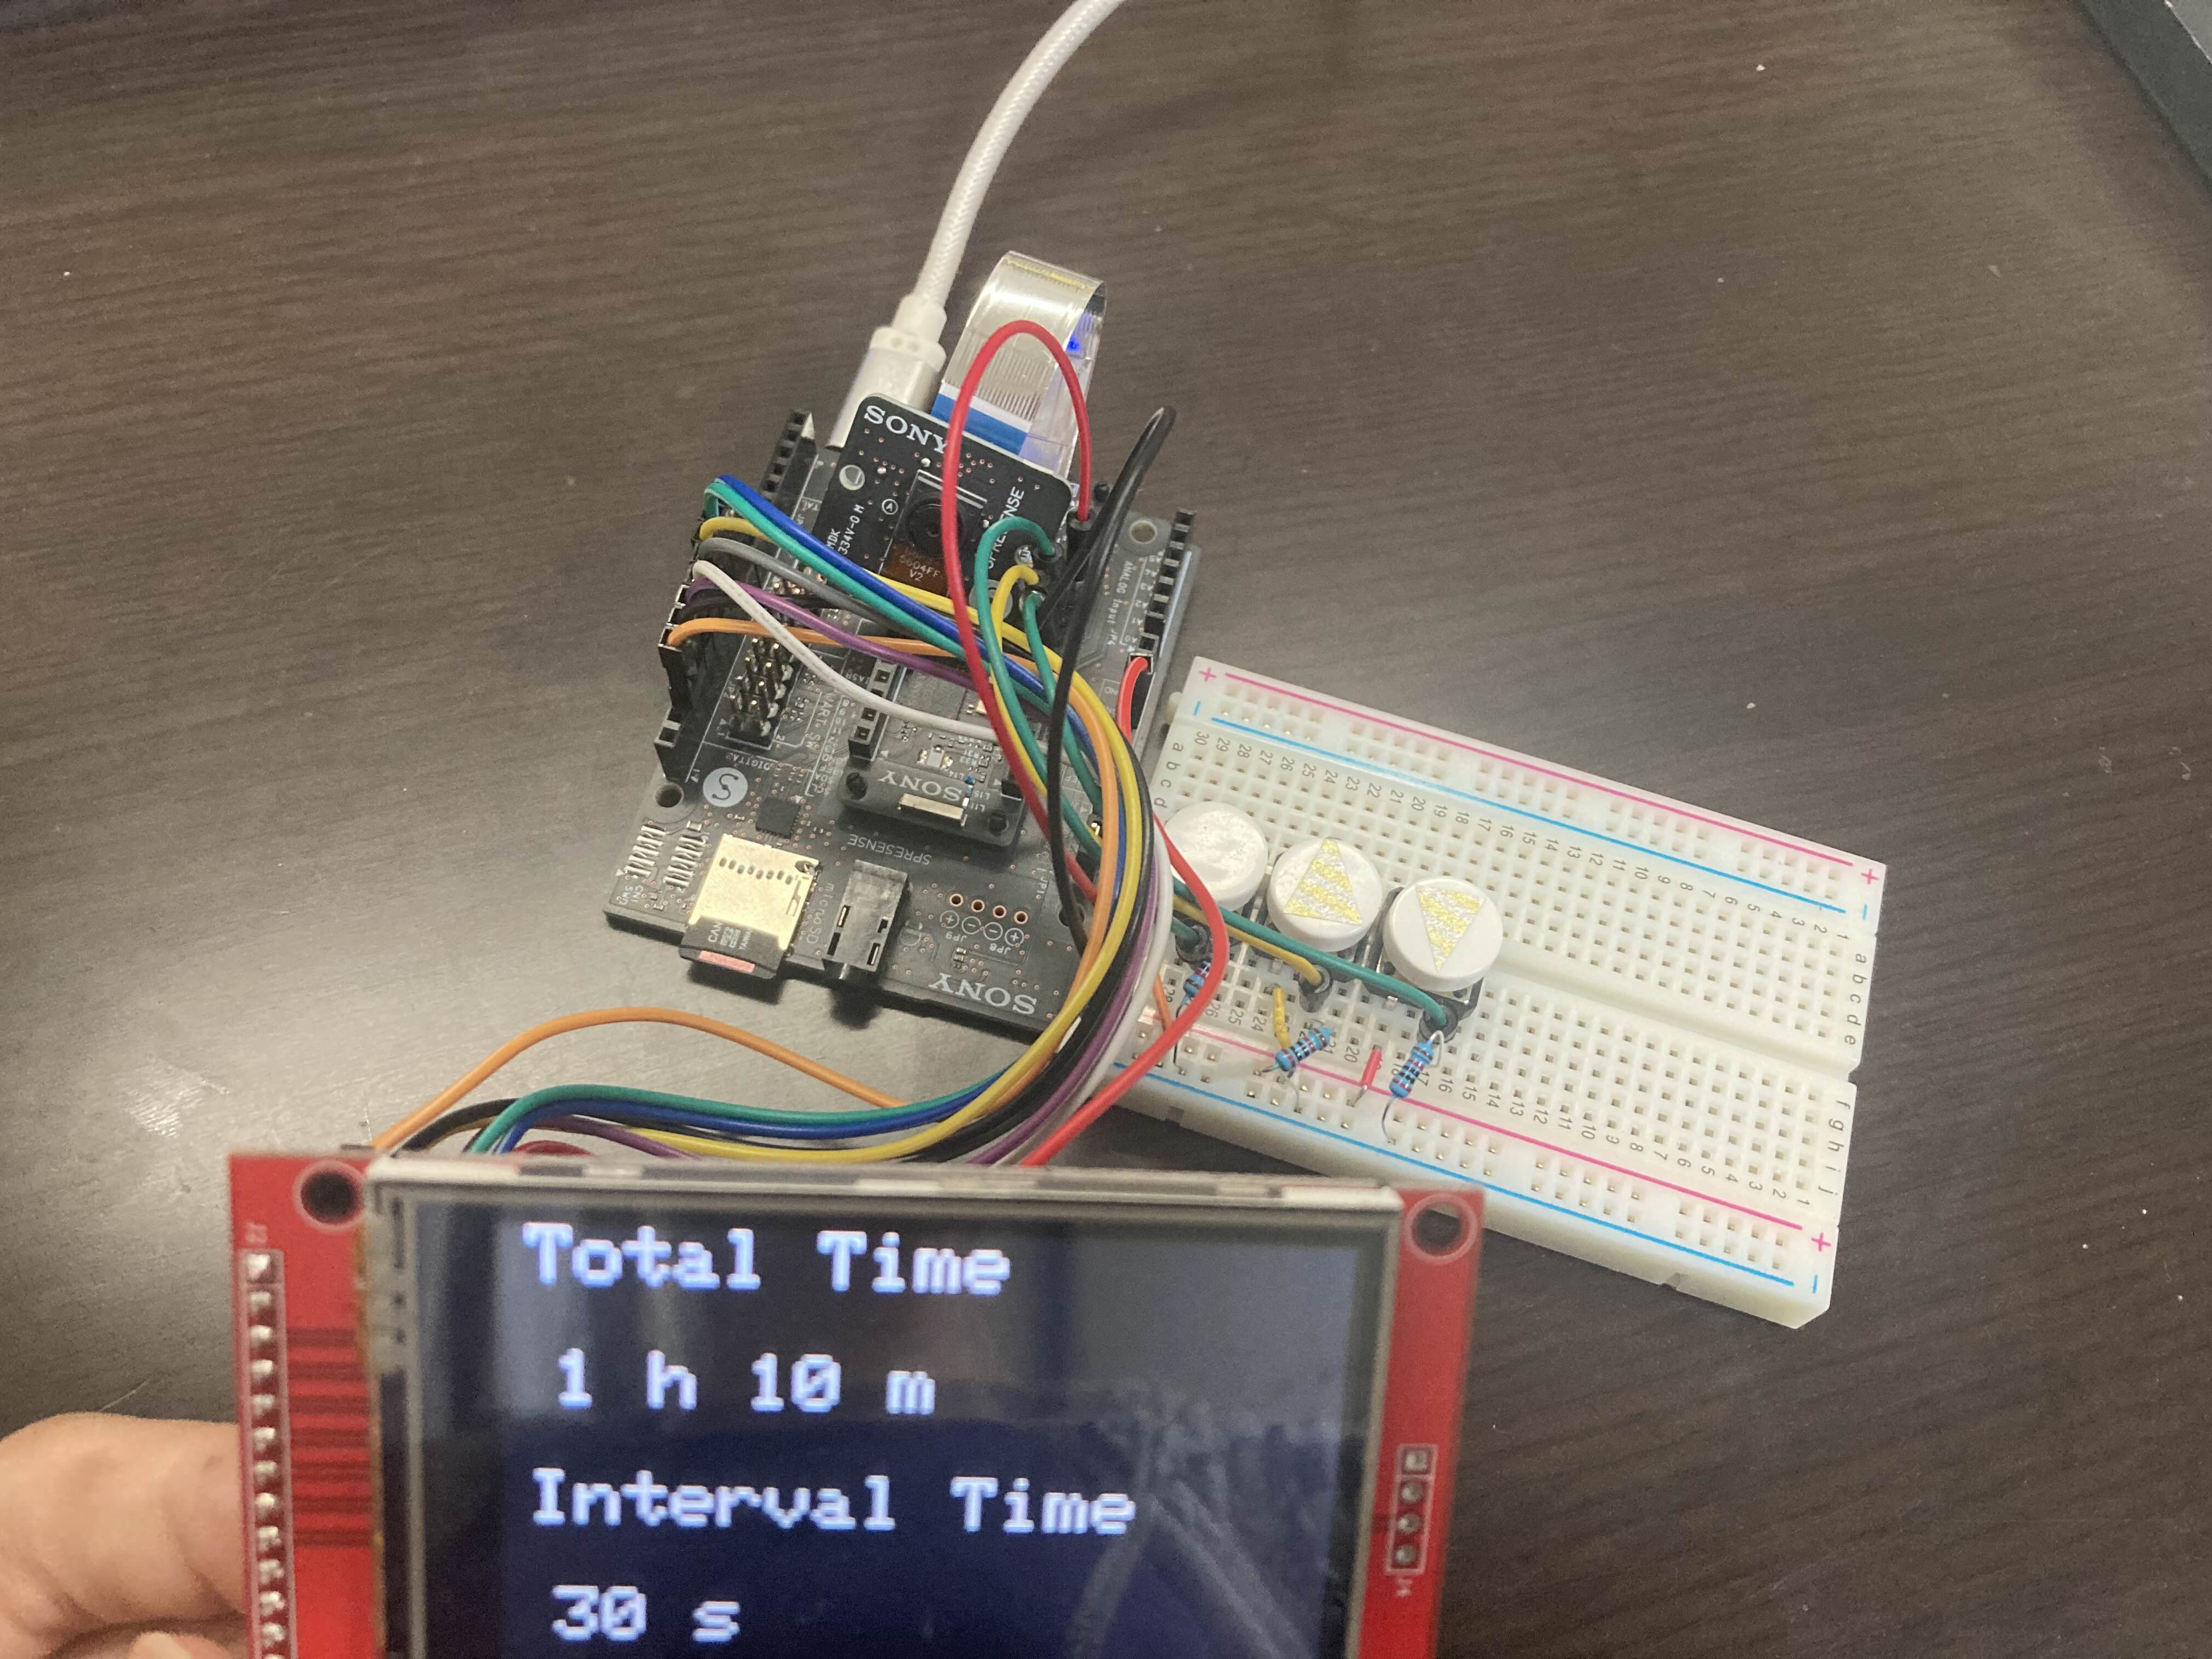 画面に表示されているのがタイムラプスの設定画面です。 ここまでで機能はできましたが、ジャンパピンを使って接続しているとかさばってしまうし安定しません。 全体をなるべくスッキリまとめるためにはんだ付けしてシールド的なものを作りました。 構成はこんな感じ。 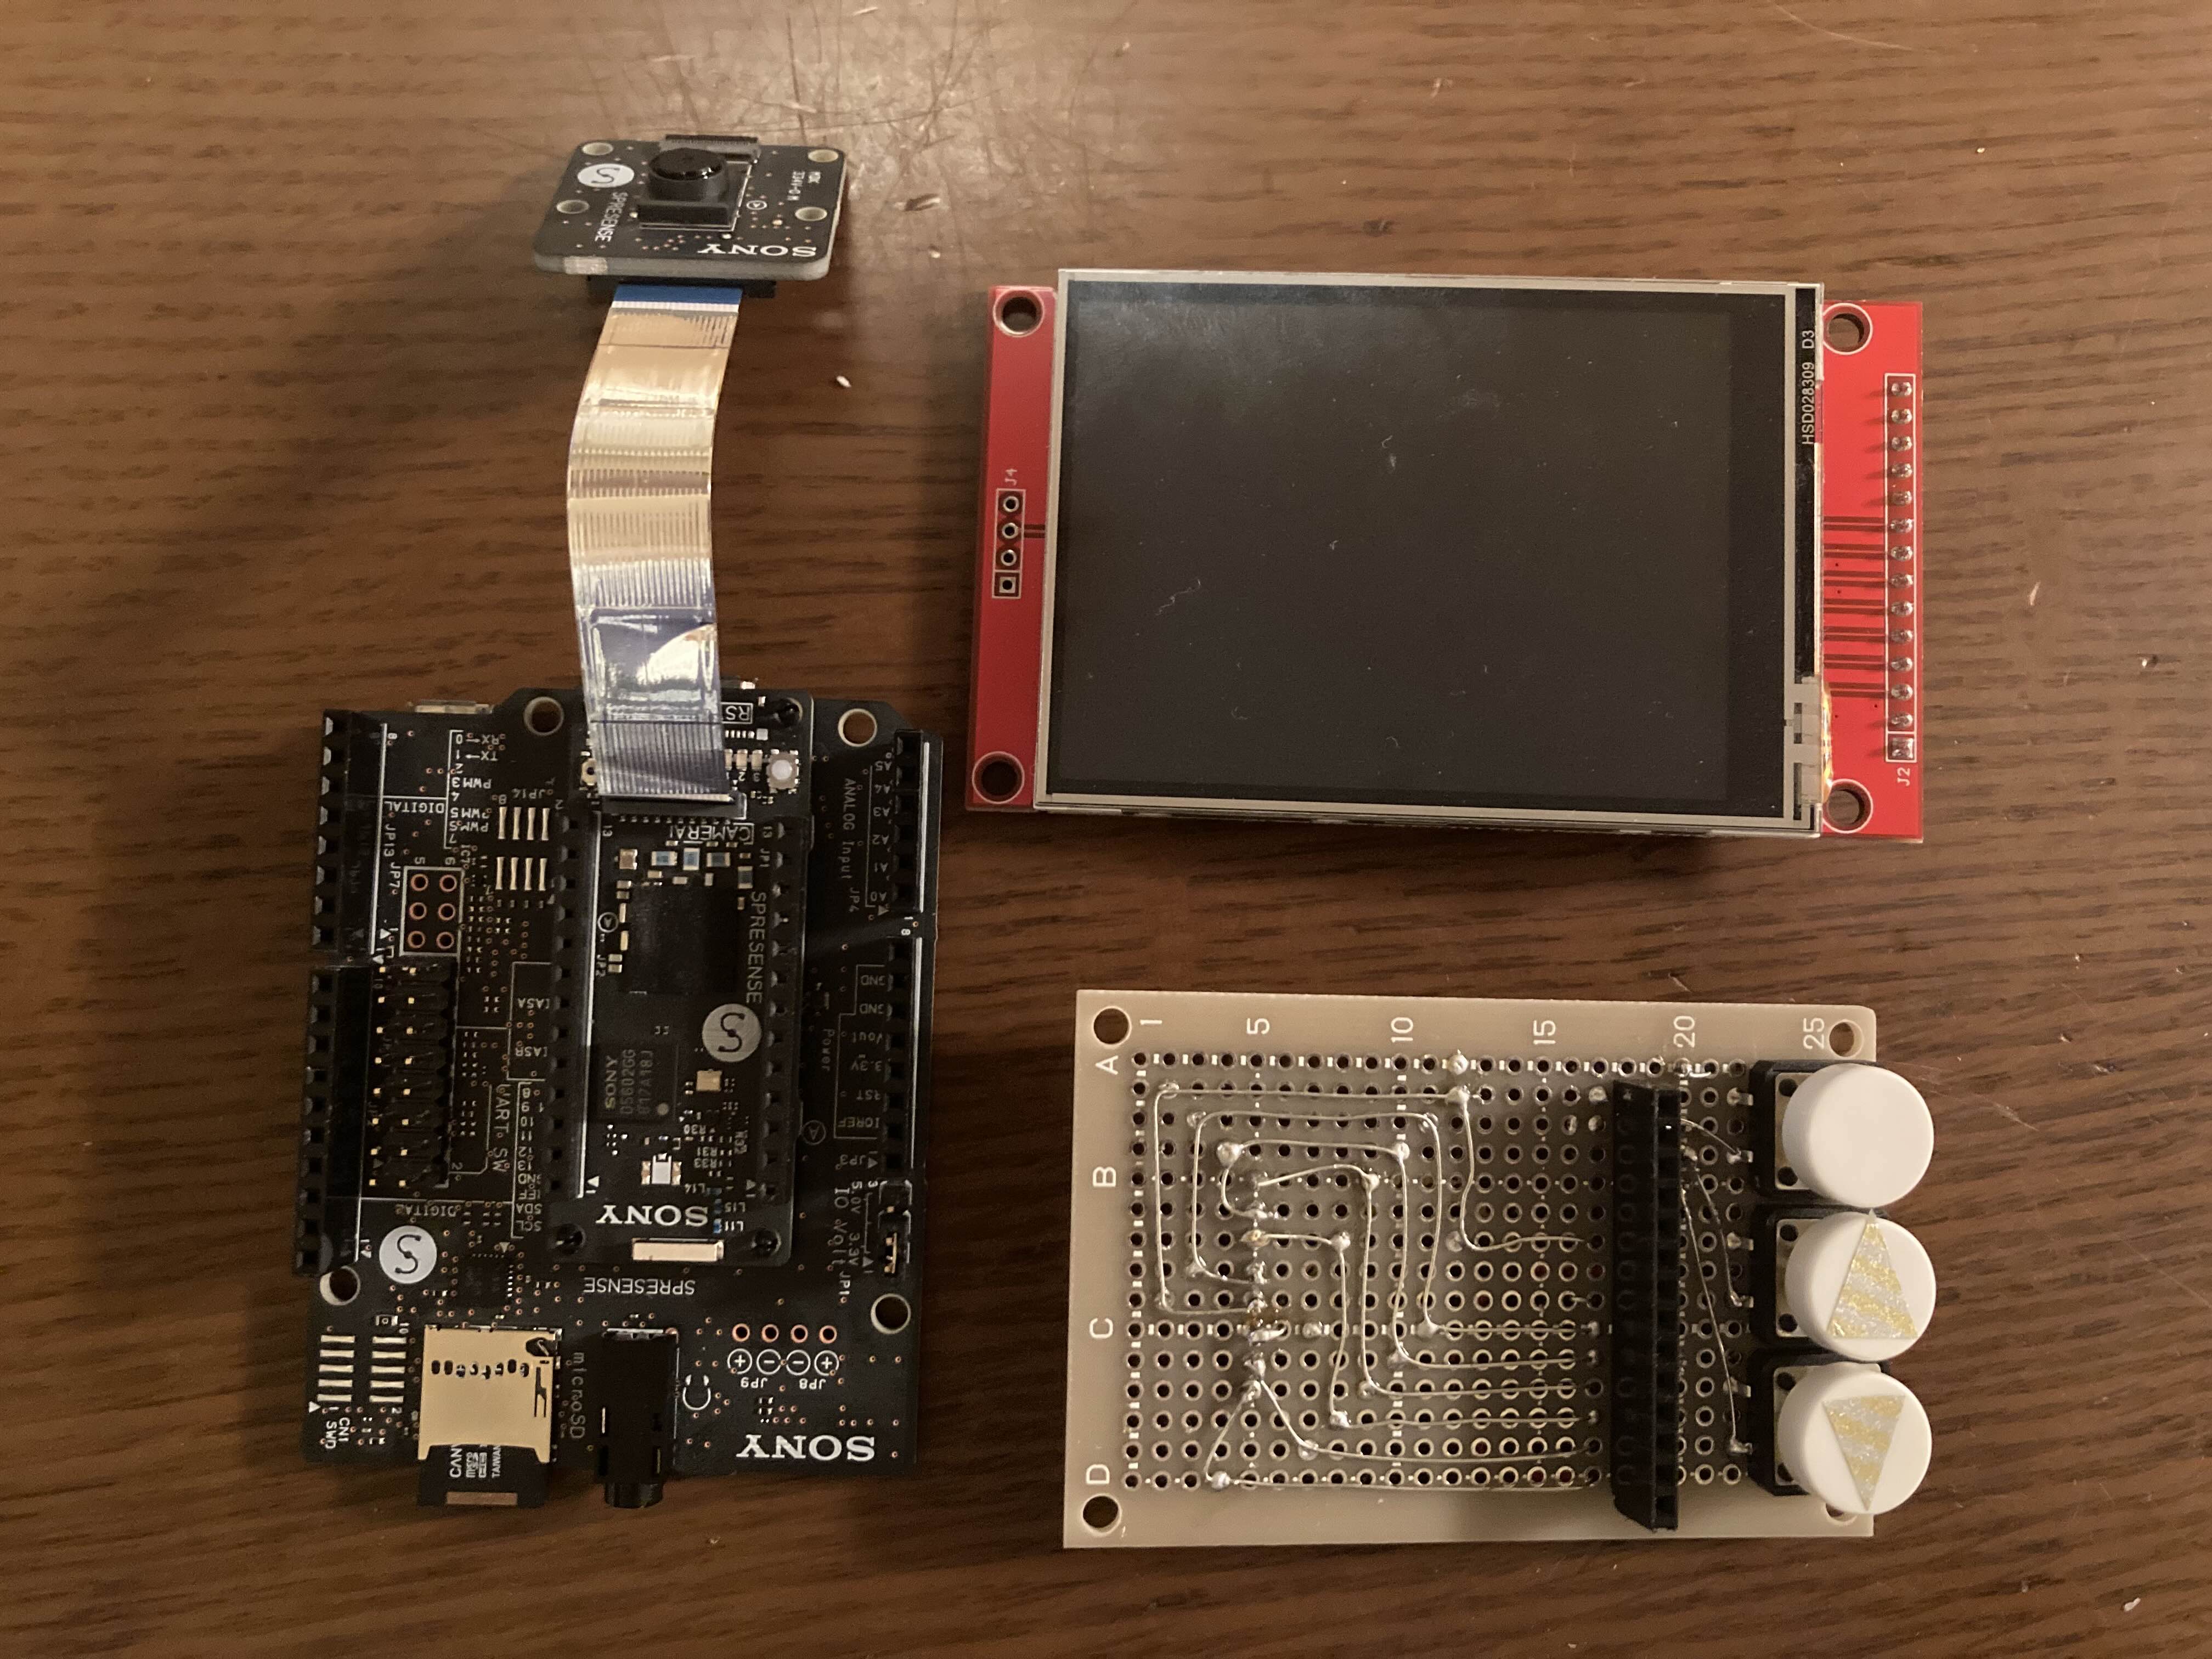 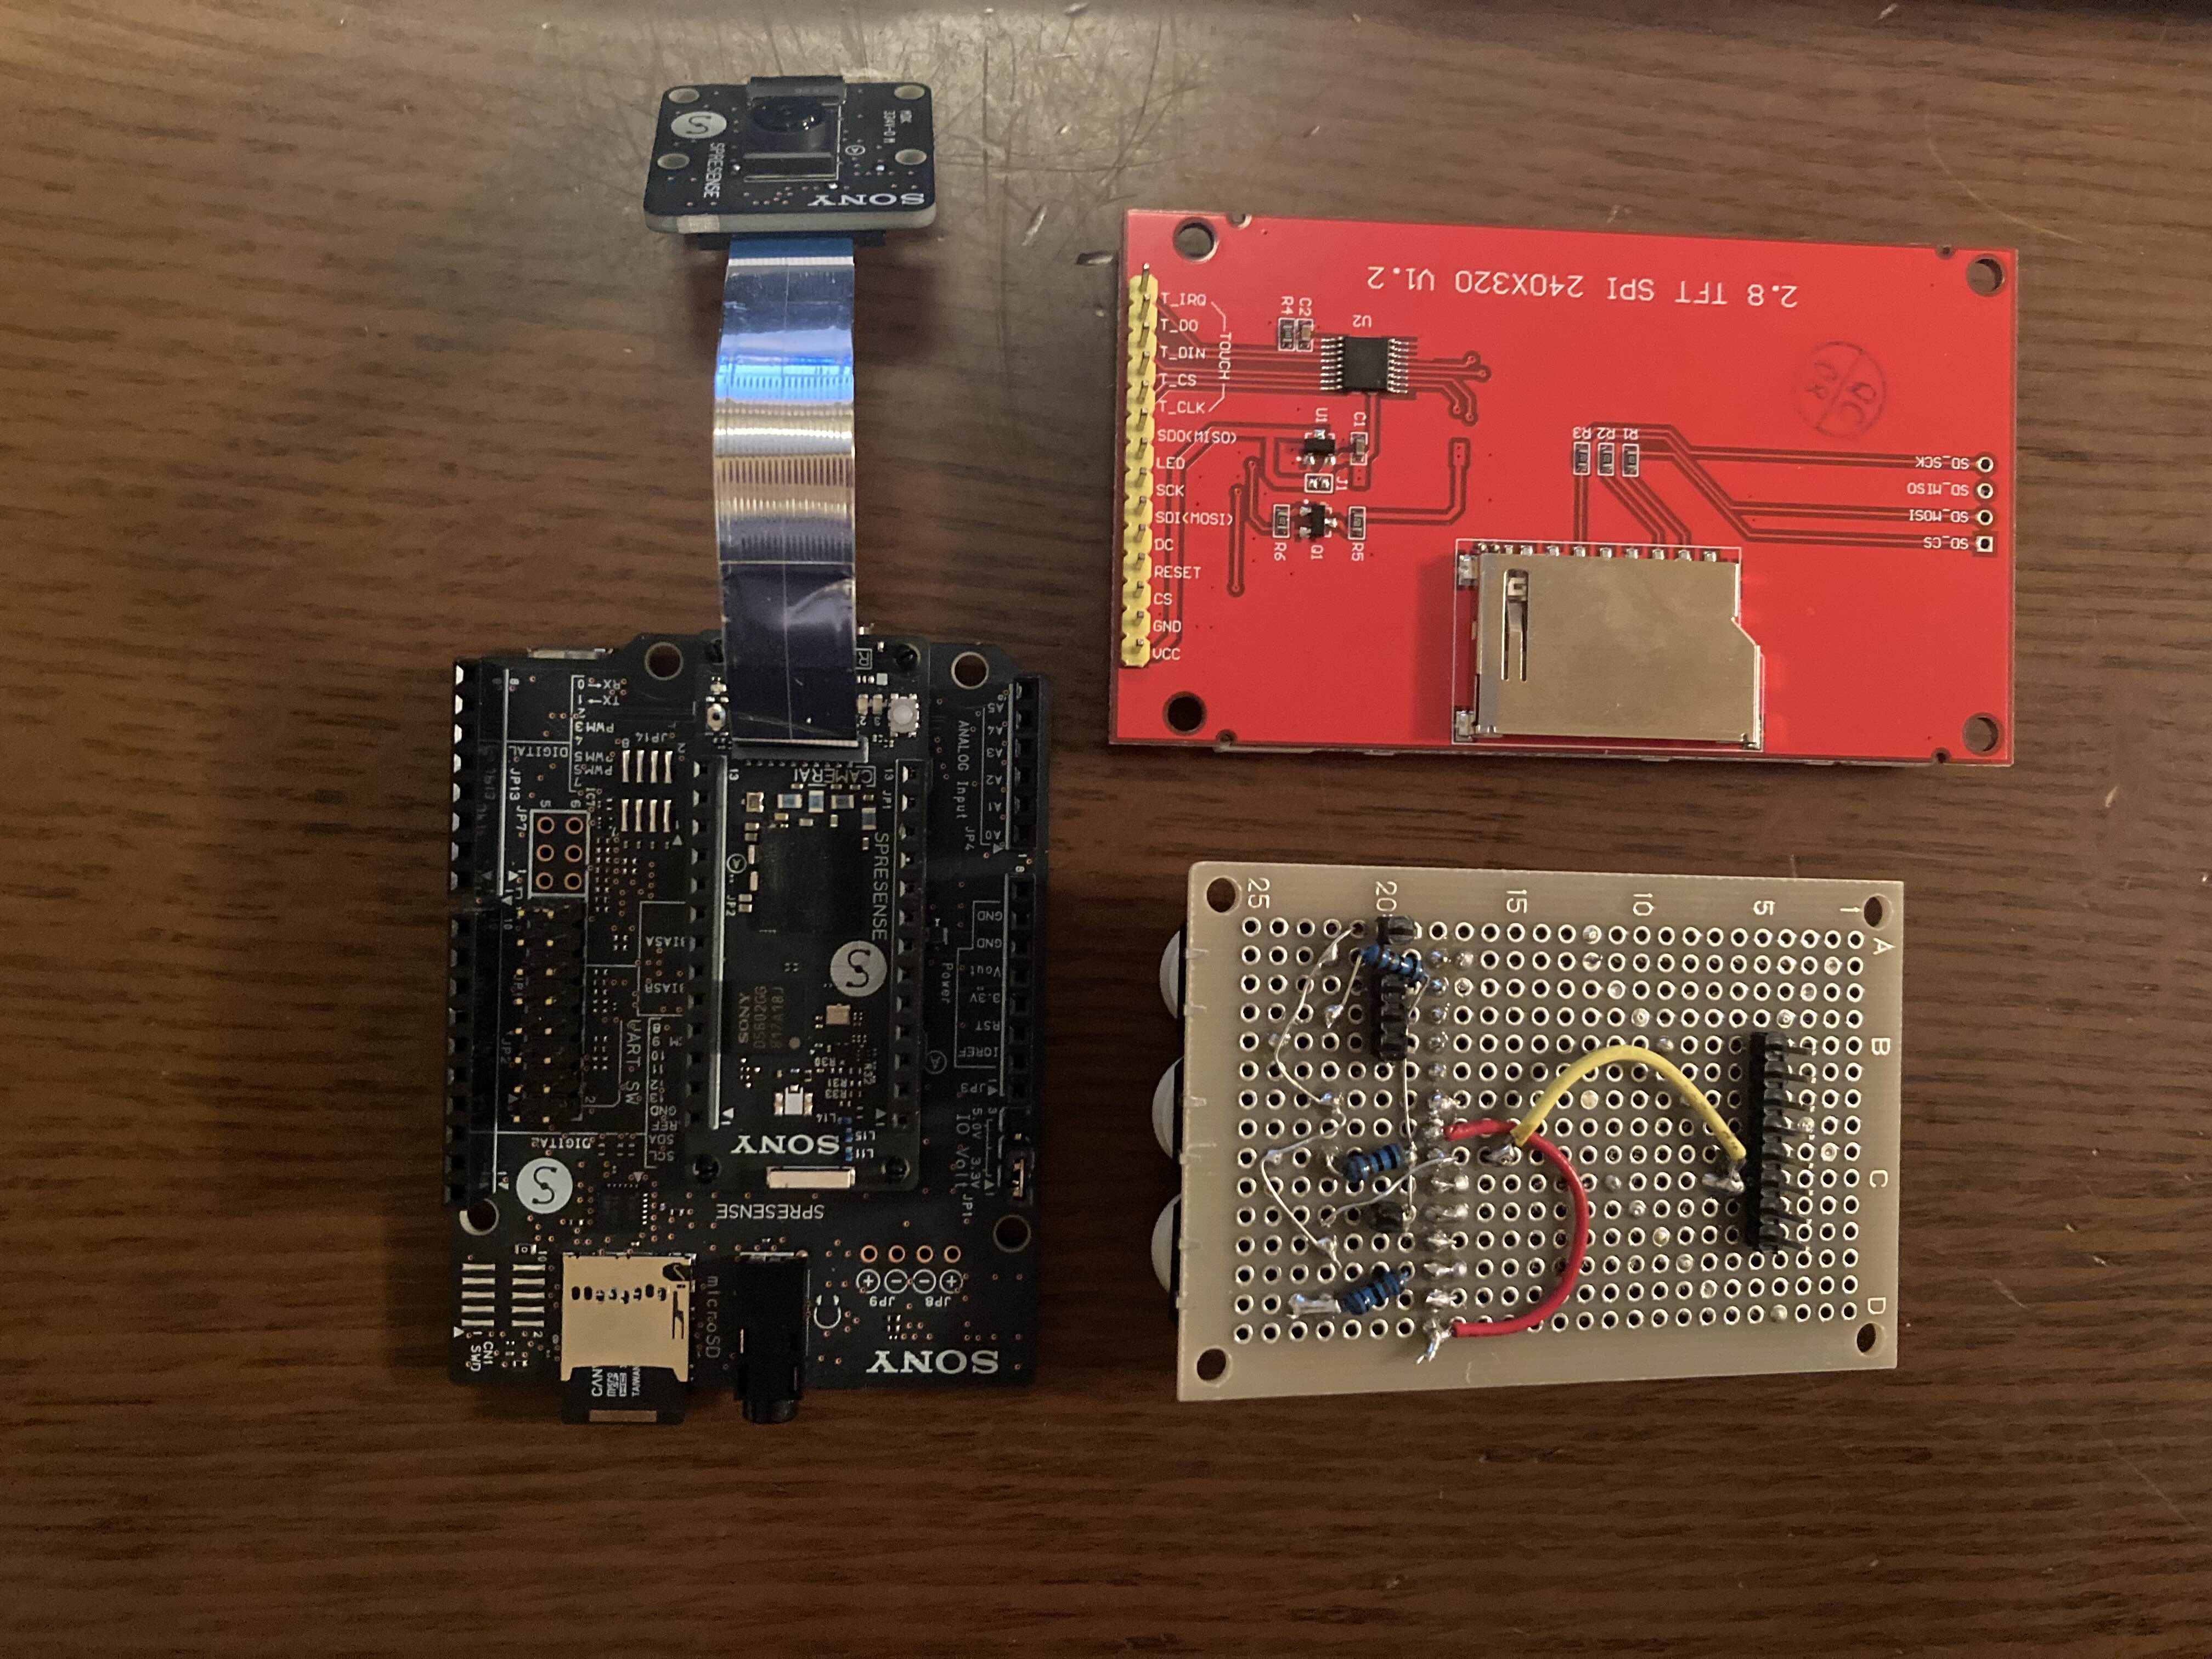 これで全体がだいぶスッキリしました。 (LCDが片持ち支持になっているので支えを作りたいところですが) 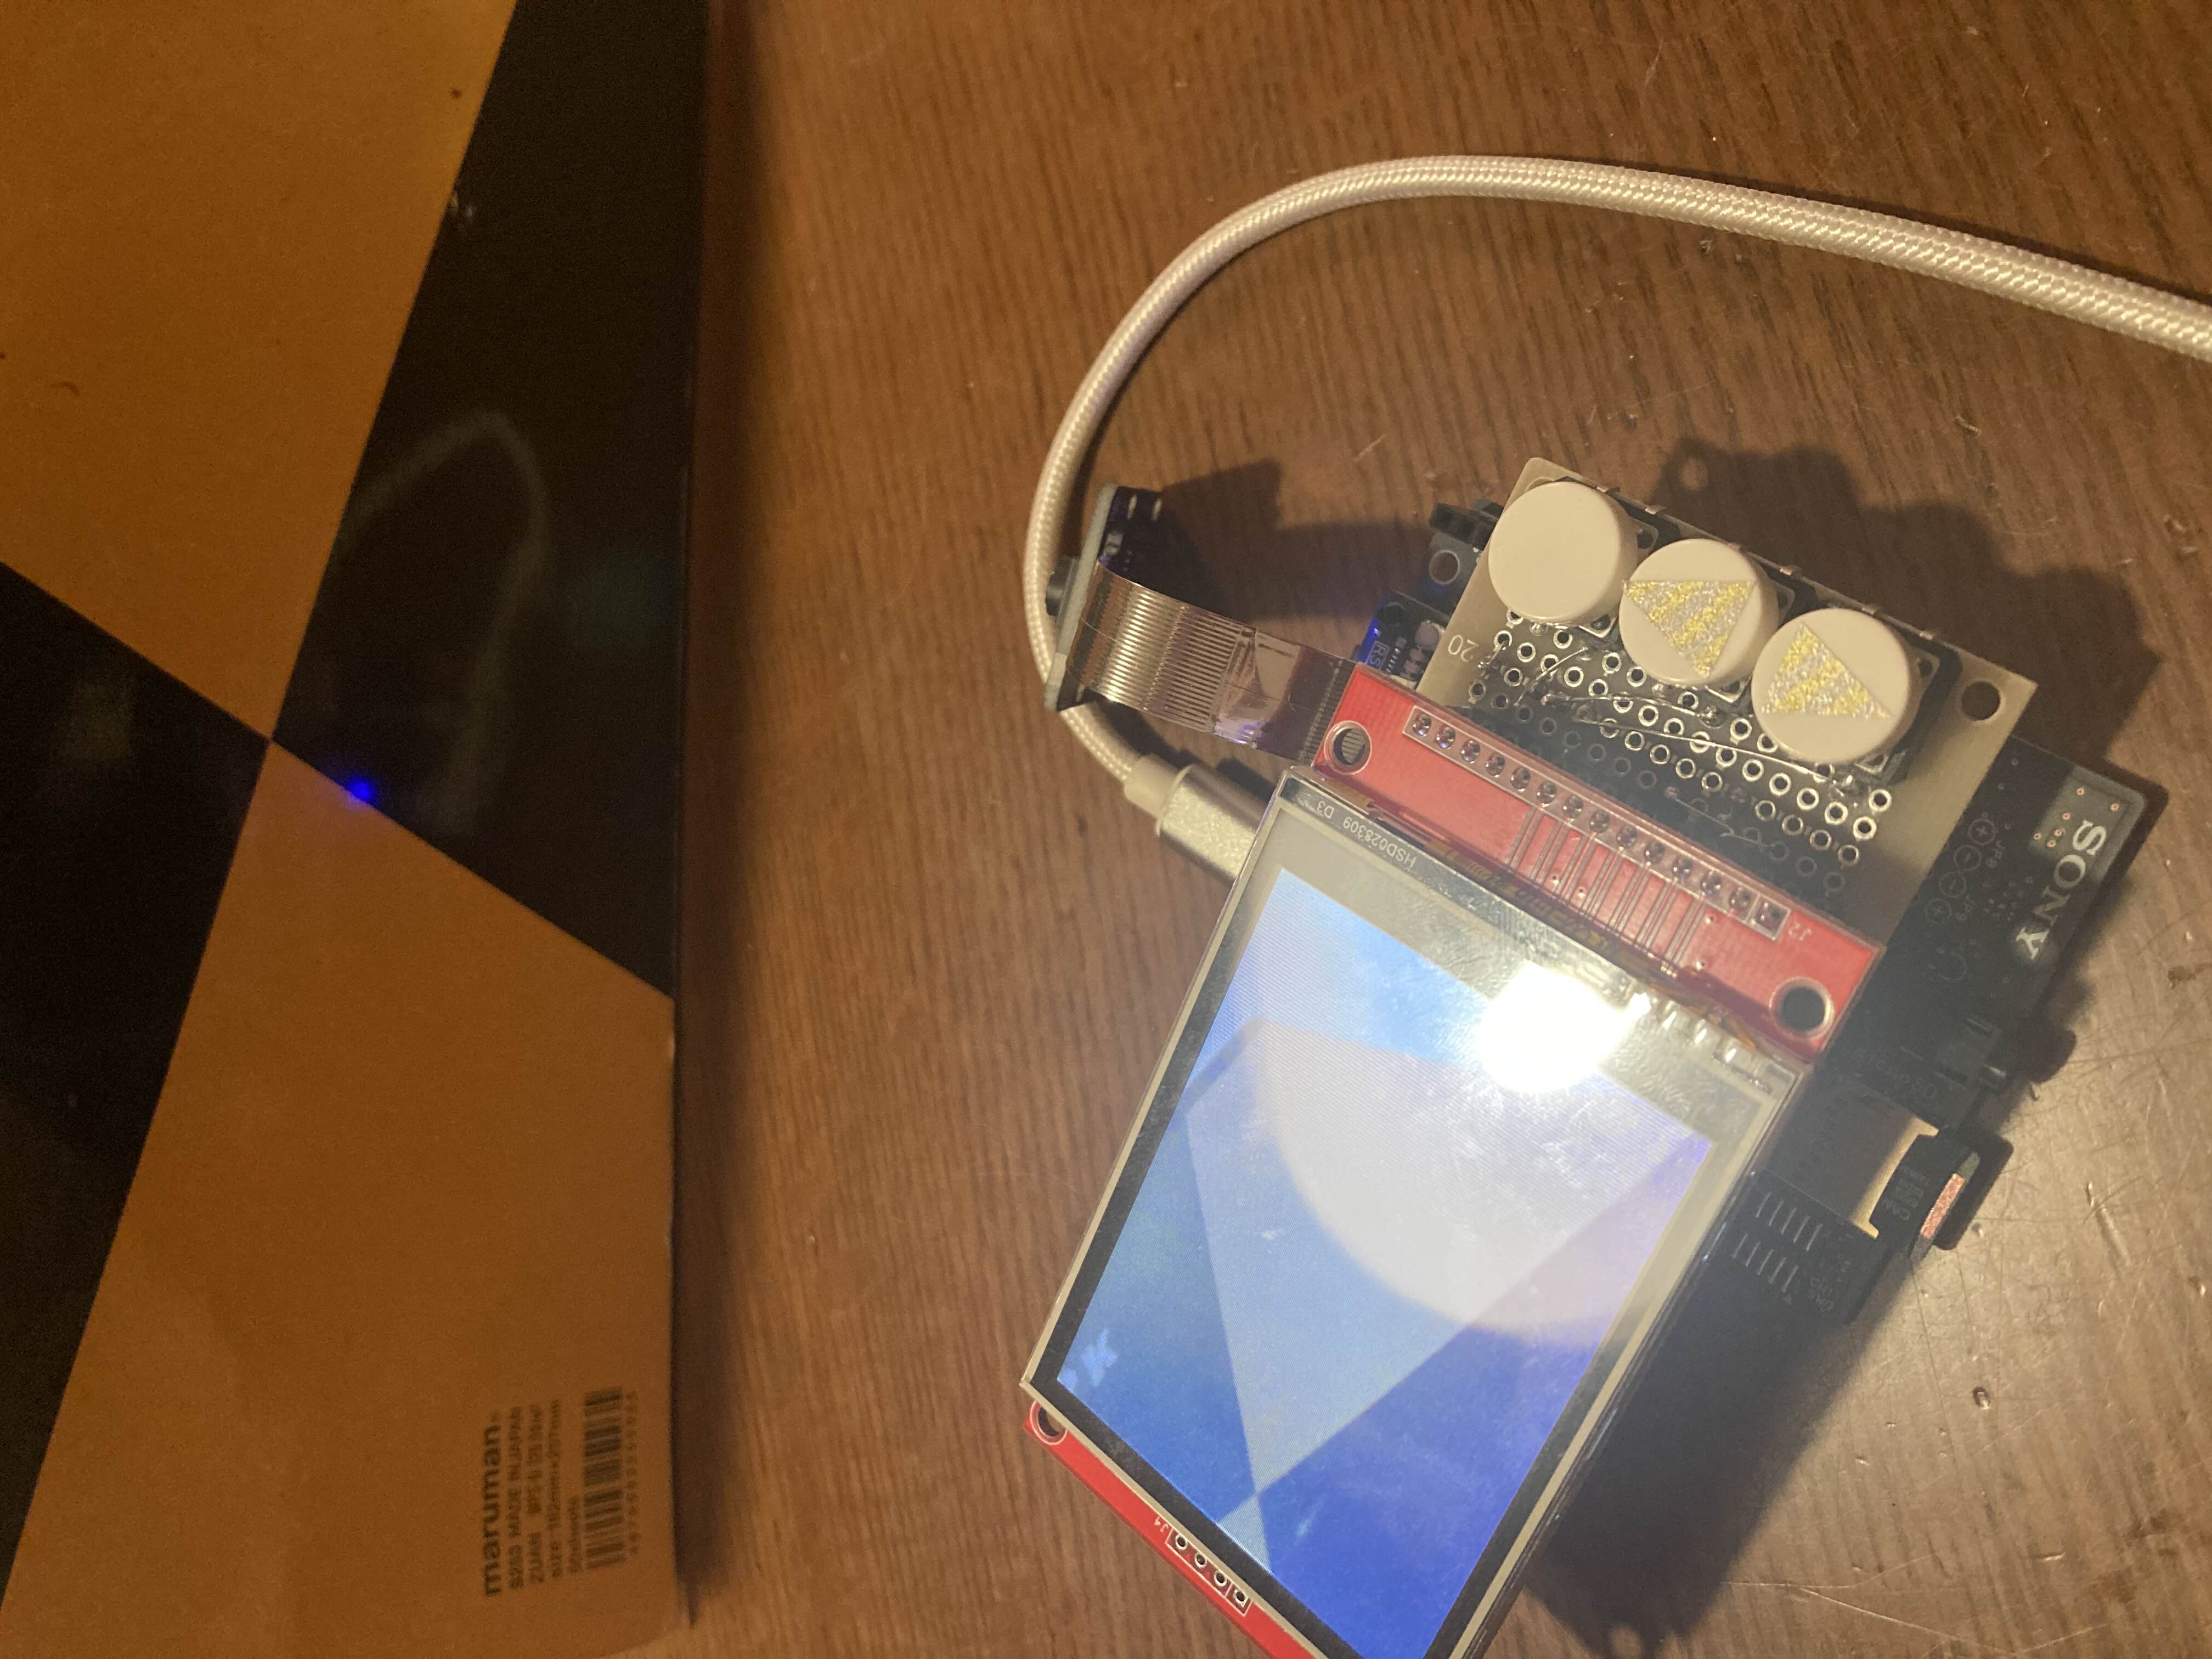 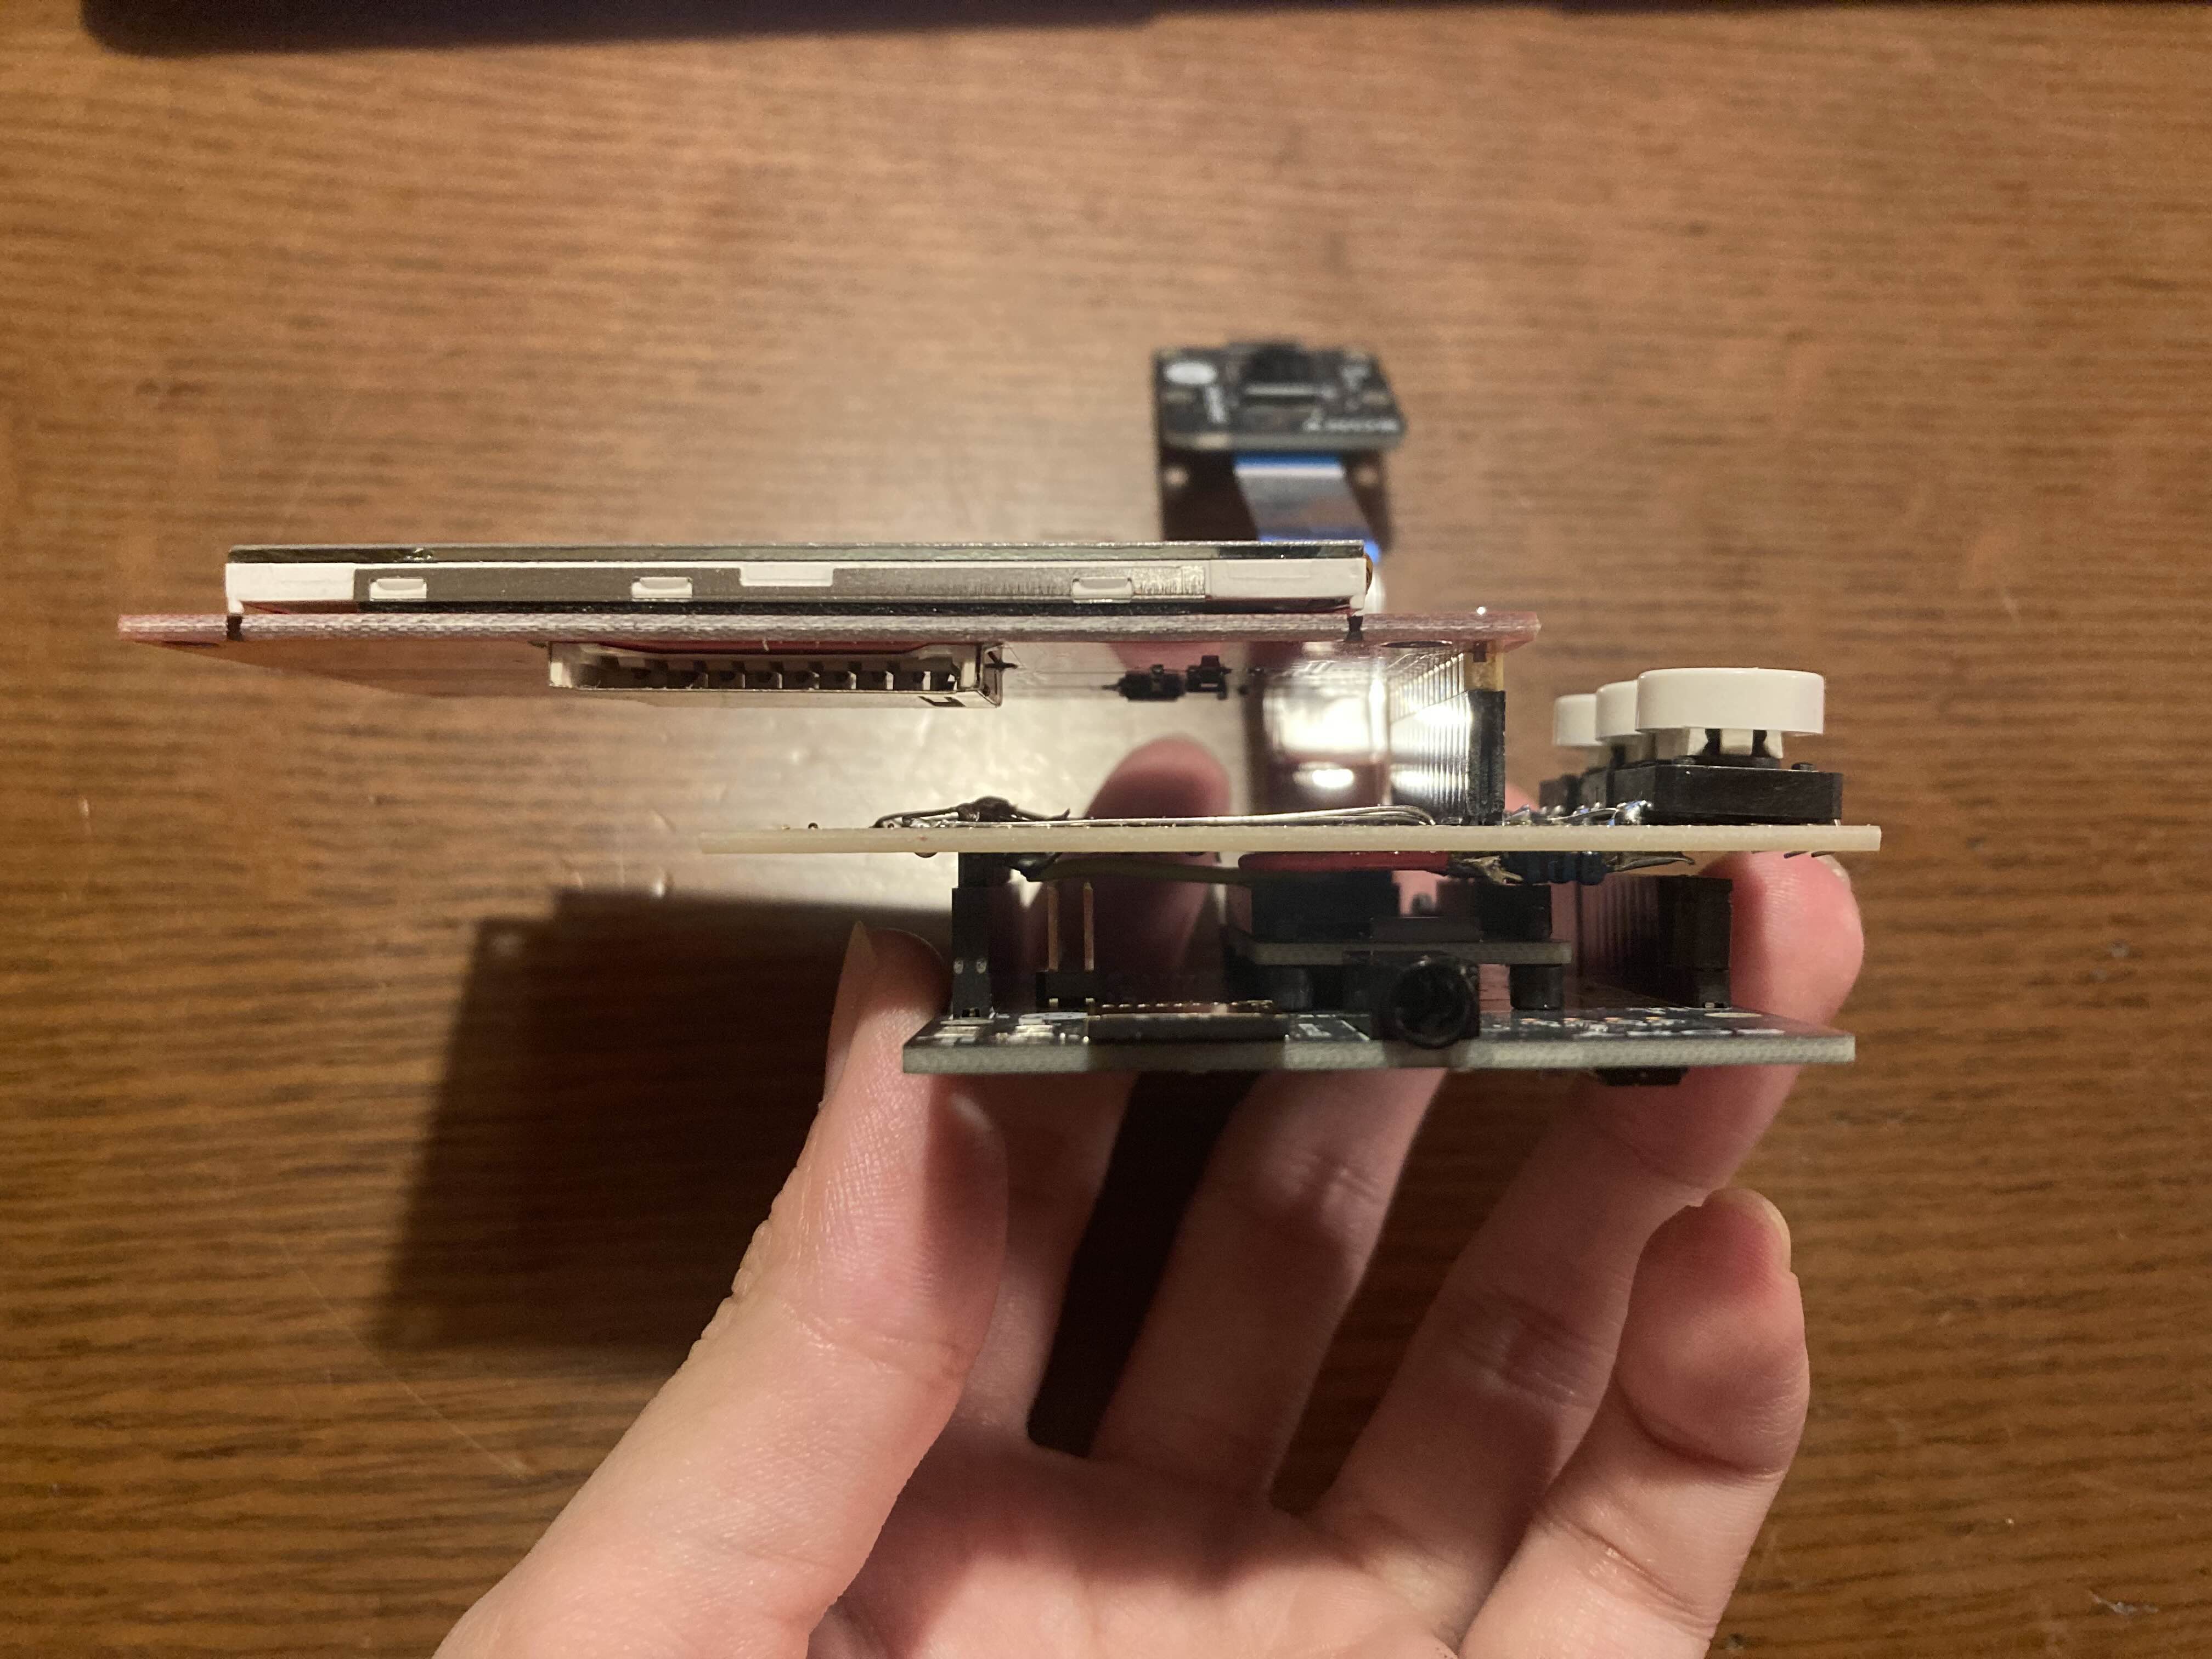 ## 動作の様子 起動した画面では、カメラのプレビューが写っています。 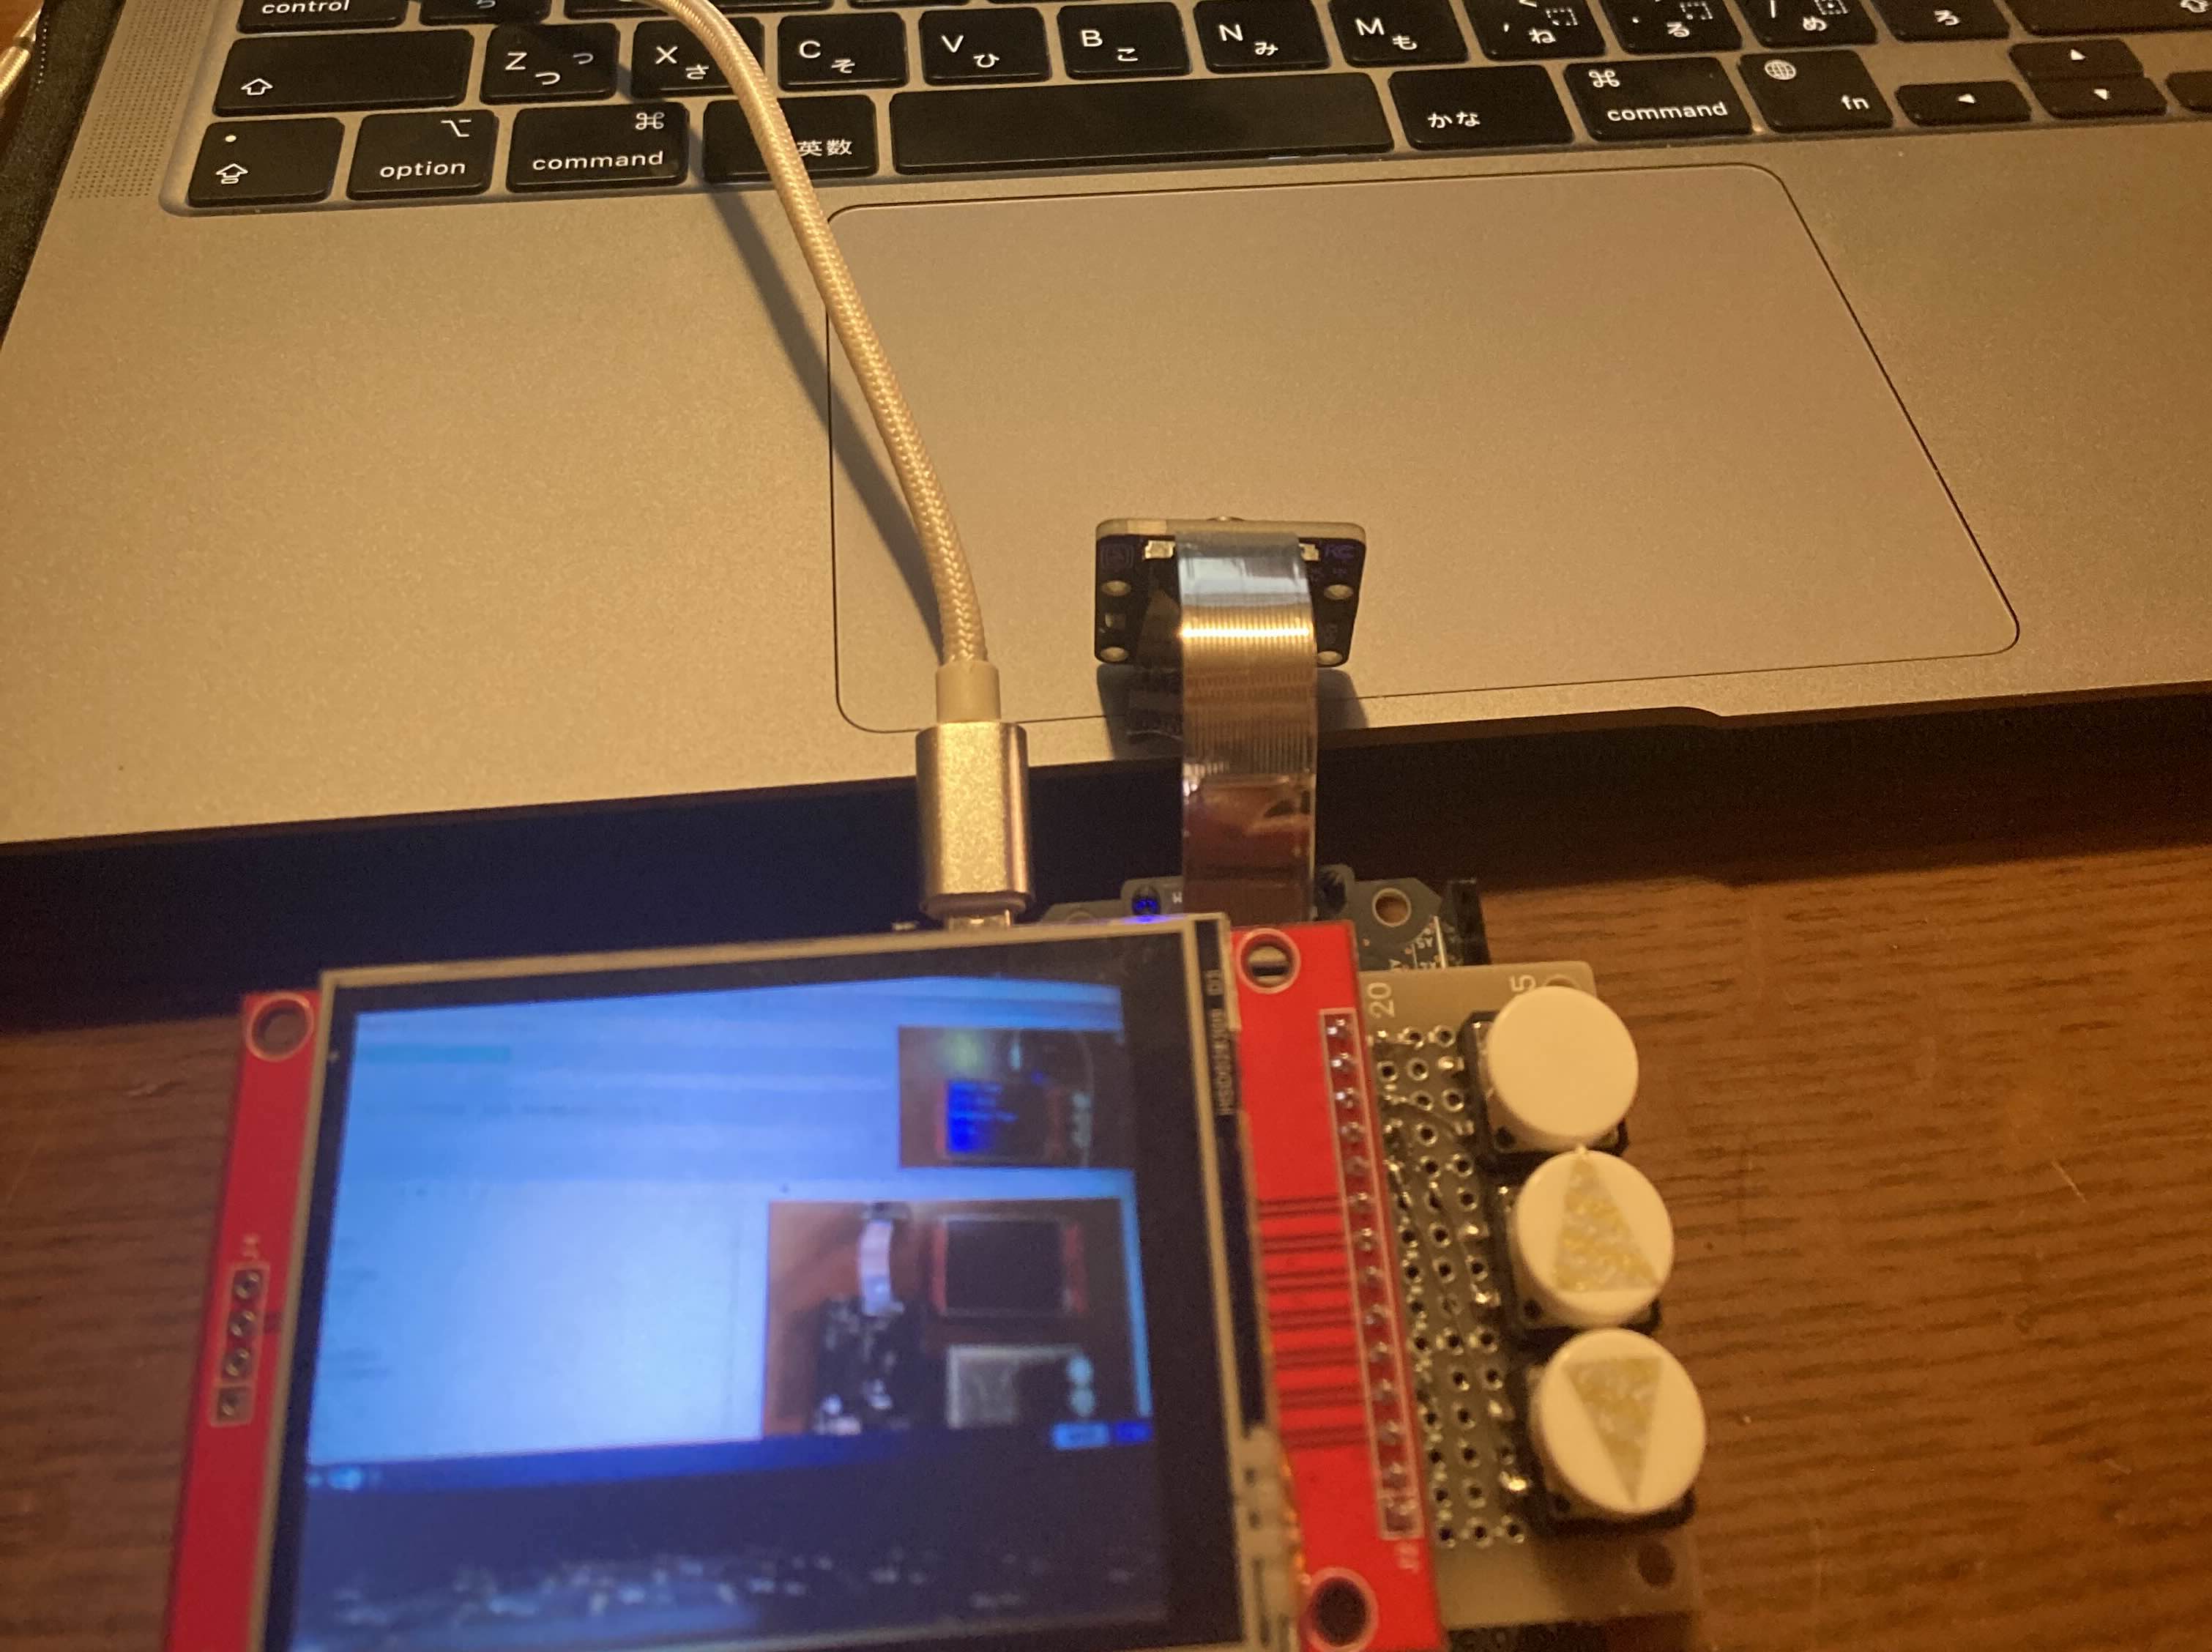 決定ボタン(一番上のボタン)を押すとタイムラプス時間の設定画面に移ります。 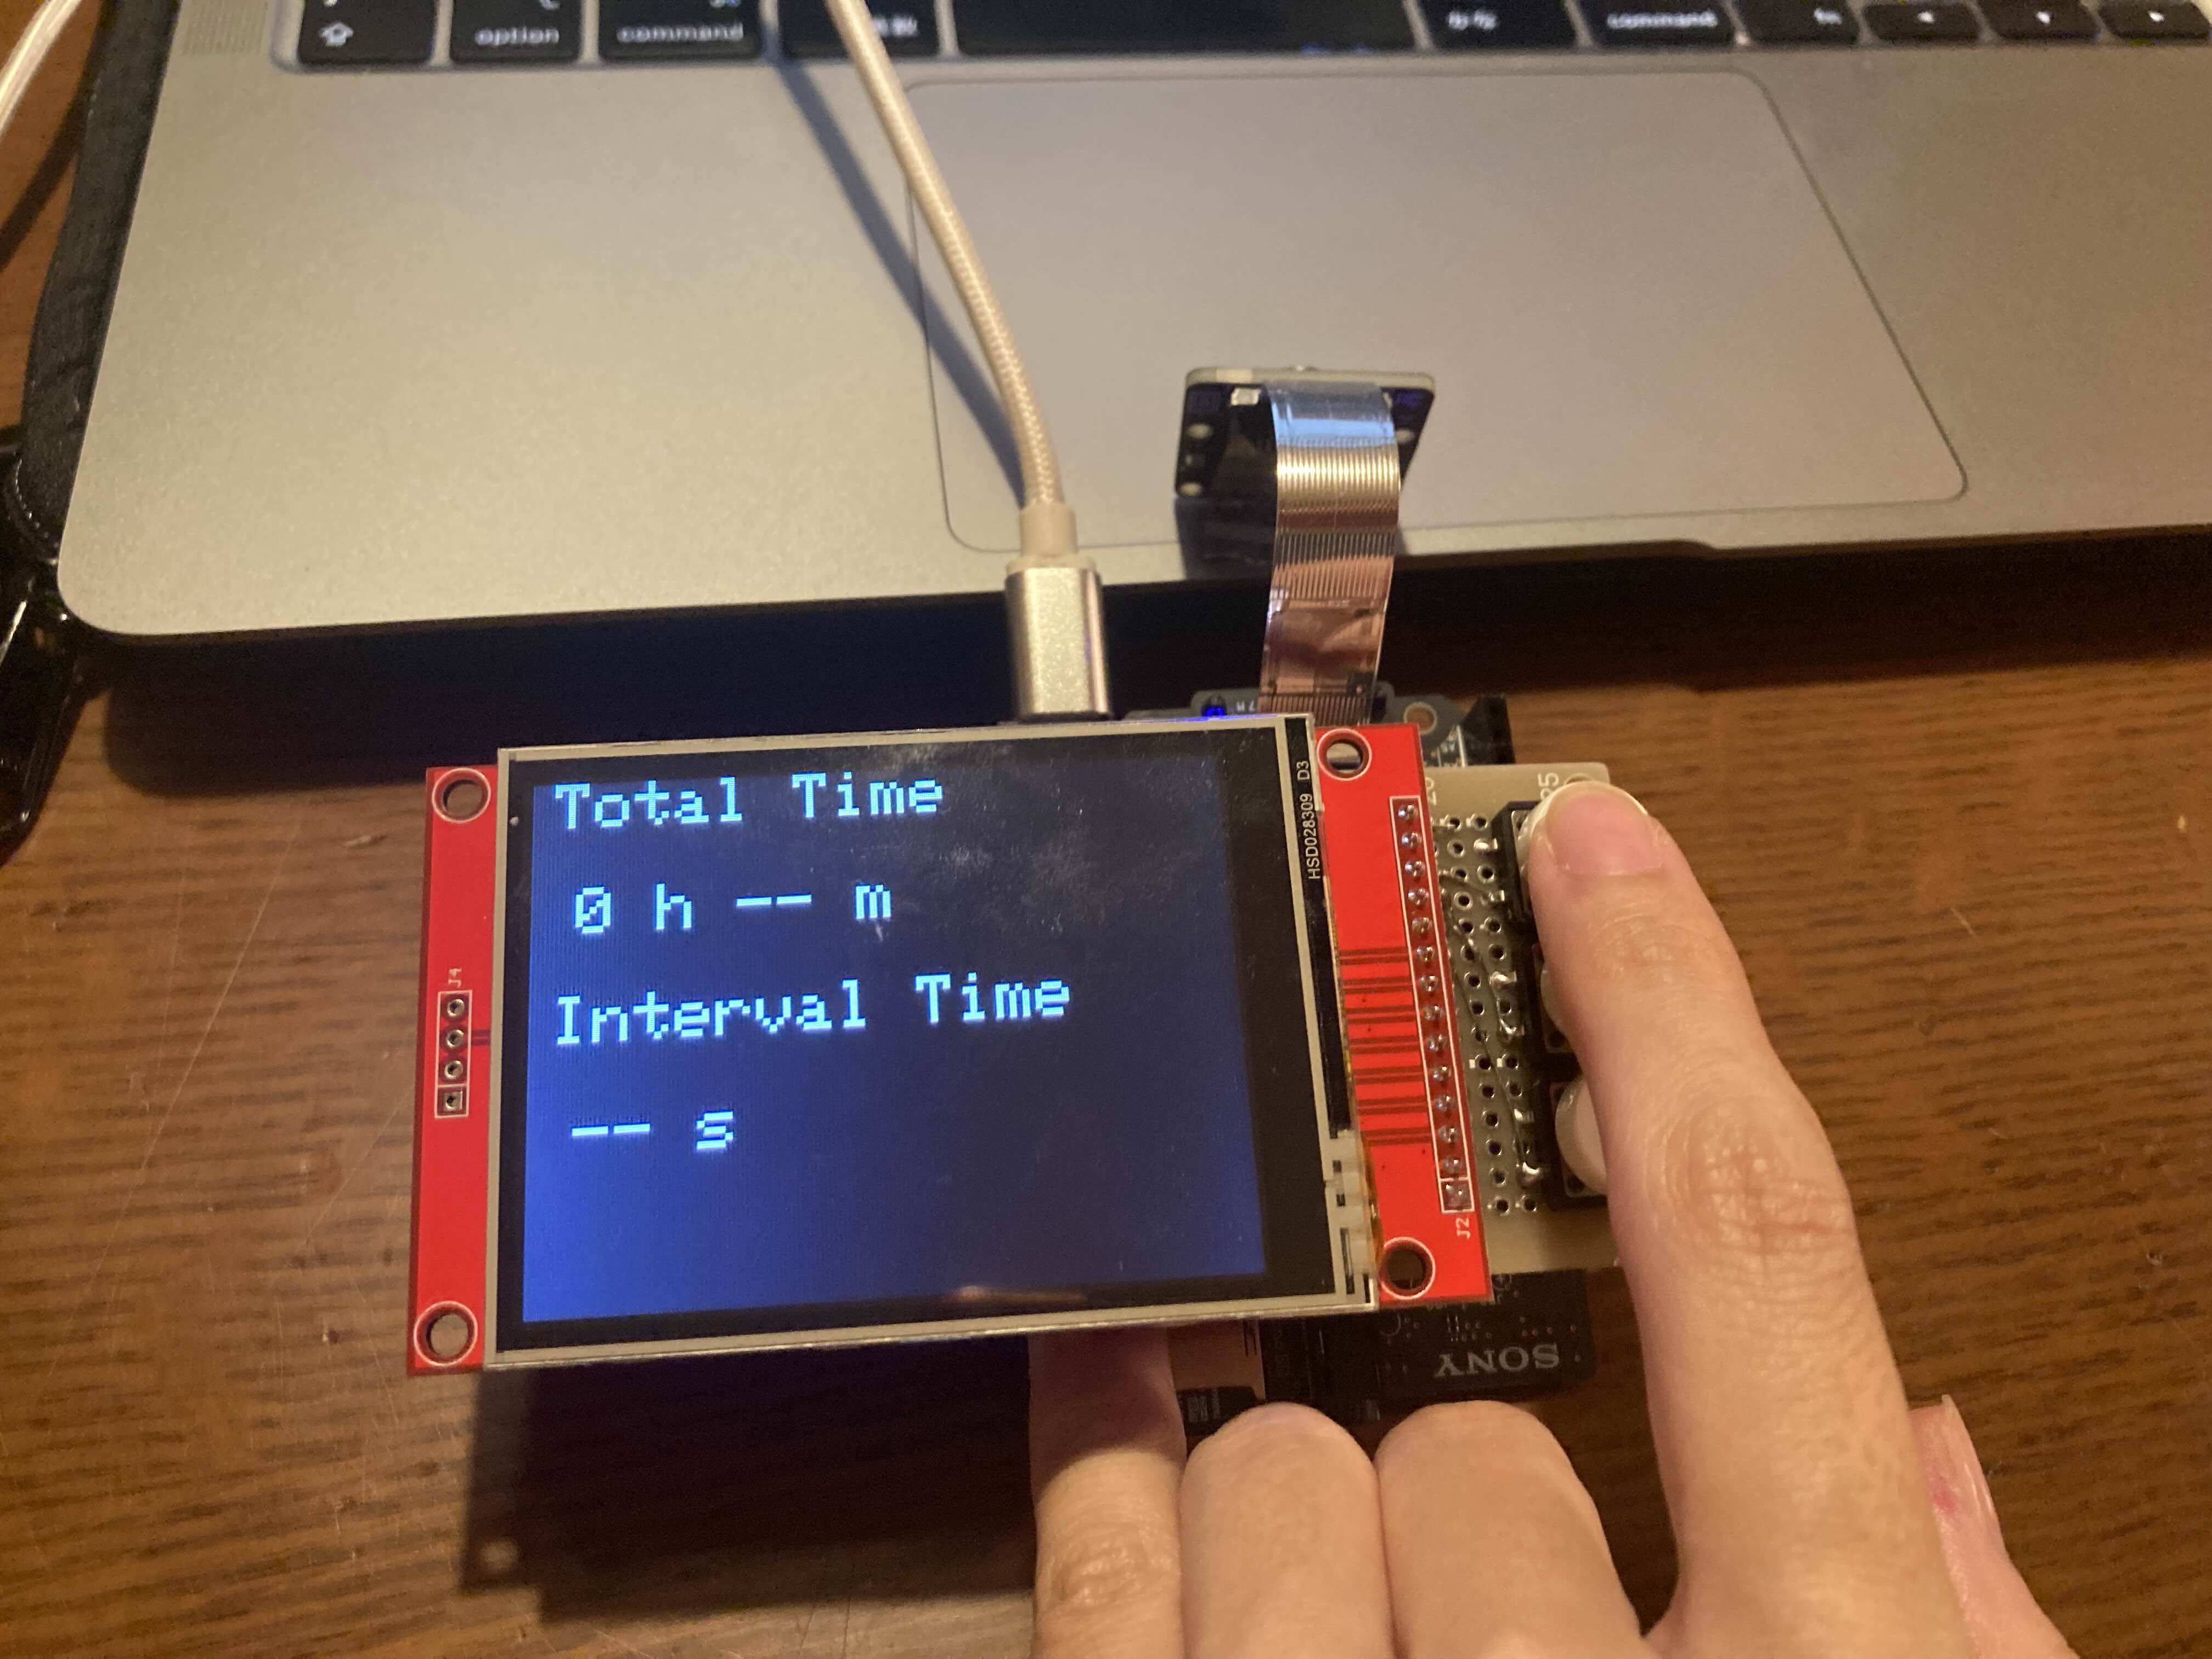 上下ボタンで値を設定します。 3ヶ所(トータル時間の時間、分、撮影間の秒数)設定して再びボタンを押すと、プレビュー確認画面を経て撮影スタートします。 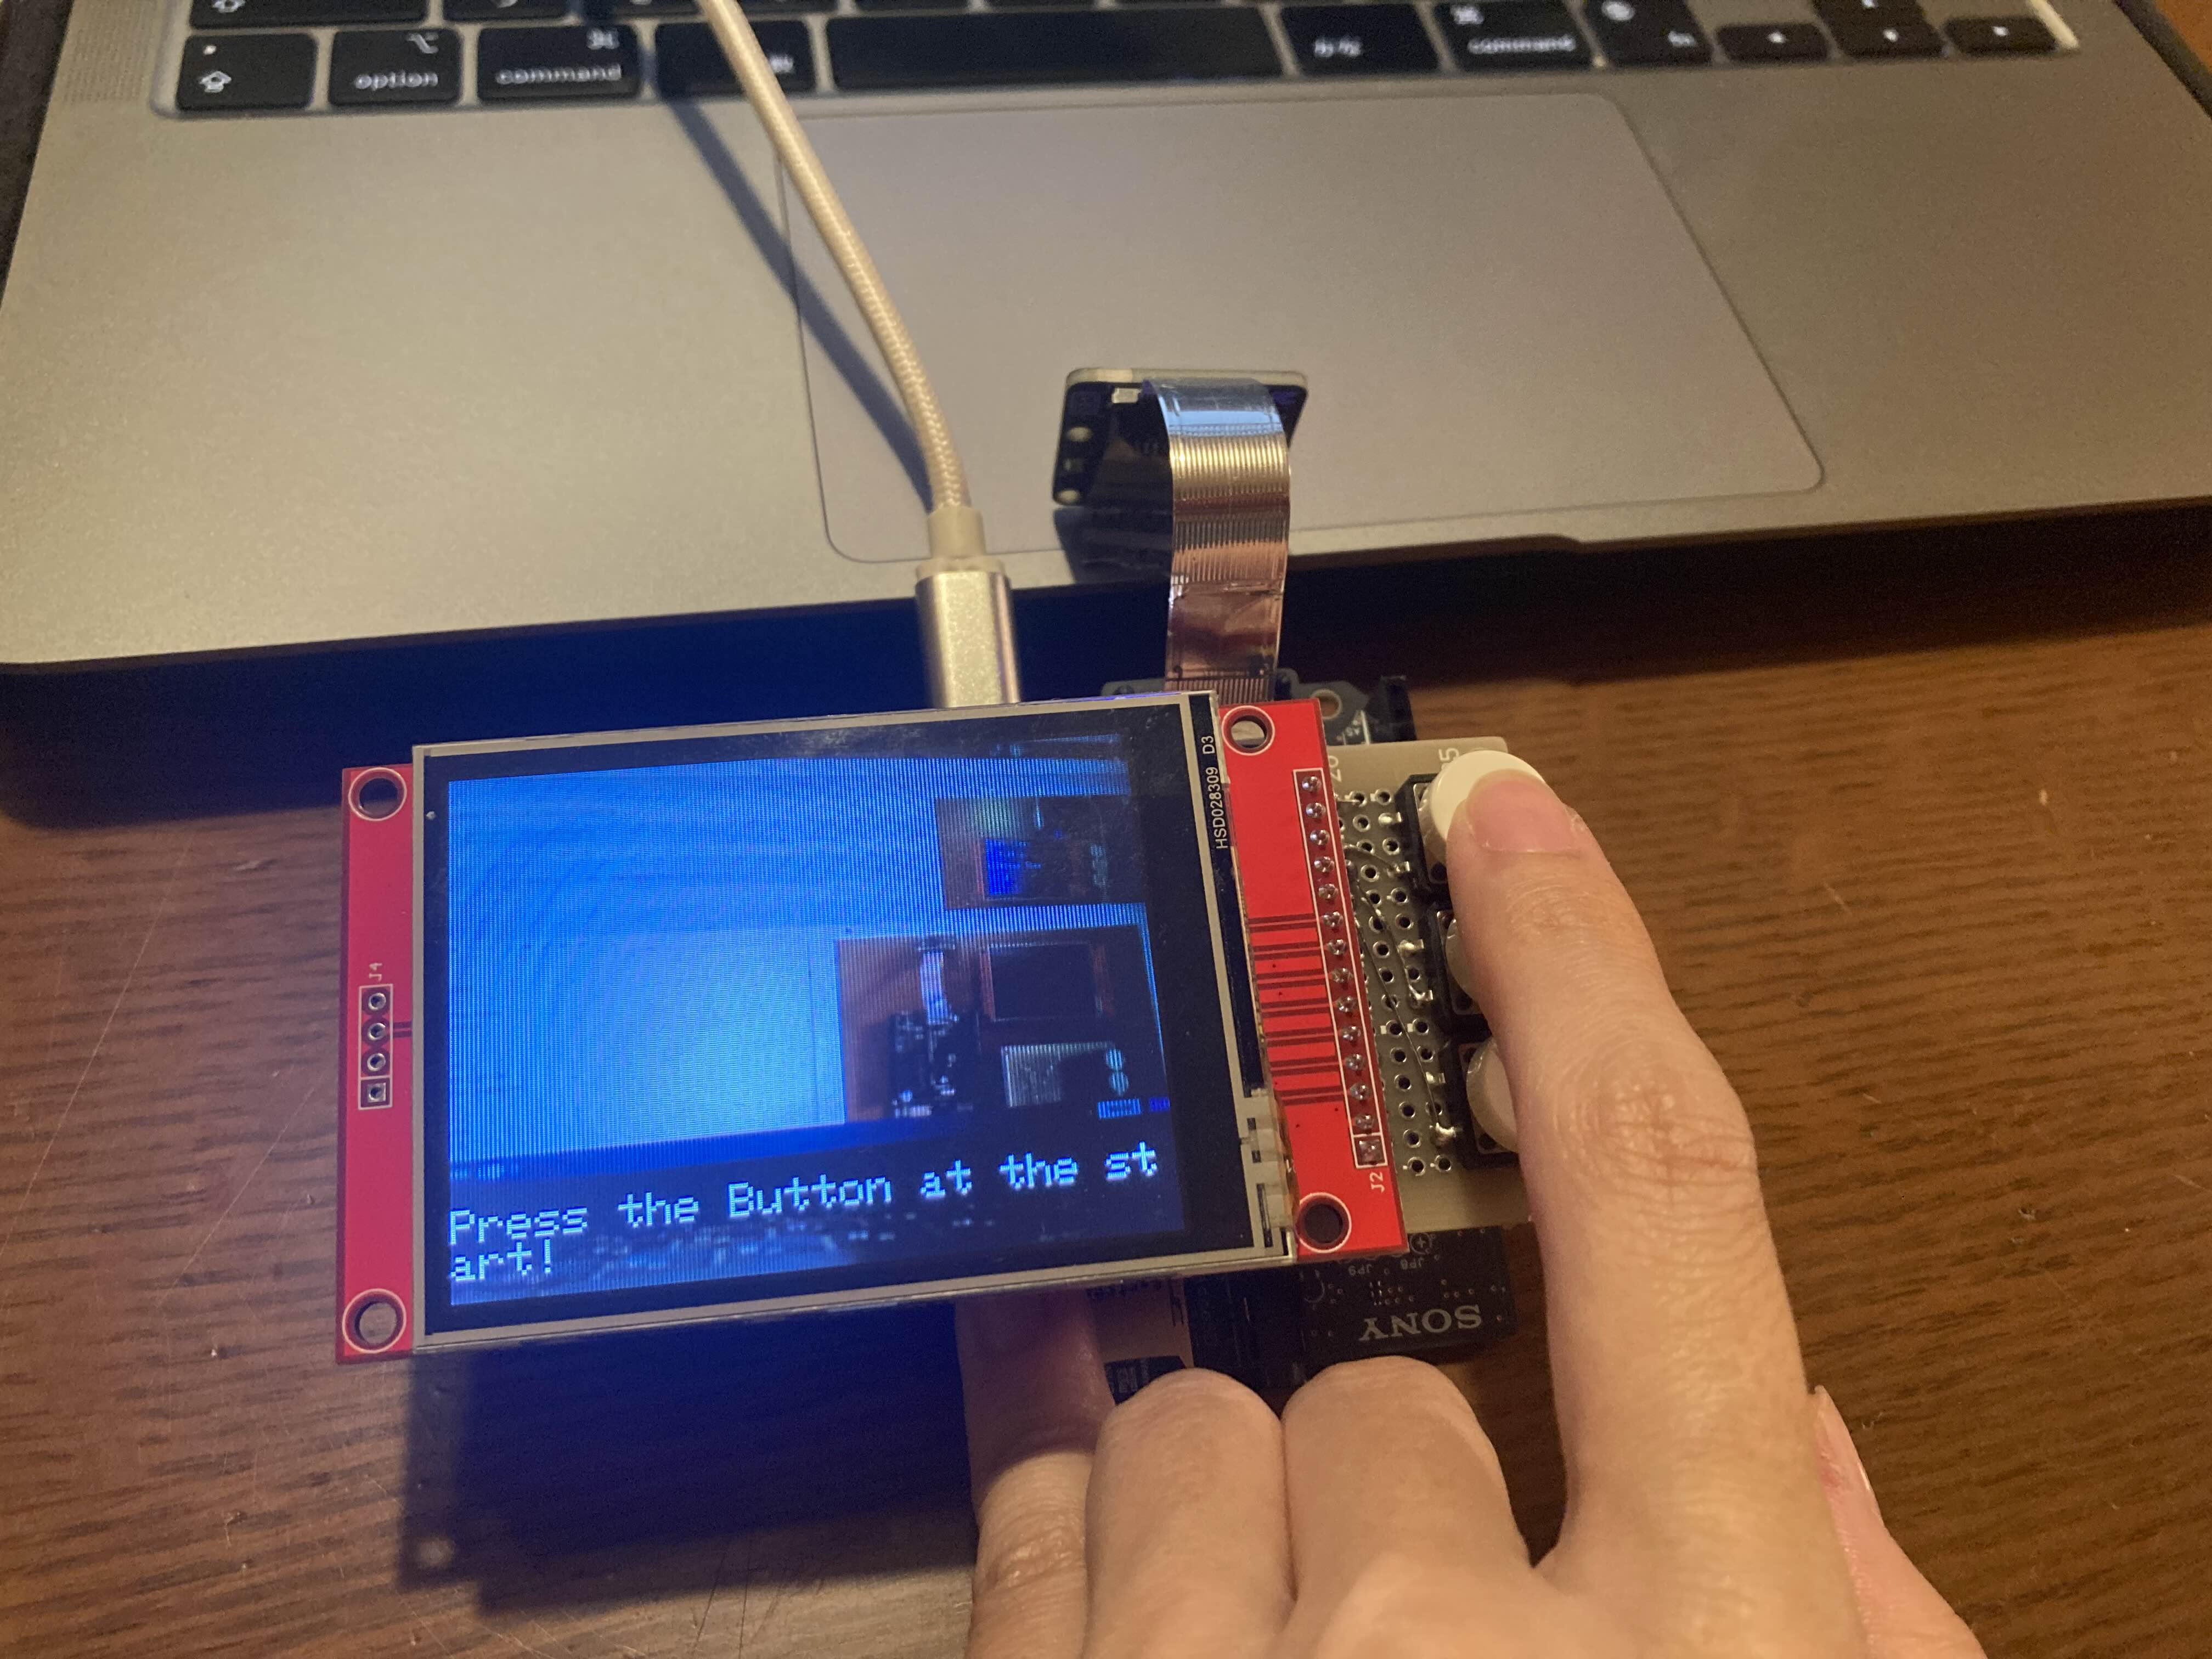 ## プログラム紹介 ```arduino:time_lapse #define LED_PIN 13 /*LCD setting*/ #include <SPI.h> #include <Adafruit_GFX.h> #include <Adafruit_ILI9341.h> #define TFT_CS -1 #define TFT_RST 8 #define TFT_DC 9 Adafruit_ILI9341 tft = Adafruit_ILI9341(&SPI, TFT_DC, TFT_CS, TFT_RST); /*LCD setting*/ /*Button setting*/ const int buttonPin1 = 23; // the number of the pushbutton pin int btn1_state = 0; int count1 = 0; const int buttonPin2 = 24; // the number of the pushbutton pin int btn2_state = 0; int count2 = 0; const int buttonPin3 = 25; // the number of the pushbutton pin int btn3_state = 0; int count3 = 0; int time_h = -1; int time_m = -1; int interval_s = -1; /*Button setting*/ #include <SDHCI.h> #include <stdio.h> /* for sprintf */ #include <Camera.h> #define BAUDRATE (115200) int TOTAL_PICTURE_COUNT; SDClass theSD; int take_picture_count = 0; /** * Print error message */ void printError(enum CamErr err) { Serial.print("Error: "); switch (err) { case CAM_ERR_NO_DEVICE: Serial.println("No Device"); break; case CAM_ERR_ILLEGAL_DEVERR: Serial.println("Illegal device error"); break; case CAM_ERR_ALREADY_INITIALIZED: Serial.println("Already initialized"); break; case CAM_ERR_NOT_INITIALIZED: Serial.println("Not initialized"); break; case CAM_ERR_NOT_STILL_INITIALIZED: Serial.println("Still picture not initialized"); break; case CAM_ERR_CANT_CREATE_THREAD: Serial.println("Failed to create thread"); break; case CAM_ERR_INVALID_PARAM: Serial.println("Invalid parameter"); break; case CAM_ERR_NO_MEMORY: Serial.println("No memory"); break; case CAM_ERR_USR_INUSED: Serial.println("Buffer already in use"); break; case CAM_ERR_NOT_PERMITTED: Serial.println("Operation not permitted"); break; default: break; } } /** * Callback from Camera library when video frame is captured. */ void CamCB(CamImage img) { /* Check the img instance is available or not. */ if (img.isAvailable()) { /* If you want RGB565 data, convert image data format to RGB565 */ img.convertPixFormat(CAM_IMAGE_PIX_FMT_RGB565); tft.drawRGBBitmap(0, 0, (uint16_t *)img.getImgBuff(), 320, 240); /* You can use image data directly by using getImgSize() and getImgBuff(). * for displaying image to a display, etc. */ Serial.print("Image data size = "); Serial.print(img.getImgSize(), DEC); Serial.print(" , "); Serial.print("buff addr = "); Serial.print((unsigned long)img.getImgBuff(), HEX); Serial.println(""); } else { Serial.println("Failed to get video stream image"); } } void check_btn23(){ int btn2 = digitalRead(buttonPin2); int btn3 = digitalRead(buttonPin3); if (btn2 == HIGH && btn2_state ==0) { count2 ++; btn2_state = 1; } if(btn2 == LOW){ btn2_state = 0; } if (btn3 == HIGH && btn3_state ==0) { count2 --; btn3_state = 1; } if(btn3 == LOW){ btn3_state = 0; } } /** * @brief Initialize camera */ void setup() { /*LCD*/ tft.begin(40000000); tft.setRotation(1); /*LCD*/ CamErr err; // initialize the pushbutton pin as an input: pinMode(buttonPin1, INPUT_PULLDOWN); pinMode(buttonPin2, INPUT_PULLDOWN); pinMode(buttonPin3, INPUT_PULLDOWN); /* Open serial communications and wait for port to open */ Serial.begin(BAUDRATE); while (!Serial) { ; /* wait for serial port to connect. Needed for native USB port only */ } /* Initialize SD */ while (!theSD.begin()) { /* wait until SD card is mounted. */ Serial.println("Insert SD card."); } /* begin() without parameters means that * number of buffers = 1, 30FPS, QVGA, YUV 4:2:2 format */ Serial.println("Prepare camera"); err = theCamera.begin(); if (err != CAM_ERR_SUCCESS) { printError(err); } /* Start video stream. * If received video stream data from camera device, * camera library call CamCB. */ /*Serial.println("Start streaming"); err = theCamera.startStreaming(true, CamCB); if (err != CAM_ERR_SUCCESS) { printError(err); }*/ /* Auto white balance configuration */ Serial.println("Set Auto white balance parameter"); err = theCamera.setAutoWhiteBalanceMode(CAM_WHITE_BALANCE_DAYLIGHT); if (err != CAM_ERR_SUCCESS) { printError(err); } /* Set parameters about still picture. * In the following case, QUADVGA and JPEG. */ Serial.println("Set still picture format"); err = theCamera.setStillPictureImageFormat( CAM_IMGSIZE_QUADVGA_H, CAM_IMGSIZE_QUADVGA_V, CAM_IMAGE_PIX_FMT_JPG); if (err != CAM_ERR_SUCCESS) { printError(err); } } /** * @brief Take picture with format JPEG per second */ void loop() { //sleep(1); /* wait for one second to take still picture. */ int btn1 = digitalRead(buttonPin1); if (btn1 == HIGH && btn1_state ==0) { //digitalWrite(LED0, HIGH); count1 ++; btn1_state = 1; } if(btn1 == LOW){ btn1_state = 0; } Serial.print(count1); if(count1%6 == 0){ theCamera.startStreaming(true, CamCB); count2 = 0; //reset count3 = 0; //reset }else if(count1%6 == 1){ theCamera.startStreaming(false, CamCB); check_btn23(); if(time_h != count2){ time_h = count2; tft.fillScreen(ILI9341_BLACK);//black tft.setTextColor(0xFFFF);//white tft.setTextSize(3); tft.setCursor(10, 0);//location tft.println("Total Time"); tft.setCursor(20, 50);//location tft.print(time_h); tft.println(" h -- m"); tft.setCursor(10, 100);//location tft.println("Interval Time"); tft.setCursor(20, 150);//location tft.println("-- s"); delay(10); } }else if(count1%6 == 2){ check_btn23(); if(time_m != count2){ time_m = count2; tft.fillScreen(ILI9341_BLACK);//black tft.setTextColor(0xFFFF);//white tft.setTextSize(3); tft.setCursor(10, 0);//location tft.println("Total Time"); tft.setCursor(20, 50);//location tft.print(time_h); tft.print(" h "); tft.print(time_m); tft.println(" m"); tft.setCursor(10, 100);//location tft.println("Interval Time"); tft.setCursor(20, 150);//location tft.println("-- s"); delay(10); } }else if(count1%6 == 3){ check_btn23(); if(interval_s != count2){ interval_s = count2; tft.fillScreen(ILI9341_BLACK);//black tft.setTextColor(0xFFFF);//white tft.setTextSize(3); tft.setCursor(10, 0);//location tft.println("Total Time"); tft.setCursor(20, 50);//location tft.print(time_h); tft.print(" h "); tft.print(time_m); tft.println(" m"); tft.setCursor(10, 100);//location tft.println("Interval Time"); tft.setCursor(20, 150);//location tft.print(interval_s); tft.println("0 s"); delay(10); } }else if(count1%6 == 4){ theCamera.startStreaming(true, CamCB); tft.setTextSize(2); tft.setCursor(0, 200);//location tft.println("Press the Button at the start!"); TOTAL_PICTURE_COUNT = (3600*time_h + 60*time_m) / (interval_s*10); }else if(count1%6 == 5){ check_btn23(); if (take_picture_count < TOTAL_PICTURE_COUNT) { Serial.println("call takePicture()"); CamImage img = theCamera.takePicture(); /* Check availability of the img instance. */ /* If any errors occur, the img is not available. */ if (img.isAvailable()) { /* Create file name */ char filename[16] = {0}; sprintf(filename, "PICT%03d.JPG", take_picture_count); Serial.print("Save taken picture as "); Serial.print(filename); Serial.println(""); /* Remove the old file with the same file name as new created file, * and create new file. */ theSD.remove(filename); File myFile = theSD.open(filename, FILE_WRITE); myFile.write(img.getImgBuff(), img.getImgSize()); myFile.close(); } else{ Serial.println("Failed to take picture"); } }else if (take_picture_count >= TOTAL_PICTURE_COUNT){ Serial.println("End."); //theCamera.end(); tft.setCursor(0, 200);//location tft.println("Time-lapse ends!"); } take_picture_count++; delay(interval_s * 10 *1000); } } ``` 基本的には[公式のCameraチュートリアル](https://developer.sony.com/develop/spresense/docs/arduino_tutorials_ja.html#_tutorial_camera)を参考に、ボタン入力の設定の追加を行った形です。 決定ボタン(buttonPin1)を押した回数(count1)でモードを切り替え、上下ボタン(buttonPin2/buttonPin3)で入力した値から、撮影枚数( TOTAL_PICTURE_COUNT)、撮影間のdelayの値を計算するようにしています。 ## テスト撮影 3Dプリンタで造形している様子を撮影してみました。 実際に保存されているものは動画…ではなく連番になっているjpeg画像なので、SDカードからPCに取り込んでスライドショー動画にしています。 @[youtube](https://youtu.be/A_yVWZEa54g)