作成意図
外出先で家の鍵閉めたっけ?と不安になることはないでしょうか?
この不安を解消するため、出先から鍵の様子を確認できるシステムを作りました。
主要部品
| 品名 | 用途 | 価格 |
|---|---|---|
| obniz Board 1Y | メインコンピュータ | 6,930円(税込) |
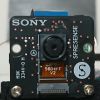
| Arducam Mini 2MP Plus | カメラ | 25.99$ |
| リレーモジュール | 照明スイッチング用 | 1000円くらい |
| 照明 | 撮影時の光源 | 家に転がってたので値段不明 |
| 人体赤外線感応モジュール | 人検知用 | 499円くらい |
システム構成
ざっくり説明すると人感検知をトリガーにカメラ撮影してSlackに画像と鍵開閉判断結果を送信している。
動作確認
動作確認した結果を下記に示す。
ソフトウェア
-
Slack送信
Slack公式ページに画像のアップロードの手法が詳細に記載してある。
本URL参照のこと。 -
鍵開閉判断
OpenCVとTensorFlowを使用し実現。
2.1. Step1 二値化
画像を二値化する。いきなり二値化すると具合が悪いのでグレースケールしてから二値化するといい感じになる。
2.2. Step2 テンプレートマッチング
二値化した画像でテンプレートマッチングを実施し、ドアの鍵部分のみをトリミングする。
2.3. Step3 機械学習
ドアの鍵部分の画像をいっぱい集めてラベルを付けて学習用画像データを作成する。ラベルは「Close」、「Open」、「Can not detect」の三項目。目視で開いてるか閉じてるか確認してラベルつけるからクッソめんどくさい。ラベルつけた後、学習用画像データをグレースケール化し、分類器を学習させる。
2.4. Step4 分類器
学習させた分類器に撮影した画像を入力すると、鍵が開いてるか閉じてるかを分類してくれる。下記画像は学習で使用していない画像を用いて分類させた結果を示している。それぞれの画像横の青いバーは、左から順に「Close」、「Open」、「Can not detect」の適合度を表しており、各テスト結果100%の適合度を示している。ほんとに合ってるかは不明。
-
カメラ撮影制御
obniz-python-sdkを使用。
本URL参照のこと。
この画像撮影において詰まったポイントが二つあるので紹介しておく。
3. 1. wifi接続が切れる事象
time.sleep関数を使用すると、obnizがフリーズの後wifi接続が切れる事象が発生した。おそらくtime.sleepによりバックグラウンドでやってたなんかの処理がtimeoutしたというオチだろう。あくまでも推測。そんな感じの動きだった。処理を待機させるときはawaitで正常動作を確認できた。
3. 2. JPEGが正常に表示されない事象
Arducamから取得したJPEGファイルを保存し、ビュアーで開くと「このファイルはサポートされていない形式のようです。」と表示される。バイナリエディタで中身を確認すると画像データの終わりを意味する「ff」「d9」のあとに「00」がいっぱい入っていた。このゴミデータが毎回入ってくるので、「ff」「d9」を検知し、それ以降を無視するような処理を入れることで対処できた。 -
照明制御
カメラ撮影前にオンにして撮影終了後にオフするだけ。
以下に分類器学習用のソースコードと、システム本体のソースコードを示す。
分類器学習用ソースコード
#!/usr/bin/env python3
# coding: UTF-8
import os
import glob
import numpy as np
import re
import cv2
import tensorflow as tf
from tensorflow import keras
import matplotlib.pyplot as plt
train_path = "train_data/"
train_filepath = "*.jpeg"
test_path = "test_data/"
test_filepath = "*.jpeg"
f_init = 0
def do_grayscale(image_path):
img = cv2.imread(image_path)
gray = cv2.cvtColor(img, cv2.COLOR_RGB2GRAY)
return gray
def plot_image(i, predictions_array, true_label, img):
predictions_array, true_label, img = predictions_array[i], true_label[i], img[i]
plt.grid(False)
plt.xticks([])
plt.yticks([])
plt.imshow(img, cmap=plt.cm.binary)
predicted_label = np.argmax(predictions_array)
if predicted_label == true_label:
color = 'blue'
else:
color = 'red'
plt.xlabel("{} {:2.0f}% ({})".format(class_names[predicted_label],
100*np.max(predictions_array),
class_names[true_label]),
color=color)
def plot_value_array(i, predictions_array, true_label):
predictions_array, true_label = predictions_array[i], true_label[i]
plt.grid(False)
plt.xticks([])
plt.yticks([])
thisplot = plt.bar(range(10), predictions_array, color="#777777")
plt.ylim([0, 1])
predicted_label = np.argmax(predictions_array)
thisplot[predicted_label].set_color('red')
thisplot[true_label].set_color('blue')
if __name__=="__main__":
#教師データ整理
f_init = 0
img_list = glob.glob(train_path + train_filepath)
for path in img_list:
tmp = path.split('_')
tmp2 = tmp[-2]
img_label = int(tmp2.replace('.jpeg',''))
if f_init == 0:
img_train = np.array(do_grayscale(path))
lab_train = np.array(img_label)
f_init = 1
else:
img = np.array(do_grayscale(path))
img_train = np.block([[[img_train]], [[img]]])
lab_train = np.append(lab_train, img_label)
print(lab_train)
train_images = img_train
train_labels = lab_train
f_init = 0
img_list = glob.glob(test_path + test_filepath)
for path in img_list:
tmp = path.split('_')
tmp2 = tmp[-2]
img_label = int(tmp2.replace('.jpeg',''))
if f_init == 0:
img_train = np.array(do_grayscale(path))
lab_train = np.array(img_label)
f_init = 1
else:
img = np.array(do_grayscale(path))
img_train = np.block([[[img_train]], [[img]]])
lab_train = np.append(lab_train, img_label)
print(lab_train)
test_images = img_train
test_labels = lab_train
class_names = ['close', 'open', 'other']
#トレーニング
train_images.shape
len(train_labels)
plt.figure()
plt.imshow(train_images[0])
plt.colorbar()
plt.grid(False)
plt.show()
train_images = train_images / 255.0
plt.figure(figsize=(10,10))
for i in range(25):
plt.subplot(5,5,i+1)
plt.xticks([])
plt.yticks([])
plt.grid(False)
plt.imshow(train_images[i], cmap=plt.cm.binary)
plt.xlabel(class_names[train_labels[i]])
plt.show()
model = keras.Sequential([
keras.layers.Flatten(input_shape=(45, 45)),
keras.layers.Dense(128, activation='relu'),
keras.layers.Dense(10, activation='softmax')
])
model.compile(optimizer='adam',
loss='sparse_categorical_crossentropy',
metrics=['accuracy'])
model.fit(train_images, train_labels, epochs=100)
model.save('saved_model/my_model')
test_loss, test_acc = model.evaluate(test_images, test_labels, verbose=2)
print('\nTest accuracy:', test_acc)
predictions = model.predict(test_images)
print(predictions)
# X個のテスト画像、予測されたラベル、正解ラベルを表示します。
# 正しい予測は青で、間違った予測は赤で表示しています。
num_rows = 3
num_cols = 2
num_images = num_rows*num_cols
plt.figure(figsize=(2*2*num_cols, 2*num_rows))
for i in range(num_images):
plt.subplot(num_rows, 2*num_cols, 2*i+1)
plot_image(i, predictions, test_labels, test_images)
plt.subplot(num_rows, 2*num_cols, 2*i+2)
plot_value_array(i, predictions, test_labels)
plt.show()家の鍵開閉状態を外出先から確認するシステムのソースコード
import asyncio
from obniz import Obniz
import datetime
import base64
import io
import time
import threading
import codecs
from slack import WebClient
import aiohttp
import json
import requests
import sys
import os
import tensorflow as tf
from tensorflow import keras
import numpy as np
import glob
import re
import cv2
import shutil
import matplotlib.pyplot as plt
#dooropen
TOKEN = "xoxb-xxxxxxxxxxxxxxxxxxxxxxxxxxxxxxxxxxxxxxxx"
CHANNEL = "XXXXXXXXXXXXX"
file_url = ""
save_path = 'download.jpeg'
TARGETPATH = "media/TARGET/"
TEMPPATH = "media/TEMP/"
OPENPATH = "open.jpeg"
CLOSEPATH = "close.jpeg"
TARGEFILETPATH = "*.jpeg"
last_vol = 0
last_time = 0
f_detect = 0
f_getpic = 0
f_delaypic = 0
obniz = Obniz('XXXX-XXXX')
async def onconnect(obniz):
global f_detect
global f_getpic
cam = obniz.wired("ArduCAMMini", {
"cs": 7, "mosi": 6, "miso": 5, "sclk": 4, "gnd": 3, "vcc": 2, "sda": 1, "scl": 0 ,"spi_frequency":100000,"module_version":1
})
obniz.io9.pull("5v")
while True:
vol = await obniz.ad8.get_wait()
hdetect(vol)
if f_getpic == 1:
obniz.io9.output(True)
await cam.startup_wait()
# data = await cam.take_wait('640x480')
data = await cam.take_wait('800x600')
head = 255
f_cnt = 0
cnt1 = 0
f = open("list.jpeg", 'bw')
f.write(head.to_bytes(1,'big'))
for x in data:
f.write(x.to_bytes(1,'big'))
if f_cnt == 1:
if data[cnt1] == 217:
if data[cnt1-1] == 255:
break
f_cnt = 1
cnt1 = cnt1 + 1
f.close()
print("done")
worker()
obniz.io9.output(False)
obniz.onconnect = onconnect
def hdetect(vol):
global last_vol
global last_time
global f_detect
global f_getpic
global f_delaypic
if vol - last_vol > 3.0:
print("detect!!!")
last_time = time.time()
f_detect = 1
if time.time() - last_time < 60.0 and f_detect == 1:
f_getpic = 1
f_delaypic = 1
f_detect = 0
if time.time() - last_time > 60.0 and f_delaypic == 1:
f_getpic = 1
f_delaypic = 0
last_vol = vol
def get_grayscale(image_path):
img = cv2.imread(image_path)
gray = cv2.cvtColor(img, cv2.COLOR_RGB2GRAY)
return gray
def do_grayscale(image_path):
img = cv2.imread(image_path)
gray = cv2.cvtColor(img, cv2.COLOR_RGB2GRAY)
save_image(image_path,"src", "gray", gray)
def do_binarization(image_path):
img = cv2.imread(image_path,0)
img_thresh = cv2.adaptiveThreshold(img,255,cv2.ADAPTIVE_THRESH_GAUSSIAN_C,cv2.THRESH_BINARY,41,2)
# ret, img_thresh = cv2.threshold(img, 110, 255, cv2.THRESH_BINARY)
save_image(image_path, "gray", "binary", img_thresh)
def do_template_matching(target_path,tmp_path):
template_img = cv2.imread(tmp_path + "binary/" + OPENPATH)
img_list = glob.glob(target_path + "binary/" + TARGEFILETPATH)
for path in img_list:
img = cv2.imread(path)
result = cv2.matchTemplate(img, template_img, cv2.TM_CCOEFF)
minVal, maxVal, minLoc, maxLoc = cv2.minMaxLoc(result)
ya, yb, xa, xb = maxLoc[0] + 0, maxLoc[0] + 45, maxLoc[1] + 0, maxLoc[1] + 45
lx, ly, rx, ry = maxLoc[0] + 45, maxLoc[1] + 45, maxLoc[0] + 0, maxLoc[1] + 0
source = cv2.imread(path.replace('binary', 'src'))
img_clip = source[xa : xb, ya : yb]
tmp_path = path.replace('.jpeg', '_')
tmp_path2 = tmp_path.replace('binary', 'result')
cv2.imwrite(tmp_path2 + "clip.jpeg" ,img_clip)
def save_image(img_path,bese_dir,dir, img):
dir_name = img_path.replace(bese_dir,dir)
cv2.imwrite(dir_name, img)
def worker():
global file_url
global f_getpic
file_url = "list.jpeg"
files = glob.glob('*.jpeg')
cnt = 0
for f in files:
shutil.copyfile(f,TARGETPATH + "src/" +str(cnt)+'_0.jpeg' )
cnt = cnt + 1
do_grayscale(TEMPPATH + "src/" + OPENPATH)
do_grayscale(TEMPPATH + "src/" + CLOSEPATH)
for path in glob.glob(TARGETPATH + "src/" + TARGEFILETPATH):
do_grayscale(path)
do_binarization(TEMPPATH + "gray/" + OPENPATH)
do_binarization(TEMPPATH + "gray/" + CLOSEPATH)
for path in glob.glob(TARGETPATH + "gray/" + TARGEFILETPATH):
do_binarization(path)
do_template_matching(TARGETPATH,TEMPPATH)
test_images = np.array(get_grayscale("media/TARGET/result/0_0_clip.jpeg"))
class_names = ['Close', 'Open', 'Cannot Detect']
model = tf.keras.models.load_model('saved_model/my_model')
model.compile(optimizer='adam',
loss='sparse_categorical_crossentropy',
metrics=['accuracy'])
test_images = (np.expand_dims(test_images,0))
predictions = model.predict(test_images)
index_name = np.argmax(predictions)
if index_name > 2:
index_name = 2
if index_name < 0:
index_name = 2
print(class_names[index_name])
param = {
"token": TOKEN,
"channels": CHANNEL,
# "filename":"filename",
"initial_comment": class_names[index_name]
# "title": "title"
}
files = {'file': open(file_url, 'rb')}
url = "https://slack.com/api/files.upload"
requests.post(url, data=param, files=files)
f_getpic = 0
if __name__=="__main__":
print("start")
asyncio.get_event_loop().run_forever()まとめ
作った後に分類器なんか使わんでも画像送信だけでいいのでは?と考えたが、読み上げ機能と組み合わせることで目が不自由な人や画像を確認できない状況にある人に対して効果を発揮できると考えられる。
この出先から鍵の様子を確認できるシステムにより、外出先で家の鍵閉めたっけ?と不安になることはないでしょう。やったね!!!
- jonajiro さんが 2021/05/03 に 編集 をしました。 (メッセージ: 初版)
- jonajiro さんが 2021/05/09 に 編集 をしました。 (メッセージ: 見出し追加)
- jonajiro さんが 2021/05/10 に 編集 をしました。
- jonajiro さんが 2021/05/10 に 編集 をしました。
- jonajiro さんが 2021/05/10 に 編集 をしました。
- jonajiro さんが 2021/05/10 に 編集 をしました。
- jonajiro さんが 2021/05/10 に 編集 をしました。
- jonajiro さんが 2021/05/10 に 編集 をしました。
- jonajiro さんが 2021/05/16 に 編集 をしました。
投稿者の人気記事


