

Google Nest HubやLINE CLOVA DESKだと話した内容がモニターにリアルタイムに表示してくれますが、Echo Showでは表示してくれません。
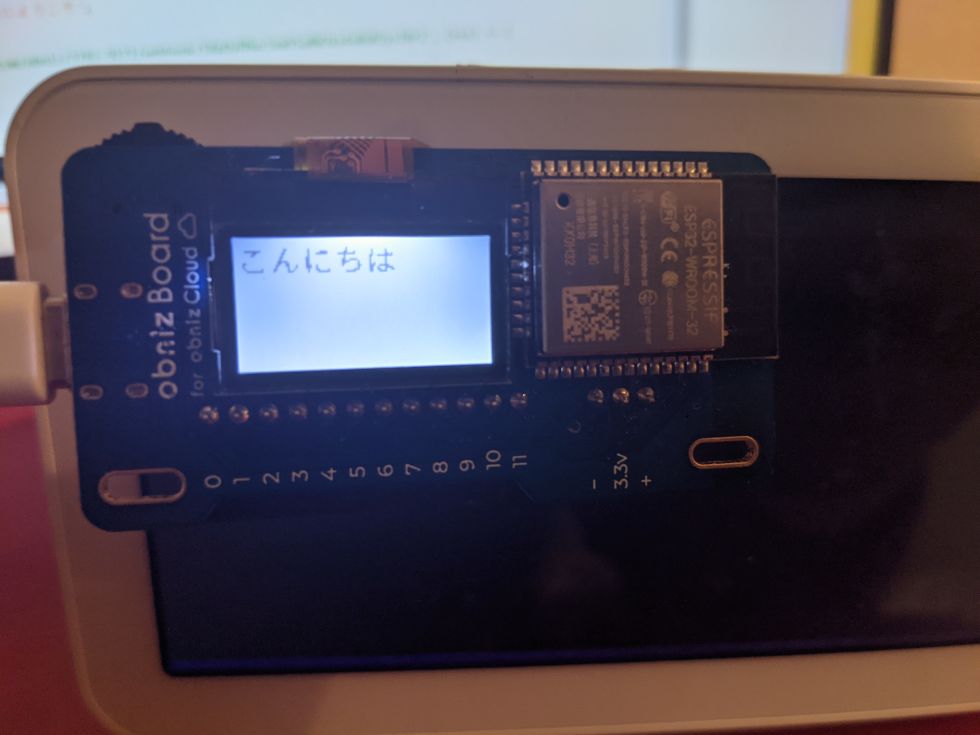
そのため、obnizを使って話した内容を表示させてみました。
Alexaのカスタムスキルをhostedスキルで実装します。
Alexa側コード
const Alexa = require('ask-sdk-core'); const webclient = require('request'); const LaunchRequestHandler = { canHandle(handlerInput) { return Alexa.getRequestType(handlerInput.requestEnvelope) === 'LaunchRequest'; }, handle(handlerInput) { const speakOutput = 'オブナイズテキスト表示にようこそ'; return handlerInput.responseBuilder .speak(speakOutput) .reprompt(speakOutput) .getResponse(); } }; const HelloWorldIntentHandler = { canHandle(handlerInput) { return Alexa.getRequestType(handlerInput.requestEnvelope) === 'IntentRequest' && Alexa.getIntentName(handlerInput.requestEnvelope) === 'HelloWorldIntent'; }, handle(handlerInput) { const speakOutput = handlerInput.requestEnvelope.request.intent.slots.message.value; // obniz呼び出し const obnizUrl = '<obnizのWebhook URL(GET/POST)>'; webclient.get({ url: obnizUrl, qs: { message: speakOutput } }, function (error, response, body) { console.log(body); }); return handlerInput.responseBuilder .speak(speakOutput) .reprompt(speakOutput) .getResponse(); } }; exports.handler = Alexa.SkillBuilders.custom() .addRequestHandlers( LaunchRequestHandler, HelloWorldIntentHandler, HelpIntentHandler, CancelAndStopIntentHandler, FallbackIntentHandler, SessionEndedRequestHandler, IntentReflectorHandler) .addErrorHandlers( ErrorHandler) .withCustomUserAgent('sample/hello-world/v1.2') .lambda();
requestモジュールを使うので、package.jsonに追加します。
(obnizへのgetを標準のhttpsモジュールを使うようにすると、これは不要なのですが、
requestモジュールの方が綺麗にかけるので、こうしています。)
Alexa側package.json
{ "name": "hello-world", "version": "1.2.0", "description": "alexa utility for quickly building skills", "main": "index.js", "scripts": { "test": "echo \"Error: no test specified\" && exit 1" }, "author": "Amazon Alexa", "license": "Apache License", "dependencies": { "ask-sdk-core": "^2.7.0", "ask-sdk-model": "^1.19.0", "aws-sdk": "^2.326.0", "request": "^2.88.2" } }
発話した内容を全部取得するように、カスタムスロットをつくります。
対話モデルの全内容はこちらになります。
(テンプレートのHelloWorldIntentをベースにしています。)
Alexa側対話モデルJSON
{ "interactionModel": { "languageModel": { "invocationName": "テキスト表示", "intents": [ { "name": "AMAZON.CancelIntent", "samples": [] }, { "name": "AMAZON.HelpIntent", "samples": [] }, { "name": "AMAZON.StopIntent", "samples": [] }, { "name": "HelloWorldIntent", "slots": [ { "name": "message", "type": "any" } ], "samples": [ "{message}" ] }, { "name": "AMAZON.NavigateHomeIntent", "samples": [] } ], "types": [ { "name": "any", "values": [ { "name": { "value": "テスト" } } ] } ] } } }
次に、obnizはブラウザアプリとして実装します。
(ブロックプログラムでは、webhookの入力値を取得する手段がないようです。)
obniz側
<html> <head> <meta charset="utf-8" /> <meta name="viewport" content="width=device-width, initial-scale=1" /> <link rel="stylesheet" href="https://stackpath.bootstrapcdn.com/bootstrap/4.3.1/css/bootstrap.min.css" /> <script src="https://code.jquery.com/jquery-3.2.1.min.js"></script> <script src="https://unpkg.com/obniz@3.x/obniz.js" crossorigin="anonymous" ></script> </head> <body> <div id="obniz-debug"></div> <script> const obniz = new Obniz("OBNIZ_ID_HERE"); // called on online obniz.onconnect = async function() { let request = {}; if (typeof req === "object") { request = req; obniz.display.clear(); obniz.display.print(request.query.message); Obniz.App.done(); } // called while online. obniz.onloop = async function() { }; }; // called on offline obniz.onclose = async function() { }; </script> </body> </html>
アプリの設定で「Webhookで実行」をONにします。
デバイス画面で「Webhook URLの確認」をクリックします。
「Webhook URL(GET/POST)」の値をAlexa側のコードに設定します。
これでAlexaでスキルを起動して、その後、発話した内容がobnizに表示されます。
-
fukumura
さんが
2021/05/16
に
編集
をしました。
(メッセージ: 初版)
-
fukumura
さんが
2021/05/16
に
編集
をしました。
-
fukumura
さんが
2021/05/16
に
編集
をしました。
ログインしてコメントを投稿する