


概要
ESP32でWi-Fi通信を行い、webブラウザで入力した文字列をモールス信号に変換し、2色のLEDの点滅として出力します。
モールス信号を光の明滅で表現するのは最近見た某映画から発想しました。
主要な部品
- ESP32開発ボード
- LED×2(赤/青)
- 抵抗(100Ω)×2
その他導線、電池、外装(3Dプリンターで制作)など
回路
2番ピンと19番ピンにそれぞれLEDと抵抗を接続しています。
プログラム
#include <WiFi.h>

//ここに自分の環境のWiFi情報を入れる
const char* ssid = "hogehoge";
const char* password = "hogehogepaswd";

WiFiServer server(80);
int pin1 = 2;
int pin2 = 19;
int timeUnit = 100;
char inputChar;

void setup()
{
    Serial.begin(115200);
    pinMode(pin1, OUTPUT);      // set the LED pin mode
    pinMode(pin2,OUTPUT);

    delay(10);

    // We start by connecting to a WiFi network -----------------------------
    Serial.println();
    Serial.print("Connecting to ");
    Serial.println(ssid);

    WiFi.begin(ssid, password);

    while (WiFi.status() != WL_CONNECTED) {
        delay(500);
        Serial.print(".");
    }

    Serial.println("");
    Serial.println("WiFi connected.");
    Serial.print("IP address: ");
    Serial.println(WiFi.localIP());
    //ここで取得したIPアドレスをブラウザで入力
    server.begin();
}

void loop(){
  WiFiClient client = server.available();     // listen for incoming clients
  int pos ;
  String cmd = "" ;

  if (client) {                                               // if you get a client,
    Serial.println("***** Client access start *****");       // print a message out the serial port
    while (client.connected()) {                              // loop while the client's connected
      if (client.available()) {                               // if there's bytes to read from the client,
        String line = client.readStringUntil('\n');           // Get Line data until '\n'1行ずつ読んでいく
        Serial.print("client:");
        Serial.println(line);
        if ((pos= line.indexOf("GET /?led_v")) != -1) {//指定の文字列がある
          Serial.print("client:") ;
          Serial.println(line);
          Serial.println("volume");
          pos += 12 ;
          Serial.println(pos);
          while(line.charAt(pos) !='&') {//文字列からpos番目の文字列を抜き出す(〜&が出てくるまで)
            inputChar = line.charAt(pos++) ;
            morse(inputChar);//対応する文字のモールス信号を出力
            cmd += inputChar;//1文字ずつ右に足していく
          }
          Serial.print("cmd : ");
          Serial.println(cmd) ;//入力した文字列(シリアルモニタで確認する用)
        }

        if (line.length() == 1 && line[0] == '\r'){           // end of HTTP request
          send_response(client) ;                             // send response to client
          break;                                              // break while loop
        }
      }
    }
    delay(1);                                        // give the web browser time to receive the data
    // close the connection:
    client.stop();
    Serial.println("Client Disconnected.");
    Serial.println("--------------------------------------------------");
  }
}

// ------------------------------------------------------------------
//ブラウザ表示用のHTML
void send_response(WiFiClient client) {
    // HTTP headers always start with a response code (e.g. HTTP/1.1 200 OK)
    // and a content-type so the client knows what's coming, then a blank line:
    client.println("HTTP/1.1 200 OK");
    client.println("Content-type:text/html");
    client.println();
    // the content of the HTTP response follows the header:
    client.println("<!DOCTYPE html><html lang='ja'><head><meta charset='UTF-8'>" ) ;
    client.println("<style>" ) ;
    //client.println("       input.button {margin-left:8px; width:80px; height:30px;background-color:#4682b4; color:#fff;}" ) ;
    client.println("       inlut.button{width:80px; height:30px;margin-left:8px;text-decoration: none;color:#fff;border: solid 2px #4682b4;border-radius: 3px;transition: .4s;}");
    client.println("       input.button:hover{background-color:#4682b4; color:#fff;border-radius: 3px;}" ) ;
    client.println("       input.text   {border-radius: 3px;}" ) ;
    client.println("       div   {font-size:20pt;text-align:center;margin:5%;padding:10%;border:solid 10px #4682b4;} " ) ;
    client.println("       </style>" ) ;
    client.println("<title>LED Morse Signal</title></head>" ) ;
    client.println() ;
    client.println("<body><div><p>LED Morse Signal</p>" ) ;
    client.println("  <form method='get'style='text-align:center'> " ) ;
    client.println("    <span style=' font-size:12pt ;text-align:center'> <p>input text(a-z only)</p></span> " ) ;
    client.print("    <input class='text'  type='text' name='led_v'>" ) ;
    client.println("<input class='button' type='submit' name='convert' value='CONVERT'></form> " ) ;
    client.println("  </div></body>" ) ;
    client.println("</html>" ) ;
    client.println();
    Serial.println( " --- send responce --- ");
}

//以下はモールス信号用のプログラム
void dot(){//トン
  digitalWrite(pin1,HIGH);
  delay(timeUnit);
  digitalWrite(pin1,LOW);
  delay(timeUnit);
}

void dash(){//ツー
  digitalWrite(pin2,HIGH);
  delay(timeUnit * 3);
  digitalWrite(pin2,LOW);
  delay(timeUnit);
}

void letterPause(){//2符号の間隔
  delay(timeUnit *3);
}

void wordPause(){//2語の間隔
  delay(timeUnit *7);
}

void lA () {dot();dash();letterPause();}//letter A in morse code!
void lB () {dash();dot();dot();dot();letterPause();}//same for B
void lC () {dash();dot();dash();dot();letterPause();}
void lD () {dash();dot();dot();letterPause();}
void lE () {dot();letterPause();}
void lF () {dot();dot();dash();dot();letterPause();}
void lG () {dash();dash();dot();letterPause();}
void lH () {dot();dot();dot();dot();letterPause();}
void lI () {dot();dot();letterPause();}
void lJ () {dot();dash();dash();dash();letterPause();}
void lK () {dash();dot();dash();letterPause();}
void lL () {dot();dash();dot();dot();letterPause();}
void lM () {dash();dash();letterPause();}
void lN () {dash();dot();letterPause();}
void lO () {dash();dash();dash();letterPause();}
void lP () {dot();dash();dash();dot();letterPause();}
void lQ () {dash();dash();dot();dash();letterPause();}
void lR () {dot();dash();dot();letterPause();}
void lS () {dot();dot();dot();letterPause();}
void lT () {dash();letterPause();}
void lU () {dot();dot();dash();letterPause();}
void lV () {dot();dot();dot();dash();letterPause();}
void lW () {dot();dash();dash();letterPause();}
void lX () {dash();dot();dot();dash();letterPause();}
void lY () {dash();dot();dash();dash();letterPause();}
void lZ () {dash();dash();dot();dot();letterPause();}

void morse(char input){
        if (input == 'a' || input == 'A') {lA();}//if the input is a or A go to function lA
        if (input == 'b' || input == 'B') {lB();}//same but with b letter
        if (input == 'c' || input == 'C') {lC();}
        if (input == 'd' || input == 'D') {lD();}
        if (input == 'e' || input == 'E') {lE();}
        if (input == 'f' || input == 'F') {lF();}
        if (input == 'g' || input == 'G') {lG();}
        if (input == 'h' || input == 'H') {lH();}
        if (input == 'i' || input == 'I') {lI();}
        if (input == 'j' || input == 'J') {lJ();}
        if (input == 'k' || input == 'K') {lK();}
        if (input == 'l' || input == 'L') {lL();}
        if (input == 'm' || input == 'M') {lM();}
        if (input == 'n' || input == 'N') {lN();}
        if (input == 'o' || input == 'O') {lO();}
        if (input == 'p' || input == 'P') {lP();}
        if (input == 'q' || input == 'Q') {lQ();}
        if (input == 'r' || input == 'R') {lR();}
        if (input == 's' || input == 'S') {lS();}
        if (input == 't' || input == 'T') {lT();}
        if (input == 'u' || input == 'U') {lU();}
        if (input == 'v' || input == 'V') {lV();}
        if (input == 'w' || input == 'W') {lW();}
        if (input == 'x' || input == 'X') {lX();}
        if (input == 'y' || input == 'Y') {lY();}
        if (input == 'z' || input == 'Z') {lZ();}
        if (input == ' ') {wordPause();}
}
Webからの入力に関してはこちらを、
https://qazsedcftf.blogspot.com/2018/07/arduinoled.html
モールス信号に関してはこちらを
https://deviceplus.jp/hobby/how-to-create-morse-code-generator/
参考にさせていただいています。
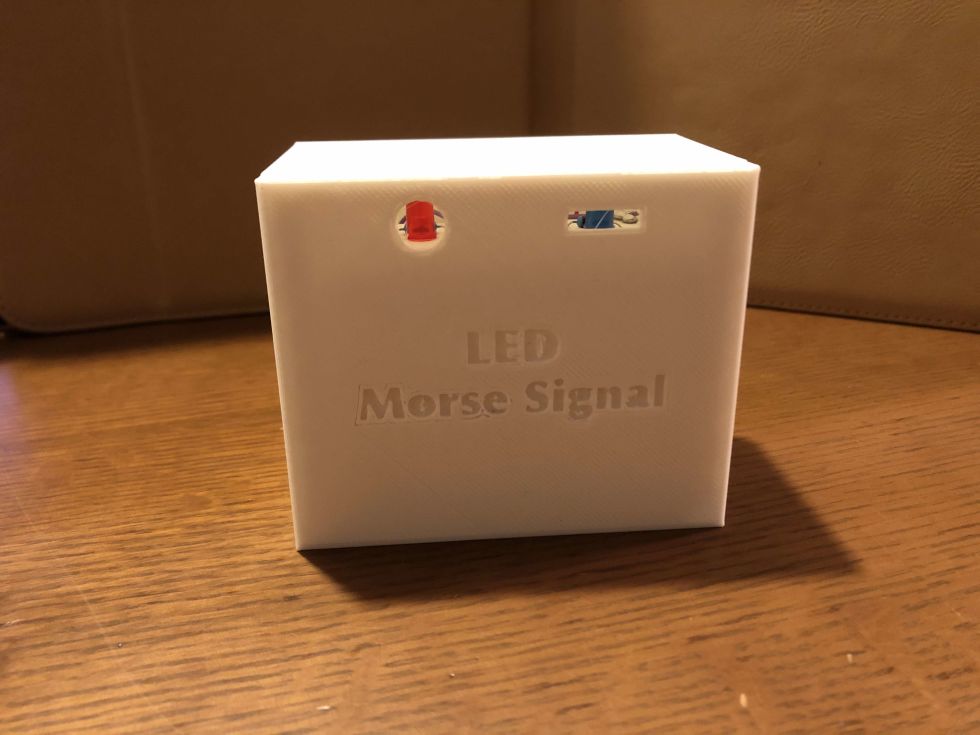
外装設計
3DCADで設計しました。
電池ケースと、マイコンを搭載するスペース・LEDを設置するスペースを内部に用意して、対応する蓋の部分にトン・ツーを表象する穴を開けています。
正面の蓋は上下にスライドして開きます。3Dプリンタで造形する都合を考え、蓋部・箱部・電池ボックス・電子部品用ユニットの4つに分けてあります。
完成
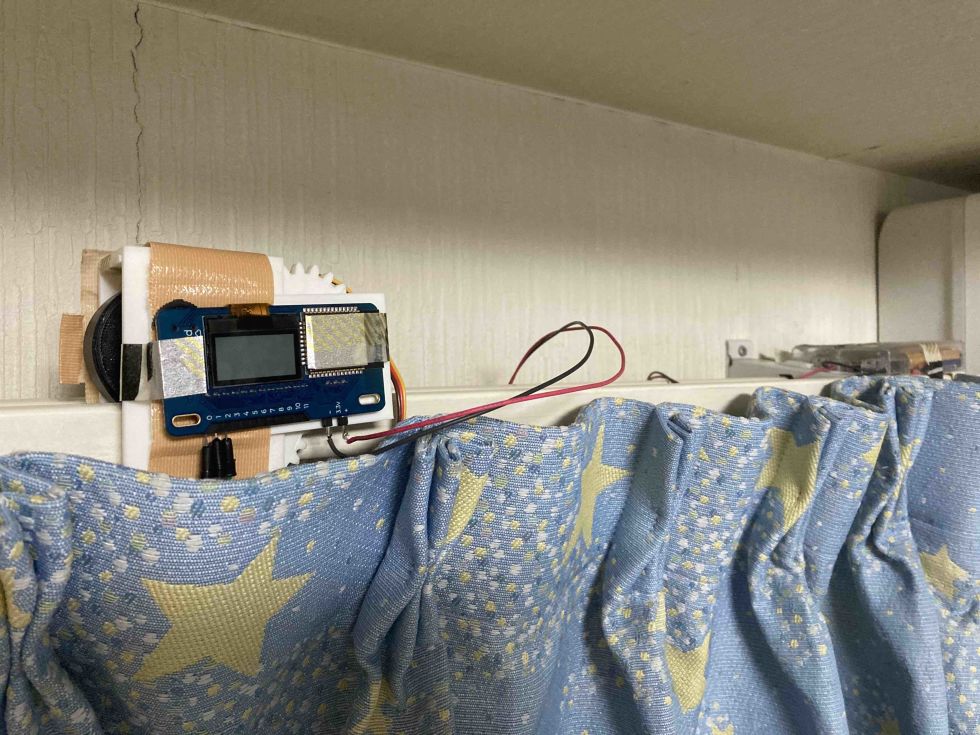
はんだ付けを行い、3Dプリンタで造形した外装の中に電子部品類を収めて完成。
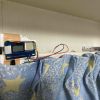
電源を入れ、事前にシリアルモニタを見て取得していたIPアドレスをブラウザに入力すると入力画面が表示されます。モールス信号に変換したい文字列を入力窓に記入して、[CONVERT]ボタンを押すと対応するLEDが点滅します。
ブラウザからの入力によって光らせた様子がこちら。
うまくいきました!
おわりに
電子工作初心者なものでプログラムはほとんど先人の方がwebで公開されていたものを組み合わせただけですが、自分で作りたいと思ったものが実際に完成すると感動しますね。
キャンペーンが良いきっかけになったのでこれからも色々作ってみたいと思います。

投稿者の人気記事

-
imm
さんが
2021/02/27
に
編集
をしました。
(メッセージ: 初版)
-
imm
さんが
2021/02/27
に
編集
をしました。
Opening
 Origen1970
2023/11/15
Origen1970
2023/11/15
ログインしてコメントを投稿するはじめまして。
とても面白い作品ですね。
明暗で暗号化ですと復号は
どのようにおこなうかアイデア
ございましたら教えていただきたいです。