 セットアップや使用方法
  2109
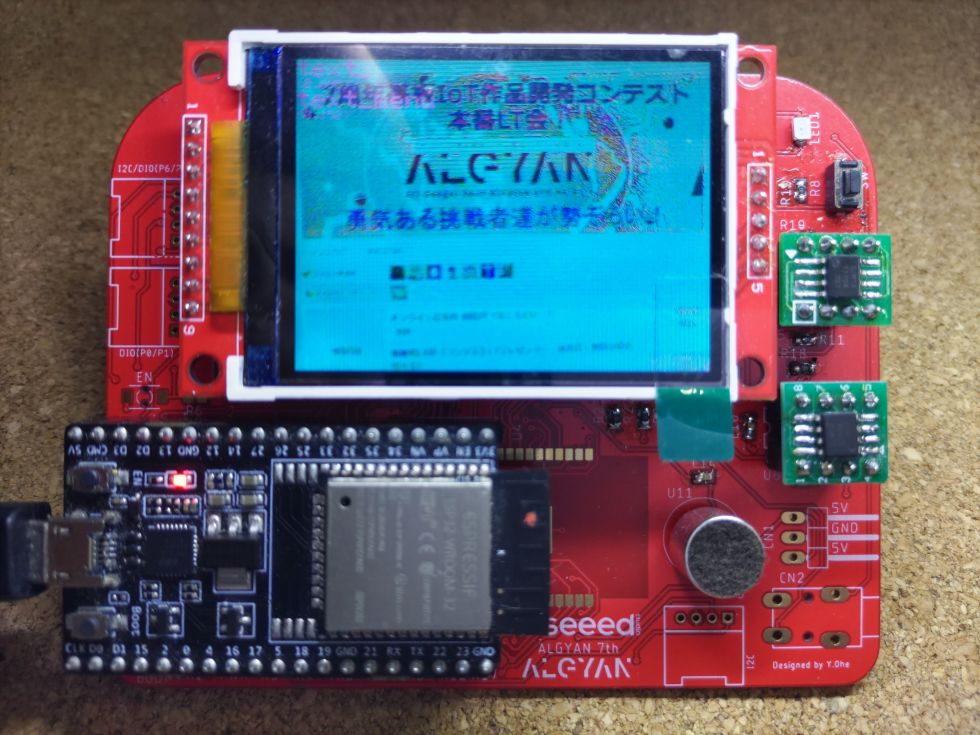
2109ALGYAN7周年基板で Azure Computer Vision を動かす
1. はじめに
IoT ALGYAN主催の 【オンライン】7周年基板IoT作品開発コンテスト 本番LT会! で発表した「メモリリソース不足で苦労しましたが、何とか7周年基板で Azure Computer Vision を動かせました」の発表で説明した内容を、自分で動かす為の方法を解説した記事となります。
2. 前提条件
Arduino IDE がインストールされており、ESP32 がコンパイルできる環境が出来ている前提。
そして、Microsoft Azure 自体への登録や Computer Vision API の使用準備については出来ている前提で進めます。
まだの方は Arduino についてはぐぐって、
Azure については Microsoft サイトに十分情報があるので、そちらを参照してください。
3. ソフトウェア
3-1. Arduino IDE で新規スケッチ作成
3-1-1. メインのソースファイル
Arduino IDE 新規スケッチを開き名前を付けて保存し、以下のファイルを貼り付けます。
Arduino用ソース
AzureComputerVisionWithALGYAN7thBoard.ino
/**************************************************
------------------------------------------
Azure Computer Vision with ALGYAN7th Board
by TakSan
------------------------------------------
必要ライブラリ:
Adafruit_GFX
Adafruit_ILI9341
Adafruit_PCF8574
ArduinoJson.h (諸事情にて少し前の 6.18.0)
ZIPから追加のライブラリ:
無し
プロジェクトフォルダに直接置いたファイル:
OV7670-ESP32 (https://github.com/kobatan/OV7670-ESP32) (サンプル以外)
***************************************************/
// -----=====<<<<<[[[[[ Include ]]]]]>>>>>=====-----
#include <Wire.h>
#include <SPI.h>
#include <Ticker.h>
#include <WiFiClientSecure.h>
#include <ArduinoJson.h>
#include <Adafruit_GFX.h>
#include <Adafruit_ILI9341.h>
#include <Adafruit_PCF8574.h>
//#include <FRAM.h>
#include "OV7670.h"
#include "PersonalDef.h"
// -----=====<<<<<[[[[[ Define ]]]]]>>>>>=====-----
// 機能スイッチ
#define OUTPUT_DEBUG_LOG_FOR_CLIENT_PRINT
#define OUTPUT_DEBUG_LOG_TO_LCD
#define USE_GRAYSCALE_IMAGE_FOR_ANALYZE
// マクロ関数
#if defined(OUTPUT_DEBUG_LOG_TO_LCD)
#define debug_printf(...) do{Serial.printf(__VA_ARGS__);tft.printf(__VA_ARGS__);}while(0)
#define debug_print(str) do{Serial.print(str);tft.print(str);}while(0)
#define debug_println(str) do{Serial.println(str);tft.println(str);}while(0)
#if defined(OUTPUT_DEBUG_LOG_FOR_CLIENT_PRINT)
#define client_printf(...) do{client.printf(__VA_ARGS__);Serial.printf(__VA_ARGS__);}while(0)
#define client_print(str) do{client.print(str);Serial.print(str);}while(0)
#define client_println(str) do{client.println(str);Serial.println(str);}while(0)
#else // defined(OUTPUT_DEBUG_LOG_FOR_CLIENT_PRINT)
#define client_printf(str, ...) client.printf(str, __VA_ARGS__)
#define client_print(str) client.print(str)
#define client_println(str) client.println(str)
#endif // defined(OUTPUT_DEBUG_LOG_FOR_CLIENT_PRINT)
#else // defined(OUTPUT_DEBUG_LOG_TO_LCD)
#define client_printf(str, ...) Serial.printf(str, __VA_ARGS__)
#define client_print(str) Serial.print(str)
#define client_println(str) Serial.println(str)
#if defined(OUTPUT_DEBUG_LOG_FOR_CLIENT_PRINT)
#define client_printf(...) do{client.printf(__VA_ARGS__);Serial.printf(__VA_ARGS__);}while(0)
#define client_print(str) do{client.print(str);Serial.print(str);}while(0)
#define client_println(str) do{client.println(str);Serial.println(str);}while(0)
#else // defined(OUTPUT_DEBUG_LOG_FOR_CLIENT_PRINT)
#define client_printf(str, ...) client.printf(str, __VA_ARGS__)
#define client_print(str) client.print(str)
#define client_println(str) client.println(str)
#endif // defined(OUTPUT_DEBUG_LOG_FOR_CLIENT_PRINT)
#endif // defined(OUTPUT_DEBUG_LOG_TO_LCD)
// [ALGAYN7周年基板ハード]
// ESP32 直ピン
#define PIN_TFT_DC 27
#define PIN_TFT_CS 5
#define PIN_LED 26
#define PIN_SPI_SCK 18
#define PIN_SPI_MOSI 23
#define PIN_SPI_MISO 19
#define PIN_FRAM1_CS 4
#define PIN_FRAM2_CS 32
// PCF8574 経由ピン
#define PIN_SEL_CAM_SD 4
#define PIN_SW 5
#define IO_EXP_SLAVE_ADR 0x20 // 0x20 の物と 0x38 の物の複数の種類があるようです。お手持ちのに変えてください。
// 画面・画像関連
#define IMAGE_WIDTH 320
#define IMAGE_HEIGHT 240
#define BITMAP_HEADER_SIZE 0x36
#define BITMAP_FILE_SIZE (BITMAP_HEADER_SIZE+(IMAGE_WIDTH*IMAGE_HEIGHT*3))
#define SEND_LINES 6
#define PROGRESS_BAR_HEIGHT 4
#define PROGRESS_BAR_CLEAR -1
// FRAM関連
// FRAM OP-CODE
#define OP_WREN 0x06 // Set Write Enable Latch
#define OP_WRDI 0x04 // Reset Write Enable Latch
#define OP_RDSR 0x05 // Read Status Register
#define OP_WRSR 0x01 // Write Status Register
#define OP_READ 0x03 // Read Memory Code
#define OP_WRITE 0x02 // Write Memory Code
#define OP_RDID 0x9F // Read Device ID
#define OP_FSTRD 0x0B // Fast Read Memory Code
#define OP_SLEEP 0xB9 // Fast Read Memory Code
#define FRAM_CMD_SIZE 4
#define FRAM_DMA_BUFFER_SIZE (FRAM_CMD_SIZE+(IMAGE_WIDTH*2))
// 通信関連
#define WIFI_CONNECT_RETRY_MAX 60 // WiFi接続リトライ回数(1秒に1回)
#define POST_RESPONSE_TIMEOUT_SEC 30
// キー関連
#define KEY_MASK 0xF
// デバッグ関連
#define DUMP_WITHOUT_ADDRESS 0xFFFFFFFFu
// -----=====<<<<<[[[[[ Types ]]]]]>>>>>=====-----
// システム状態
typedef enum {
e_state_initial = 0, // 初期化中状態
e_state_live_cam, // カメラリアルタイム表示状態
e_state_analizing, // 画像解析中状態
e_state_show_result, // 解析結果表示状態
} e_state_t;
typedef enum {
e_res_status = 0, // ステータスライン待ち
e_res_header, // レスポンスヘッダー待ち
e_res_body // レスポンスボディ
} e_res_t;
// -----=====<<<<<[[[[[ Valiable ]]]]]>>>>>=====-----
// ライブラリ関連インスタンス
Ticker ticker;
WiFiClientSecure client;
Adafruit_PCF8574 io_exp;
Adafruit_ILI9341 tft = Adafruit_ILI9341(PIN_TFT_CS, PIN_TFT_DC);
OV7670 cam; // camera
// システム
e_state_t state = e_state_initial;
bool Analizing = false;
static uint32_t KeyData = 0;
String ErrString;
// バッファ関連
uint8_t image_line_buf[3 * IMAGE_WIDTH]; // 画像取り込み用1ライン分のバッファ
uint8_t send_buf[3 * IMAGE_WIDTH * SEND_LINES]; // 画像送信用
uint16_t save_buf_behind_progress_bar[IMAGE_WIDTH*PROGRESS_BAR_HEIGHT]; // プログレスバーの下保存用
//uint8_t* spi_master_tx_buf;
//uint8_t* spi_master_rx_buf;
// URL関連
const char* host_name_for_computer_vision = computer_vision_endpoint;
const char* http_path_for_computer_vision= "/vision/v3.2/analyze";
const char* http_query_for_computer_vision= "?visualFeatures=Objects,Brands,Categories,Faces&language=en&model-version=latest";
//const char* http_path_for_computer_vision= "/vision/v3.1/detect";
//const char* http_query_for_computer_vision= "";
String response_body;
StaticJsonDocument<JSON_ARRAY_SIZE(80)> json_doc;
// -----=====<<<<<[[[[[ Prototype ]]]]]>>>>>=====-----
void loop();
void setup();
bool ConnectToWifi(void);
char* ipAddrToString(IPAddress ip);
void InitializeCameraAndLcd(void);
void ScanI2cSlaveAddresses(void);
void DrawLiveCamera(void);
bool DoAnalyze(void);
void DrawAnalizeResult(void);
void DrawErrorStrings(void);
void DrawProgressBar(int percent);
void KeyScan();
int ChatterlessKeyRead(void);
void DumpMemory(uint32_t addr, uint8_t* buf, int len);
// -----=====<<<<<[[[[[ Tables ]]]]]>>>>>=====-----
// カメラ端子定義
const camera_config_t cam_conf = {
.D0 = 36,
.D1 = 39,
.D2 = 34,
.D3 = 35,
.D4 = 12,
.D5 = 2,
.D6 = 16,
.D7 = 17,
.XCLK = 15,
.PCLK = 14,
.VSYNC = 13,
.xclk_freq_hz = 10000000, // XCLK 10MHz
.ledc_timer = LEDC_TIMER_0,
.ledc_channel = LEDC_CHANNEL_0
};
// ビットマップヘッダー (320x240x24bits color
const uint8_t bitmap_header[] = {
0x42, 0x4D, 0x36, 0x84, 0x03, 0x00, 0x00, 0x00, 0x00, 0x00, 0x36, 0x00, 0x00, 0x00, 0x28, 0x00,
0x00, 0x00, 0x40, 0x01, 0x00, 0x00, 0xF0, 0x00, 0x00, 0x00, 0x01, 0x00, 0x18, 0x00, 0x00, 0x00,
0x00, 0x00, 0x00, 0x84, 0x03, 0x00, 0x00, 0x00, 0x00, 0x00, 0x00, 0x00, 0x00, 0x00, 0x00, 0x00,
0x00, 0x00, 0x00, 0x00, 0x00, 0x00
};
// -----=====<<<<<[[[[[ Functions ]]]]]>>>>>=====-----
// [[[[[ 起動時初期化関数(Arduino標準) ]]]]]
void setup() {
int io_exp_rc;
// シリアル初期化
Serial.begin(115200);
delay(100);
// I2C初期化
Wire.begin();
Wire.setClock(400000);
// IOエキスパンダ初期化
io_exp_rc = io_exp.begin(IO_EXP_SLAVE_ADR, &Wire);
// ピン初期化
pinMode(PIN_LED, OUTPUT);
io_exp.pinMode(PIN_SW, INPUT_PULLUP);
io_exp.pinMode(PIN_SEL_CAM_SD, OUTPUT);
digitalWrite(PIN_LED, LOW);
io_exp.digitalWrite(PIN_SEL_CAM_SD, LOW);
// カメラとLCDの初期化
InitializeCameraAndLcd();
// IOエキスパンダの初期化エラー発生なら画面に出す。
if (!io_exp_rc) {
debug_println("Couldn't find PCF8574!\nCheck found address below and change \"IO_EXP_SLAVE_ADR\"");
ScanI2cSlaveAddresses();
while (1);
}
// WiFi を初期化して接続
ConnectToWifi();
// キー割り込み開始
ticker.attach_ms(10, KeyScan);
// リアルタイムカメラ表示状態に遷移
Serial.println("<<STATE>> LIVE Cam!");
state = e_state_live_cam;
}
// [[[[[ メインループ(Arduino標準) ]]]]]
void loop()
{
int key;
static int key_before = LOW;
// 現在の状態で処理を切り替える
switch(state)
{
// [カメラリアルタイム表示状態]
case e_state_live_cam:
DrawLiveCamera();
/* キー判定 */
key = ChatterlessKeyRead();
/* キー押下エッジなら */
if ((key == HIGH) && (key != key_before) ) {
state = e_state_analizing;
Serial.println("<<STATE>> Analyze!");
digitalWrite(PIN_LED, HIGH);
if ( DoAnalyze() == true ) {
DrawAnalizeResult();
}
else {
DrawErrorStrings();
}
delay(5000);
}
key_before = key;
break;
// [画像解析中状態]
case e_state_analizing:
if ( Analizing == false ) {
Serial.println("<<STATE>> Result!");
state = e_state_show_result;
digitalWrite(PIN_LED, LOW);
}
break;
// [解析結果表示状態]
case e_state_show_result:
/* キー判定 */
key = ChatterlessKeyRead();
/* キー押下エッジなら */
if ((key == HIGH) && (key != key_before) ) {
Serial.println("<<STATE>> LIVE Cam!");
state = e_state_live_cam;
}
key_before = key;
break;
}
}
// [[[[[ WiFi接続処理 ]]]]]
bool ConnectToWifi(void)
{
bool ret = true;
int TimeOutCnt = 0;
if (state == e_state_initial) debug_printf("Attempting to connect to SSID: %s\n", ssid);
else Serial.printf("Attempting to connect to SSID: %s\n", ssid);
WiFi.begin(ssid, password);
// attempt to connect to Wifi network:
while (WiFi.status() != WL_CONNECTED) {
if (state == e_state_initial) debug_print(".");
else Serial.print(".");
// wait 1 second for re-trying
TimeOutCnt++;
if (TimeOutCnt >= WIFI_CONNECT_RETRY_MAX) {
ErrString = "WiFi connect failed!";
Serial.println();
Serial.println(ErrString.c_str());
if (state == e_state_initial) {
DrawErrorStrings();
delay(3000);
}
ret = false;
break;
}
delay(1000);
}
if (ret == true) {
if (state == e_state_initial) {
debug_printf("\nConnected to %s\n", ssid);
debug_printf("IP: %s\n", ipAddrToString(WiFi.localIP()));
debug_printf("Netmask: %s\n", ipAddrToString(WiFi.subnetMask()));
debug_printf("Gateway: %s\n", ipAddrToString(WiFi.gatewayIP()));
debug_printf("RSSI: %d\n", WiFi.RSSI());
delay(5000);
}
else {
Serial.printf("\nConnected to: %s\n", ssid);
Serial.printf("IP: %s\n", ipAddrToString(WiFi.localIP()));
Serial.printf("Netmask: %s\n", ipAddrToString(WiFi.subnetMask()));
Serial.printf("Gateway: %s\n", ipAddrToString(WiFi.gatewayIP()));
Serial.printf("RSSI: %d\n", WiFi.RSSI());
}
}
return ret;
}
// [[[[[ IPアドレスを文字列に変換 ]]]]]
char* ipAddrToString(IPAddress ip)
{
static char buf[18];
sprintf(buf, "%d.%d.%d.%d", (ip & 0x000000FF)>>0, (ip & 0x0000FF00)>>8, (ip & 0x00FF0000)>>16, (ip & 0xFF000000)>>24);
return (buf);
}
// [[[[[ I2Cスレーブアドレスをスキャンし、見つかったものを表示する ]]]]]
void ScanI2cSlaveAddresses(void)
{
uint8_t rc, addr;
int DeviceCount;
debug_println("Scanning I2C...");
DeviceCount = 0;
for (addr = 1; addr < 127; addr++ )
{
Wire.beginTransmission(addr);
rc = Wire.endTransmission();
if (rc == 0)
{
debug_printf("found at address 0x%02X!\n", addr);
DeviceCount++;
}
else if (rc == 4)
{
debug_printf("Unknown error at address 0x%02X\n", addr);
}
else ;// nothing to do
}
if (DeviceCount == 0) {
debug_printf("No i2c devices found\n");
}
else {
debug_printf("Found %d i2c devices\n", DeviceCount);
}
delay(5000); // wait 5 seconds for the next I2C scan
}
// [[[[[ カメラとLCDの初期化処理 ]]]]]
void InitializeCameraAndLcd(void)
{
// [LCD初期化]
Serial.println("Initialize LCD ...");
tft.begin();
tft.setRotation(3);
tft.fillScreen(0);
tft.setTextSize(2);
// [カメラ初期化]
debug_println("Initialize OV7670 camera ...");
esp_err_t err = cam.init(&cam_conf, QVGA, RGB565);
if(err != ESP_OK) debug_println("cam.init ERROR");
cam.setPCLK(2, DBLV_CLK_x4); // PCLK 設定 : 10MHz / (pre+1) * 4 --> 13.3MHz
cam.vflip( false ); // 画面180度回転
debug_printf("cam MID = %X\n\r",cam.getMID());
debug_printf("cam PID = %X\n\r",cam.getPID());
}
// [[[[[ カメラ入力をリアルタイム表示 ]]]]]
void DrawLiveCamera(void)
{
uint16_t y, *buf;
// 1ラインごとにカメラから読みだしてLCDに表示(DMAを使用)
for( y = 0; y < IMAGE_HEIGHT; y++){
buf = cam.getLine( y+1 ); // カメラから1ライン分読み込む LineNo(1~240)
tft.drawRGBBitmap( 0, y, buf, IMAGE_WIDTH, 1); // TFT に1ライン出力
/* プログレスバーで隠れる2ライン分を後に復元するためにメモリにバックアップしておく */
if ( y <PROGRESS_BAR_HEIGHT ) {
memcpy((uint8_t*)&save_buf_behind_progress_bar[y*IMAGE_WIDTH], (uint8_t*)buf, IMAGE_WIDTH*2);
}
}
}
// [[[[[ 画像解析処理 ]]]]]
bool DoAnalyze(void)
{
bool ret = false;
int FileSize = BITMAP_FILE_SIZE;
//int FileSize = BITMAP_HEADER_SIZE + (320*20);
//int FileSize = sizeof(algyan_bitmap);
int w_pos;
Analizing = true;
ErrString = "";
// 証明書設定
DrawProgressBar(0);
client.setCACert(computer_vision_root_ca);
//client.setCertificate(test_client_key); // for client verification
//client.setPrivateKey(test_client_cert); // for client verification
// WiFi エラーや切断などでつながっていなければここで再試行
if (WiFi.status() != WL_CONNECTED) {
if ( true != ConnectToWifi() ) {
return (false);
}
}
// サーバーに接続開始
DrawProgressBar(5);
Serial.printf("\nStarting connection to server = %s:%d ...\r\n",host_name_for_computer_vision, 443);
if (!client.connect(host_name_for_computer_vision, 443)) {
ErrString = "Failed to connectt Azure server!";
Serial.println(ErrString.c_str());
return (false);
}
else {
DrawProgressBar(10);
Serial.println("Connected to server!");
// Make a HTTP request:
// POST部送信
client_printf("POST https://%s%s%s HTTP/1.0\n",
host_name_for_computer_vision,
http_path_for_computer_vision,
http_query_for_computer_vision);
DrawProgressBar(15);
// ヘッダー送信
client_printf("Host: %s\n", host_name_for_computer_vision);
client_printf("User-Agent: ESP32/1.0\n");
client_printf("Connection: close\n");
client_printf("Content-Type: application/octet-stream\n");
client_printf("Content-Length: %d\n", FileSize);
client_printf("Content-Transfer-Encoding: binary\n");
client.printf("Ocp-Apim-Subscription-Key: %s\n", computer_vision_key);
Serial.printf("Ocp-Apim-Subscription-Key: ********\n");
client_printf("FileName: Temp.bmp\n");
client_println();
// 画像送信処理(バイナリ送信)
Serial.println("Sending BITMAP Image");
// BITMAPファイルヘッダー
DrawProgressBar(20);
client.write(bitmap_header, sizeof(bitmap_header));
client.flush();
// デバッグ用にダンプを出力
// Serial.println("===Start Binary Dump===");
// DumpMemory(DUMP_WITHOUT_ADDRESS, (uint8_t*)bitmap_header, sizeof(bitmap_header));
w_pos = 0;
for(int y = 0; y < IMAGE_HEIGHT; y++){
DrawProgressBar( 20+ ( ( y * 60 ) / IMAGE_HEIGHT) );
// LCDから直接画像が読み込む(LCDコントローラ制御コマンド送信)
tft.startWrite();
tft.writeCommand(ILI9341_CASET); // Column address set
tft.SPI_WRITE16(0);
tft.SPI_WRITE16(IMAGE_WIDTH-1);
tft.writeCommand(ILI9341_PASET); // Row address set
tft.SPI_WRITE16(IMAGE_HEIGHT - y - 1);
tft.SPI_WRITE16(IMAGE_HEIGHT - y - 1);
tft.writeCommand(ILI9341_RAMRD); // Read from RAM
tft.spiRead(); // Dummy Read 1byte
// ピクセル値を読みだす
for (int x = 0; x < IMAGE_WIDTH; x++) {
#if defined(USE_GRAYSCALE_IMAGE_FOR_ANALYZE)
/* グレイスケールで解析 */
uint16_t ave = 0;
ave += tft.spiRead();
ave += tft.spiRead();
ave += tft.spiRead();
ave /= 3;
send_buf[w_pos++] = ave;
send_buf[w_pos++] = ave;
send_buf[w_pos++] = ave;
#else // defined(USE_GRAYSCALE_IMAGE_FOR_ANALYZE)
/* RGBカラー画像で解析 */
send_buf[w_pos+2] = tft.spiRead();
send_buf[w_pos+1] = tft.spiRead();
send_buf[w_pos+0] = tft.spiRead();
w_pos += 3;
#endif // defined(USE_GRAYSCALE_IMAGE_FOR_ANALYZE)
}
tft.endWrite();
// 一旦バッファーに入れたものをバッファーの数分で送信(1バイトずつ送るととてつもなく遅くなる:原因は後で調査?)
if ((y % SEND_LINES) == (SEND_LINES-1)) {
client.write(send_buf, w_pos);
// デバッグ用にダンプを出力
//DumpMemory(DUMP_WITHOUT_ADDRESS, send_buf, w_pos);
w_pos = 0;
client.flush();
Serial.print("-");// ダンプ時はコメントアウトする事!
}
}
// デバッグ用にダンプを出力
// Serial.println("===End Binary Dump===");
Serial.println("Sending Binary Done!!");
delay(10);
// 返信待ち
Serial.println("Waiting Response!");
DrawProgressBar(80);
//レスポンス タイムアウト
int timeout = millis() + (POST_RESPONSE_TIMEOUT_SEC * 1000);
bool isTimeout = false;
while (client.available() == 0) {
if (timeout - millis() < 0) {
Serial.println(">>> Client Timeout !");
isTimeout = true;
break;
}
}
// 返信を受信
DrawProgressBar(85);
e_res_t waiting_res = e_res_status;
Serial.println("Recieving Response");
response_body = "";
if(isTimeout == false){
String line = "";
while(client.available()){
line = client.readStringUntil('\n');
switch(waiting_res) {
case e_res_status: // ステータスライン待ち
Serial.printf("StatusRecv:'%s'\n", line.c_str());
if (line.substring(0,4) == "HTTP") waiting_res = e_res_header;
break;
case e_res_header: // レスポンスヘッダー待ち
DrawProgressBar(90);
Serial.printf("HeaderRecv:'%s'\n", line.c_str());
if (line == "\r" || line == "") waiting_res = e_res_body;
break;
case e_res_body: // レスポンスボディ待ち
DrawProgressBar(95);
if (line.substring(line.length()-1,1)=="\r") response_body += line.substring(0, line.length()-1);
else response_body += line;
break;
default:
break;
}
}
DrawProgressBar(100);
Serial.printf("BodyRecv:'%s'\n", response_body.c_str());
}
client.stop();
DrawProgressBar(PROGRESS_BAR_CLEAR);
Serial.println("ALL DONE!");
Serial.println();
ret = true;
}
Analizing = false;
return ret;
}
// [[[[[ 画像解析結果の描画 ]]]]]
void DrawAnalizeResult(void)
{
int i, cnt;
deserializeJson(json_doc, response_body);
deserializeJson(json_doc, response_body);
/* Categories */
cnt = json_doc["categories"].size();
Serial.printf("categories = %d\n", cnt);
for (i = 0; i<cnt; i++) {
const char* name = json_doc["categories"][i]["name"];
float scr = json_doc["categories"][i]["score"];
Serial.printf("Name=%s Score=%f\n", name, scr);
tft.setTextColor(ILI9341_PINK);
tft.setTextSize(2);
tft.setCursor(0, i*24);
tft.print(name);
tft.setTextSize(1);
tft.setCursor(0, i*24+16);
tft.printf("(%1.3f)", scr);
}
/* Objects */
cnt = json_doc["objects"].size();
Serial.printf("objects = %d\n", cnt);
for (i = 0; i<cnt; i++) {
const char* obj = json_doc["objects"][i]["object"];
int x = json_doc["objects"][i]["rectangle"]["x"];
int y = json_doc["objects"][i]["rectangle"]["y"];
int w = json_doc["objects"][i]["rectangle"]["w"];
int h = json_doc["objects"][i]["rectangle"]["h"];
float conf = json_doc["objects"][i]["confidence"];
tft.drawRect(x, y, w, h, ILI9341_RED);
Serial.printf("object=%s confidence=%f Rect(%d,%d,%d,%d)\n", obj, conf, x, y, w, h);
tft.setTextColor(ILI9341_RED);
tft.setTextSize(2);
tft.setCursor(x+2, y+2);
tft.print(obj);
tft.setTextSize(1);
tft.setCursor(x+2, y+16+2);
tft.printf("(%1.4f)", conf);
}
}
// [[[[[ エラー文字列描画 ]]]]]
void DrawErrorStrings(void)
{
tft.fillScreen(0);
tft.setTextColor(ILI9341_WHITE);
tft.setTextSize(2);
tft.setCursor(0, 0);
tft.print(ErrString.c_str());
}
// [[[[[ プログレスバーの描画処理 ]]]]]
void DrawProgressBar(int percent)
{
int y;
if (percent != PROGRESS_BAR_CLEAR) {
tft.fillRect(0, 0, ( ( IMAGE_WIDTH * percent ) / 100 ), PROGRESS_BAR_HEIGHT, ILI9341_RED);
}
else {
for (y = 0; y<PROGRESS_BAR_HEIGHT; y++) {
tft.drawRGBBitmap( 0, y, &save_buf_behind_progress_bar[y*IMAGE_WIDTH], IMAGE_WIDTH, 1); // TFT に1ライン出力
}
}
}
// [[[[[ キースキャン割り込み処理 ]]]]]
void KeyScan()
{
/* キー判定 */
KeyData <<= 1;
if (io_exp.digitalRead(PIN_SW) == HIGH) KeyData |= 1;
}
// [[[[[ キー状態読み出し処理(チャタリング除去済) ]]]]]
int ChatterlessKeyRead(void)
{
static int KeyState = LOW;
if ( (KeyData & KEY_MASK) == 0 ) KeyState = LOW;
else if ( (KeyData & KEY_MASK) == KEY_MASK ) KeyState = HIGH;
else ; // チャタリング中(過渡期)処理なし
return KeyState;
}
// [[[[[ メモリダンプ処理(デバッグ用) ]]]]]
void DumpMemory(uint32_t addr, uint8_t* buf, int len)
{
int i;
for (i = 0; i < len; i++) {//@
if ( (addr != DUMP_WITHOUT_ADDRESS) && ((i%16)==0)) Serial.printf("%06x : ", addr + i);
Serial.printf("%02x ", buf[i]);//@
if ((i%16)==15) Serial.println();
}
if ((i%16)!=15) Serial.println();
}3-1-2. 個人設定定義ヘッダファイル
右上の方にある▼を押して、新規タブで "PersonalDef.h" という名前を付けて保存し、以下のソースをコピペします。その後 ■ ■ で囲まれた部分を下記の通りに編集します。
3-1-2-1 Arduino用ソースを編集
PersonalDef.h
#ifndef PersonalDefH
#define PersonalDefH
const char* ssid = "■各個人のSSID■"; // your network SSID (name of wifi network)
const char* password = "■各個人のパスワード■"; // your network password
#define computer_vision_key "■Azure Computer Vision 各個人のキー■";
#define computer_vision_endpoint "■Azure Computer Vision 各個人のエンドポイント■";
const char* computer_vision_root_ca=
"-----BEGIN CERTIFICATE-----\n"
"■中間証明書■"
"-----END CERTIFICATE-----\n"
;
#endif // PersonalDefH3-1-2-2 個人用の設定値 (■ ■ で囲まれた部分)の編集
基本的にすべて文字列なので、ダブルコーテーション " でくくられるようにしてください。
以下をあなたの家のネット環境になります。ルーターやスマホの設定値に置き換えてください。
■各個人のSSID■
■各個人のパスワード■
以下をあなたが設定した Azure Computer Vision の設定情報に置き換えてください。
画像の赤文字の所からコピペしてください。
■Azure Computer Vision 各個人のキー■
■Azure Computer Vision 各個人のエンドポイント■
■中間証明書■
サイト別のクライアント証明書が必要となります。以下は Google Chrome を使った場合の手順となりますが、Chrome が保持している証明書を使います。(他のブラウザの場合は少しやり方が異なります。)
まずはブラウザに 上記のAzure Computer Vision 各個人のエンドポイントアドレスをコピペして貼り付け、開きます。
その後、下記画像中の赤文字箇所、鍵マークを押します。
[この接続は保護されています] と書かれたところをクリックし、さらに [証明書は有効です]と書かれたところをクリックします。
[証明書のパス] と書かれたタブを開いて真ん中の Microsoft Azure TLS Issuing CA ... をクリックし、[証明書の表示] を押します。同じような窓がもう一度開くので、今度は [詳細] と書かれたタブを開いて、[ファイルにコピー] を押します。
[次へ] を押して "Base 64 encoded X.509 (.CER)(S) を選択し、さらに [次へ] を押します。
[参照] を押してファイルを名前を付けて保存してください。
保存したファイルを開き、
"-----BEGIN CERTIFICATE-----"
"-----END CERTIFICATE-----"
で囲まれた部分を ■中間証明書■の部分に貼り付けてください。(上記文字列は重複するので含めない)
この部分は文字列なので、ダブルコーテーション " でくくる必要があります。
全ての行について、先頭と末尾に " を入れてください。
3-2. 必要なライブラリの準備
3-2-1. ライブラリの管理にてインストール
Arduino IDE で [ツール] - [ライブラリの管理] にて、以下を検索してインストールされていなければインストールしてください。
Adafruit_GFX
Adafruit_ILI9341
Adafruit_PCF8574
ArduinoJson
3-2-2. スケッチのフォルダに直接置く分
以下 github から、
OV7670-ESP32 ファイルをダウンロードし、解凍したファイルから、OV7670-ESP32 フォルダ内の (sample以外の) 以下の4つのファイルを、スケッチと同じフォルダー入れてください。(エクスプローラー等使って入れてください。)
I2Scamera.c
I2Scamera.h
OV7670.cpp
OV7670.h
入れただけだと Arduino IDE に認識されないので、コンパイル時にエラーになります。
今までの分をいったん保存して、Arduino IDE を閉じて開きなおしてください。
ちゃんと追加出来ていたら、以下の図のように赤枠の場所に追加したファイルが現れます。
そのままでは、コンパイルが通らないので以下一部書き換えてください。
OV7670.cpp の 3行目付近 <> をダブルコーテーション " に変更
変更前
#include <OV7670.h>
▼
変更後
#include "OV7670.h"
3-3. 書き込み
以上でコンパイル準備は完了です。USBケーブルで基板をつなぎ、Arduino IDE から
[ツール] - [ボード] から "ESP32 Dev Module" を選択し、 [ツール] - [シリアルポート] で正しいポートを選択し、[→] (マイコンボードに書き込む) を押して走らせてください。
カメラの画像がリアルタイムで液晶に表示されたら完了です。
4. 使い方
本ソフトは以下の3つの状態があります。
1.リアルタイム表示モード
2.解析中
3.結果表示中
起動すると、1. リアルタイム表示モードになります。
カメラで映している被写体がリアルたむで液晶モニタに表示されます。
被写体を選んでボタンを押すことで、2. 解析中になります。(数秒かかります)
Azure に HTTP POST 要求を送って、解析を待っている状態です。
時間がかかるので画面上部に赤い進捗バーが表示されます。
解析が終わると 3. 結果表示中になります。
画面左上にはカテゴリーとして認識されたものの一覧が。
認識されたものがあれば赤枠が表示され、その枠の内側に名称が表示されます。名称の下の数値はスコア(確信度)
ボタンを押すと 1. リアルタイム表示モードに戻ります。
5. トラブルシュート
- 初期化処理中のエラーは画面に表示しますが、解析中は画面のデータを上書きするわけにいかないので、画面にエラーが出ません。 解析中に上部の赤い進捗バーが止まって動かない場合は、どこかで止まっていると思います。
Arduino IDE から [ツール] - [シリアルモニター] を開き、ソースと照らし合わせて、何が原因で止まっているかを調べてください。
以下よく出るエラーだけ書いていきます。(将来的にも追記していければと思います)
5-1. "Couldn't find PCF8574!" で止まる場合
聞いた話ですが、PCF8574 には2種類のアドレスがあるらしいです。(生産ロットによる?)
私のは 0x38 でしたが一般的には 0x20 が多いらしいです。
エラーが出た場合は i2c アドレス全体をスキャンして見つかったものが画面に表示されます。
ソースプログラム "AzureComputerVisionWithALGYAN7thBoard.ino" の 84行目付近の "IO_EXP_SLAVE_ADR" を 0x38, 0x20 いずれか、表示されている見つかったほうに変更して下さい。
5-2. "Connected to XXXX" で止まる場合 (XXXX はssid)
WiFi ルーターの接続に失敗しています。ルータが有効になっているかまたは、SSID やパスワードの設定が間違っていないか確認してください。
5-3. "Starting connection to server = *****" の後の "Connection failed!" で止まる場合
"3-1-2-2 個人用の設定値" の "中間証明書" に問題があり、SSL通信(暗号化通信)が失敗している状態です。
見直してください。
6. さいごに
問題点、誤記、質問や要望があればコメントに書き込んでください。即答、即対処はできませんが何等かの対処していこうと思います。
少し頑張って改造すれば、"Azure Custom Vision" なども利用可能かと思います。(時間が出来たら試して見れればと思います。)
投稿者の人気記事


-
TakSan0
さんが
2022/08/27
に
編集
をしました。
(メッセージ: 初版)
-
TakSan0
さんが
2022/09/05
に
編集
をしました。
(メッセージ: エラー処理追加。トラブルシュート追加。)
ログインしてコメントを投稿する