

AI(を使って対決する)カードゲーム
今度は学習済みモデルを実際に作ってみましょう!
製作に至ったいきさつ
2023年に行われたハイブリッド・ハッカソンにて作成した「出現白黒カード(レスも選べる)ゲーム」の開発中、
ハッカソン期間内には間に合わなかったがspresenseの画像認識を活用してリアルカードでもコンピュータと対戦できるようにしたら面白いと思い
elchikaの2023年spresense活用コンテストに応募し製作することとなりました。
必要なもの
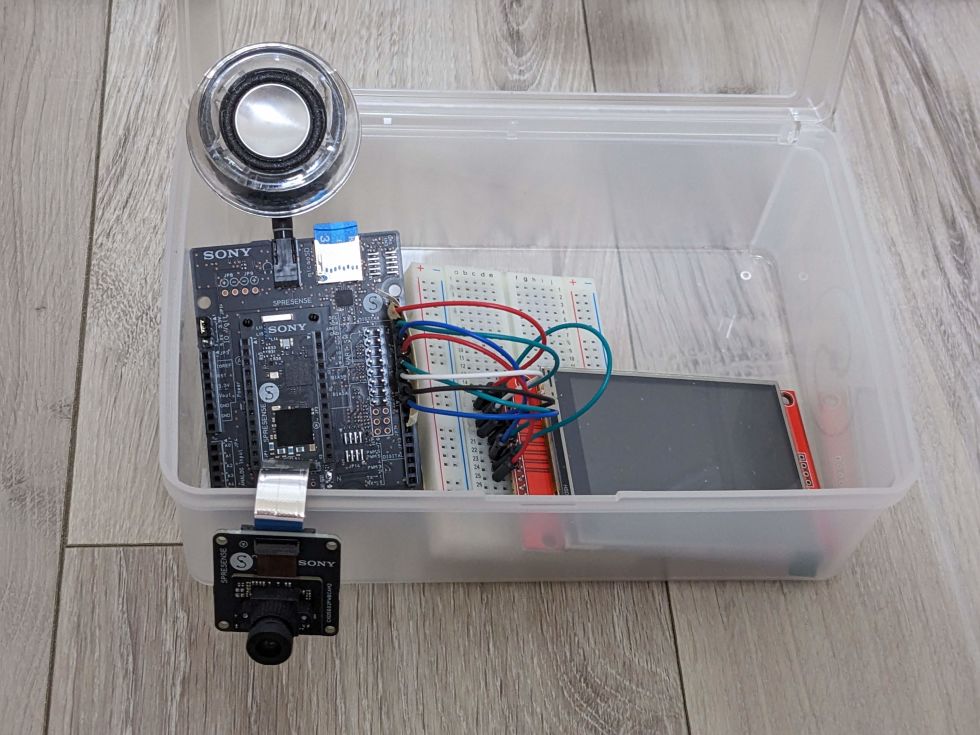
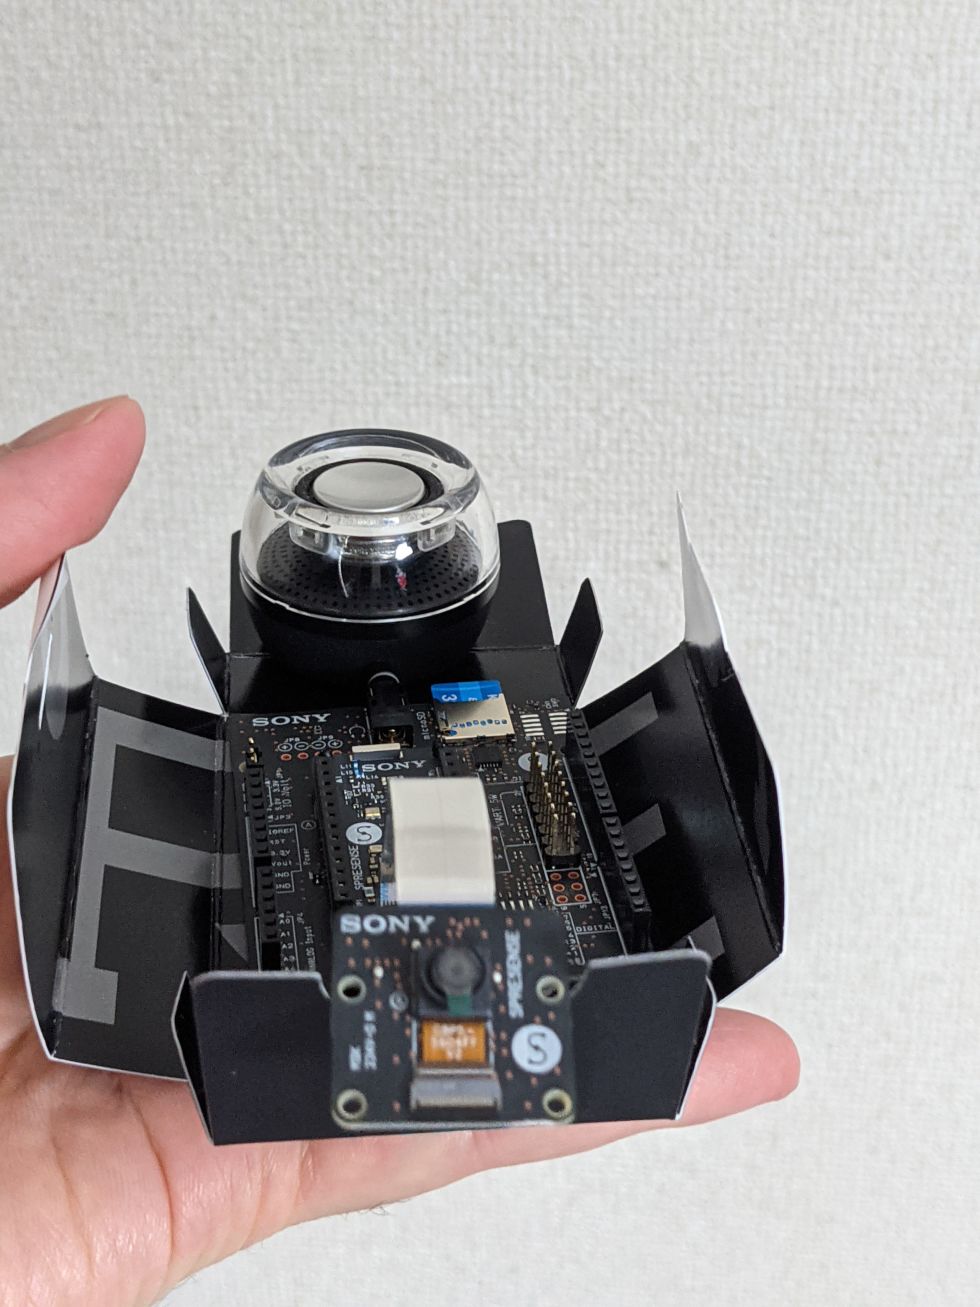
- spresenseメイン基板
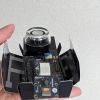
- spresenseカメラボード もしくはHDRカメラボード
- spresense拡張ボード(公式)
- LCDボード(ILI9341 搭載 2.2 インチ液晶モジュール)
- ブレッドボードとオスーオスのジャンパー線9本
- googleアカウント か Sony ID
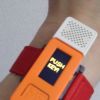
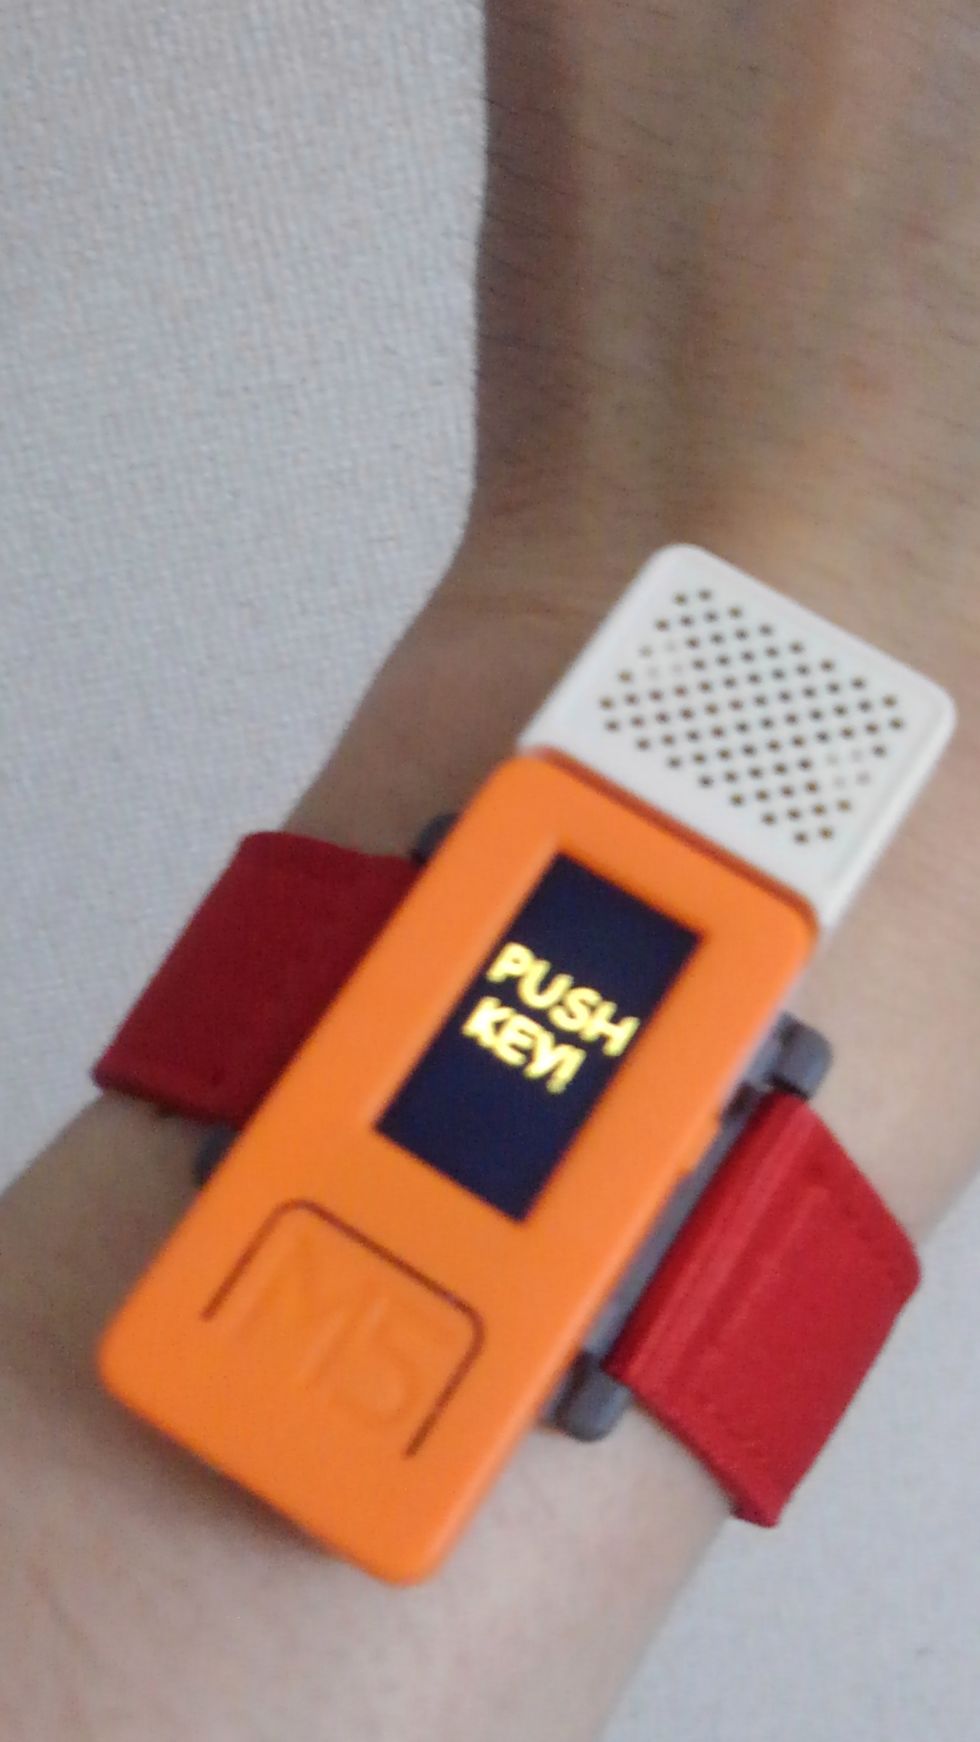
- 小さめのスピーカ(開発中はヘッドフォンの方がよい)
- i5第四世代以上のCPUを搭載したWindowsパソコン(GPUがついているとよい)
- 日本国内にてインターネットが使える環境
- MicroUSB to USBケーブル
- MicroSDメモリーカード(4Gバイト以上を推奨)
- 白い紙とハサミと筆記用具
カードゲームのルールと作成
ルールは次の通り
カードの上の数字(1~3)は大きい方が勝ち カードの下の数字([1]~[3])※紙版ではダイス表記 は上の数字が同じだった場合に使用し、小さい方が勝ち カードは1[1]~3[3]まで9枚存在し、一度使用したカードは再使用しない。 一枚づつドロー(引く)して対戦相手と出し合い勝敗を決める 使用できるカードが無くなるまで続け、勝ちの回数が多い方が最終的に勝ち
白い紙を切って数字とダイス表記の丸を書いてカードを作ってください。ちゃんとパソコンで作って奇麗に切るのは自由ですが、最初は凝ったデザインではなくシンプルにしたほうが良いと思います。誤検知が増えるので…
また、9枚の各カードには0~8の番号を割り当てます。表記は英数字[ダイス表記] カード番号
- 1[1] 0
- 1[2] 1
- 1[3] 2
- 2[1] 3
- 2[2] 4
- 2[3] 5
- 3[1] 6
- 3[2] 7
- 3[3] 8
この番号はAIによるカード認識で大事になります。
まずはspresenseのセットアップと動作確認
マイコン全般に言えることですが、環境を揃えて必要なものを用意すれば作れるとは限りません。ボードへの書き込みができないなどは日常茶飯事なのでここはしっかりと。
2022年spresense活用コンテストに応募したNumToneより一部転載となりますが、動作確認はしっかり行った方がよいです。
くどいようですが、特にspresenseメインボードと拡張ボードの接続は一発で成功するものとは思わない方がよいと思います。
また、spresenseを接続した際comポートが標準シリアルと被った場合一時的に標準シリアルを無効化したほうがよいです。
ここから一部転載
まず、こちらを参考にしてArduinoIDEをインストールしてspresense用の開発環境を整えます
LEDを光らせるところまで行ってください
https://developer.sony.com/develop/spresense/docs/arduino_set_up_ja.html
スピーカかヘッドフォンも接続してしまいましょう
次にこちらを参考にしてMicroUSBケーブルをメインボードに接続し、拡張ボードが実際に接続されているか動作確認をします
リチウムポリマーバッテリーのところは行わなくてよいです
https://deviceplus.jp/mc-general/spresense-02/
更にカメラボードとLCDボードが実際に接続されているか動作確認をします。
https://developer.sony.com/spresense/development-guides/arduino_tutorials_ja.html
3.2 Cameraプレビュー画像をLCDに表示する を行ってください。
動作確認ができたら分解しないでそのまま…
SDカードとスピーカorヘッドフォンを装着しておいてください。
AIはここで使います
このタイトルだとAIが思考して出すカードを決めるゲームだと思われがちですが、実はAIはカードの画像認識で使用します。
プレイヤーがどのカードを出したかをAIが判断するのです。
ただし、静止画を沢山集めて機械学習の学習済みモデルを作成するのはとても大変です。
そこでEdge impulseを使用します。画像認識なら動画をカード1枚1枚撮影してそれを使って学習済みモデルができるものです。Communityアカウントなら無料で使用できます。
動画は背景に何も映らないようにしながらいろんな方向からカードを撮影してください。これを9枚のカード全部に行います。
動画が揃ったら、ここを参考にEdge impulseを使って以下ファイル名の学習済みモデルを作成してください。
cards.sdcproj
そうしたらNumToneの
〇NewralNetworkConsoleを「インストール」する から
〇サンプルプロジェクトで学習済みモデルファイルを生成する
までを行ってください。学習済みモデルファイル名は上記のものに置き換えてください。
NNBファイル名は
cards.nnb
としてください。
Spresense上で動作させる
以下のコードをSpresense上で動作させてください。
Spresense本体
#include <SPI.h>
#include <Adafruit_GFX.h>
#include <Adafruit_ILI9341.h>
#define TFT_CS -1
#define TFT_RST 8
#define TFT_DC 9
Adafruit_ILI9341 tft = Adafruit_ILI9341(&SPI, TFT_DC, TFT_CS, TFT_RST);
#include <SDHCI.h>
#include <stdio.h> /* for sprintf */
#include <Camera.h>
#include <EEPROM.h>
#include <SDHCI.h>
#include <NetPBM.h>
#include <DNNRT.h>
#include <Audio.h>
#define BAUDRATE (115200)
#define TOTAL_PICTURE_COUNT (10)
AudioClass *theAudio;
SDClass theSD;
#define DNN_IMG_W 28
#define DNN_IMG_H 28
#define CAM_IMG_W 320
#define CAM_IMG_H 240
#define CAM_CLIP_X 104
#define CAM_CLIP_Y 0
#define CAM_CLIP_W 112
#define CAM_CLIP_H 224
int take_picture_count = 0;
int data[10] = {0,262,294,330,349,392,440,494,523,552};
int cards[8][2] = {1,1},{1,2},{1,3},{2,1},{2,2},{2,3},{3,1},{3,2},{3,3};
int count = 1;
uint8_t buf[DNN_IMG_W*DNN_IMG_H];
DNNRT dnnrt;
DNNVariable input(DNN_IMG_W*DNN_IMG_H);
static uint8_t const label[11] = {0, 1, 2, 3, 4, 5, 6, 7, 8, 9, 10};
/**
* Print error message
*/
void printError(enum CamErr err)
{
Serial.print("Error: ");
switch (err)
{
case CAM_ERR_NO_DEVICE:
Serial.println("No Device");
break;
case CAM_ERR_ILLEGAL_DEVERR:
Serial.println("Illegal device error");
break;
case CAM_ERR_ALREADY_INITIALIZED:
Serial.println("Already initialized");
break;
case CAM_ERR_NOT_INITIALIZED:
Serial.println("Not initialized");
break;
case CAM_ERR_NOT_STILL_INITIALIZED:
Serial.println("Still picture not initialized");
break;
case CAM_ERR_CANT_CREATE_THREAD:
Serial.println("Failed to create thread");
break;
case CAM_ERR_INVALID_PARAM:
Serial.println("Invalid parameter");
break;
case CAM_ERR_NO_MEMORY:
Serial.println("No memory");
break;
case CAM_ERR_USR_INUSED:
Serial.println("Buffer already in use");
break;
case CAM_ERR_NOT_PERMITTED:
Serial.println("Operation not permitted");
break;
default:
break;
}
}
/**
*/
void CamCB(CamImage img)
{
/* Check the img instance is available or not. */
if (!img.isAvailable()) {
Serial.println("Image is not available. Try again");
return;
}
else if (img.isAvailable())
{
/* If you want RGB565 data, convert image data format to RGB565 */
img.convertPixFormat(CAM_IMAGE_PIX_FMT_RGB565);
tft.drawRGBBitmap(0, 0, (uint16_t *)img.getImgBuff(), 320, 240);
/* You can use image data directly by using getImgSize() and getImgBuff().
* for displaying image to a display, etc. */
Serial.print("Image data size = ");
Serial.print(img.getImgSize(), DEC);
Serial.print(" , ");
Serial.print("buff addr = ");
Serial.print((unsigned long)img.getImgBuff(), HEX);
Serial.println("");
CamImage small;
CamErr err = img.clipAndResizeImageByHW(small
, CAM_CLIP_X, CAM_CLIP_Y
, CAM_CLIP_X + CAM_CLIP_W -1
, CAM_CLIP_Y + CAM_CLIP_H -1
, DNN_IMG_W, DNN_IMG_H);
}
else if (!small.isAvailable()){
putStringOnLcd("Clip and Reize Error:" + String(err), ILI9341_RED);
return;
Serial.println("Failed to get video stream image");
}
}
small.convertPixFormat(CAM_IMAGE_PIX_FMT_RGB565);
uint16_t* tmp = (uint16_t*)small.getImgBuff();
float *dnnbuf = input.data();
float f_max = 0.0;
for (int n = 0; n < DNN_IMG_H*DNN_IMG_W; ++n) {
dnnbuf[n] = (float)((tmp[n] & 0x07E0) >> 5);
if (dnnbuf[n] > f_max) f_max = dnnbuf[n];
}
for (int n = 0; n < DNN_IMG_W*DNN_IMG_H; ++n) {
dnnbuf[n] /= f_max;
}
String gStrResult = "?";
dnnrt.inputVariable(input, 0);
dnnrt.forward();
DNNVariable output = dnnrt.outputVariable(0);
int index = output.maxIndex();
if (index < 10) {
gStrResult = String(label[index]) + String(":") + String(output[index]);
} else {
gStrResult = String("?:") + String(output[index]);
}
Serial.println(gStrResult);
img.convertPixFormat(CAM_IMAGE_PIX_FMT_RGB565);
uint16_t* imgBuf = (uint16_t*)img.getImgBuff();
/**
* @brief Initialize camera
*/
void setup()
{
Serial.begin(115200);
tft.begin(40000000);
tft.setRotation(3);
CamErr err;
/* Open serial communications and wait for port to open */
theSD.begin();
theAudio = AudioClass::getInstance();
theAudio->begin();
puts("initialization Audio Library");
theAudio->setPlayerMode(AS_SETPLAYER_OUTPUTDEVICE_SPHP, 0, 0);
File nnbfile = SD.open("cards.nnb");
if (!nnbfile) {
Serial.print("nnb not found");
return;
}
int ret = dnnrt.begin(nnbfile);
if (ret < 0) {
Serial.println("Runtime initialization failure.");
if (ret == -16) {
Serial.print("Please install bootloader!");
Serial.println(" or consider memory configuration!");
} else {
Serial.println(ret);
}
return;
}
theCamera.begin();
theCamera.startStreaming(true, CamCB);
while (!Serial)
{
; /* wait for serial port to connect. Needed for native USB port only */
}
/* Initialize SD */
while (!theSD.begin())
{
/* wait until SD card is mounted. */
Serial.println("Insert SD card.");
}
/* begin() without parameters means that
* number of buffers = 1, 30FPS, QVGA, YUV 4:2:2 format */
Serial.println("Prepare camera");
err = theCamera.begin();
if (err != CAM_ERR_SUCCESS)
{
printError(err);
}
/* Start video stream.
* If received video stream data from camera device,
* camera library call CamCB.
*/
Serial.println("Start streaming");
err = theCamera.startStreaming(true, CamCB);
if (err != CAM_ERR_SUCCESS)
{
printError(err);
}
/* Auto white balance configuration */
Serial.println("Set Auto white balance parameter");
err = theCamera.setAutoWhiteBalanceMode(CAM_WHITE_BALANCE_DAYLIGHT);
if (err != CAM_ERR_SUCCESS)
{
printError(err);
}
/* Set parameters about still picture.
* In the following case, QUADVGA and JPEG.
*/
Serial.println("Set still picture format");
err = theCamera.setStillPictureImageFormat(
CAM_IMGSIZE_QUADVGA_H,
CAM_IMGSIZE_QUADVGA_V,
CAM_IMAGE_PIX_FMT_JPG);
if (err != CAM_ERR_SUCCESS)
{
printError(err);
}
}
/**
*/
void loop()
{
sleep(1); /* wait for one second to take still picture. */
puts("loop!!");
DNNVariable output = dnnrt.outputVariable(0);
int index = output.maxIndex();
//theAudio->setBeep(1,-40,262);
theAudio->setBeep(1,-40,data[index]);
usleep(500 * 1000);
theAudio->setBeep(0,0,0);
if (cards[index][0] > 1)(
if (cards[index][1] > 1){
theAudio->setBeep(1,-40,440);
theAudio->setBeep(1,-40,523);
}
)else {
theAudio->setBeep(1,-40,330);
theAudio->setBeep(1,-40,262);
}
}
usleep(100000);
/* theCamera.setStillPictureImageFormat(
* CAM_IMGSIZE_HD_H,
* CAM_IMGSIZE_HD_V,
* CAM_IMAGE_PIX_FMT_JPG);
*/
/* This sample code can take pictures in every one second from starting. */
if (take_picture_count < TOTAL_PICTURE_COUNT)
{
/* Take still picture.
* Unlike video stream(startStreaming) , this API wait to receive image data
* from camera device.
*/
Serial.println("call takePicture()");
CamImage img = theCamera.takePicture();
/* Check availability of the img instance. */
/* If any errors occur, the img is not available. */
if (img.isAvailable())
{
/* Create file name */
char filename[16] = {0};
/* sprintf(filename, "PICT%03d.JPG", take_picture_count);
Serial.print("Save taken picture as ");
Serial.print(filename);
Serial.println("");
*/
/* Remove the old file with the same file name as new created file,
* and create new file.
*/
/* theSD.remove(filename);
File myFile = theSD.open(filename, FILE_WRITE);
myFile.write(img.getImgBuff(), img.getImgSize());
myFile.close();
*/
}
else
{
/* The size of a picture may exceed the allocated memory size.
* Then, allocate the larger memory size and/or decrease the size of a picture.
* [How to allocate the larger memory]
* - Decrease jpgbufsize_divisor specified by setStillPictureImageFormat()
* - Increase the Memory size from Arduino IDE tools Menu
* [How to decrease the size of a picture]
* - Decrease the JPEG quality by setJPEGQuality()
*/
Serial.println("Failed to take picture");
}
}
else if (take_picture_count == TOTAL_PICTURE_COUNT)
{
Serial.println("End.");
theCamera.end();
}
take_picture_count++;
}カメラにカードを見せると、認識したらコンピュータが選んだ札と勝負して勝ち負けの音が出ます。
カメラの画像がLCDに表示されるので参考にしてください。
最後に
寒気がする…どうやら風邪をひいてしまったようだ…病院予約できるかな…
ストレッチゴールとして勝ち負けをLCDに表示したりWifiボードで「出現白黒カード(レスも選べる)ゲーム」のM5StickCと対戦したり…したかった…
無事回復できたら、またお会いしましょう…
投稿者の人気記事


-
busyoucow
さんが
2024/01/31
に
編集
をしました。
(メッセージ: 初版)
ログインしてコメントを投稿する